Synchroniser avec Thunderbird
Thunderbird est un client courriel riche en fonctionnalités et mature qui peut être transformé en PIM à part entière. Cependant, il lui manque le support de la synchronisation de carnet d’adresses via CardDAV et la possibilité de découvrir automatiquement les calendriers et carnet d’adresses disponibles sur le serveur. Par conséquent, pour se synchroniser avec Nextcloud, des extensions sont nécessaires. Elles peuvent être facilement installées via le gestionnaire d’extensions intégré à Thunderbird.
Méthode recommandée
For this method, you need to have two add-ons installed:
When they are installed, if you are on Windows, go to Extras/Synchronisation settings (TbSync) or Edit/Synchronisation settings (TbSync) if on Linux, and then:
Dans le gestionnaire de comptes, choisir « Ajouter un compte / compte CalDAV / CardDAV »
Dans la fenêtre suivante, choisir l’option par défaut Configuration automatique et cliquer sur suivant
Saisissez un nom d’utilisateur, à votre choix, nom utilisateur, mot de passe et l”URL de votre serveur et cliquez Suivant
In the next window, TbSync should have autodiscovered the CalDAV and CardDAV addresses. When it has, click Finish
Now check the box Enable and synchronize this account. TbSync will discover all address books and calenders your account has access to on the server
Check the box next to each calender and address book you want to have synchronised, also set how often you want them to be synchronised and push the button sychronize now
After the first successful synchronisation is complete, you can close the window. Henceforth, TbSync will do the work for you. You are done and can skip the next sections (unless you need a more advanced address book)
Alternative: Utiliser l’extension CardBook (Contacts seulement)
CardBook is an advanced alternative to Thunderbird’s address book, which supports CardDAV. You can have TbSync and CardBook installed in parallel.
Click the CardBook icon in the upper right corner of Thunderbird:
In CardBook:
« Address book > New Address book Remote > Next
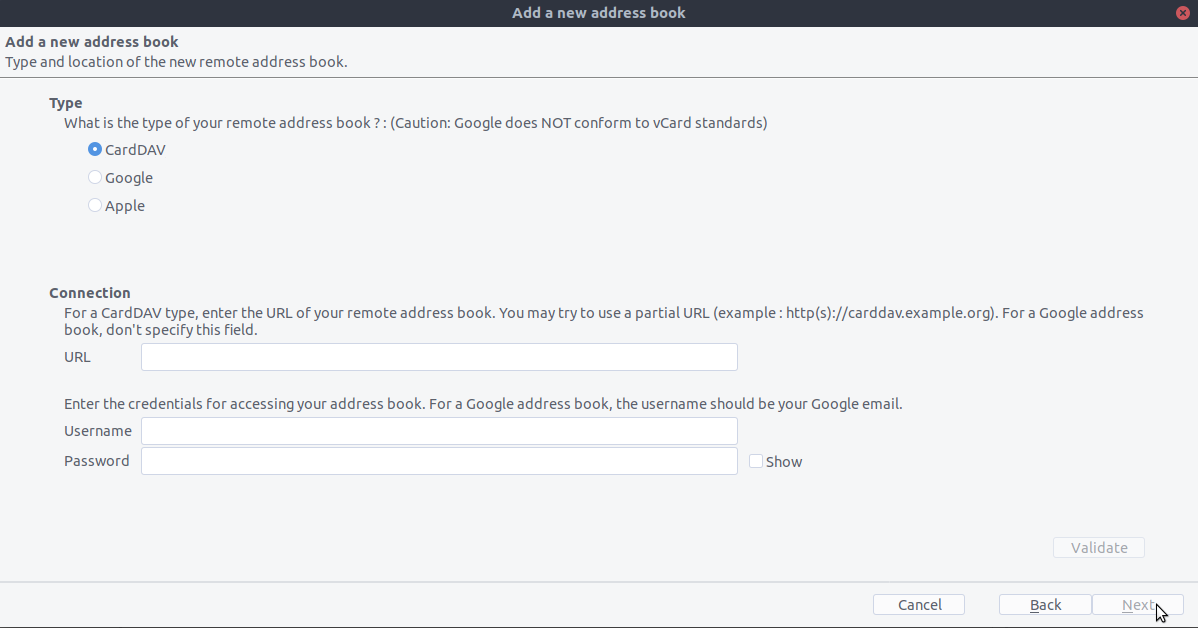
Sélectionner CardDAV, renseigner l’adresse de votre serveur Nextcloud, votre nom d’utilisateur et votre mot de passe

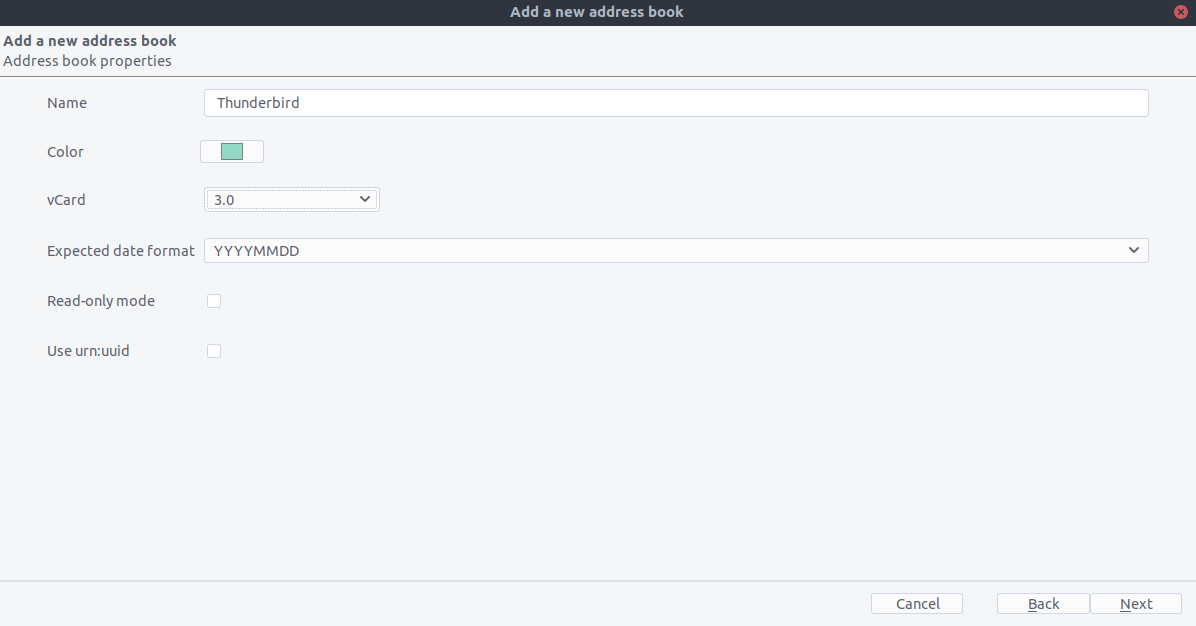
Click on « Validate », click Next, then choose the name of the address book and click Next again:

When you are finished, CardBook synchronizes your address books. You can always trigger a synchronisation manually by clicking « Synchronize » in the top left corner of CardBook:

L’ancienne méthode : s’abonner manuellement à chaque calendrier
Cette méthode n’est nécessaire que si vous ne souhaitez pas installer TBSync.
Go to your Nextcloud Calendar and click on the 3 dotted menu for the calendar that you want to synchronize which will display an URL that looks something like this:
https://cloud.nextcloud.com/remote.php/dav/calendars/daniel/personal/Allez dans l’agenda de Thunderbird et cliquez droit dans le menu gauche des agendas (où le nom des agenda est affiché) pour ajouter un nouvel agenda: Nouvel Agenda.
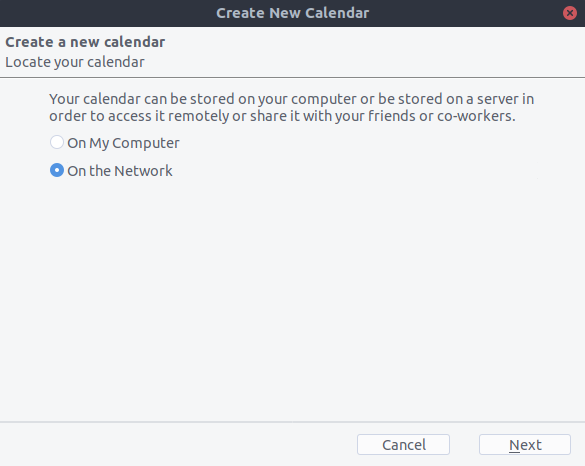
Choose On the Network:

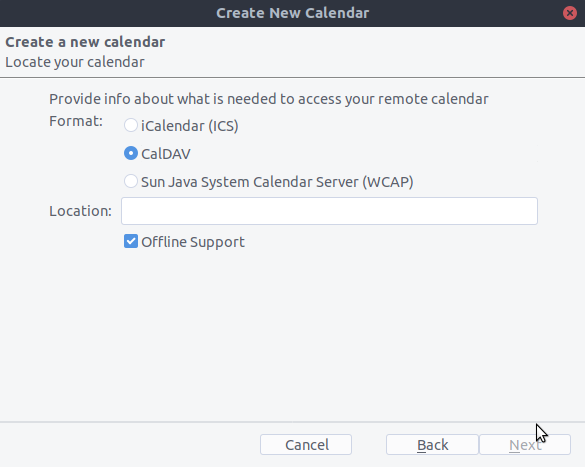
Choisissez CalDAV et renseignez les informations manquantes:

Solution pour Thunderbird 60
If you are still using Thunderbird 60, you need to change a configuration setting to make CalDAV/CardDAV work around Thunderbird bug #1468918 as described here.