Advanced Talk features
Nextcloud Talk has a number of advanced features users might find useful.
Notifications and privacy
By default, Nextcloud Talk will notify you about:
New messages in private conversations;
Replies to messages you sent;
Messages mentioning you or group/team you are member of;
Started calls in conversations you are part of.
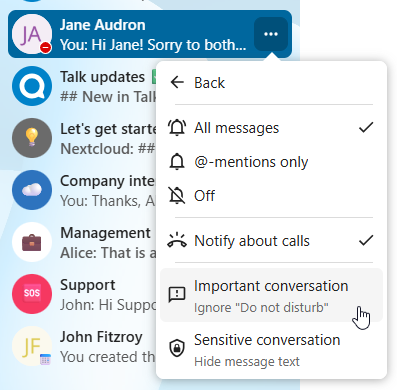
You can change this behavior in the conversation settings. Additionally, you can configure:
Important conversations: you will be always notificed about new messages, even if you are in «Do Not Disturb» mode;
Sensitive conversations: content of messages will not be shown in the conversation list and obscured from notifications.
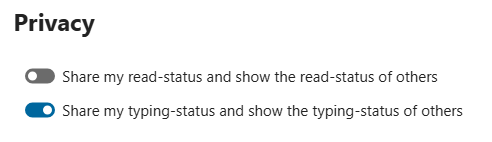
To have more control over your privacy, you can also configure the visibility of your typing and read indicators in Talk settings:
Matterbridge
Matterbridge integration in Nextcloud Talk makes it possible to create ’bridges’ between Talk conversations and conversations on other chat services like MS Teams, Discord, Matrix and others. You can find a list of supported protocols on the Matterbridge github page.
A moderator can add a Matterbridge connection in the chat conversation settings.
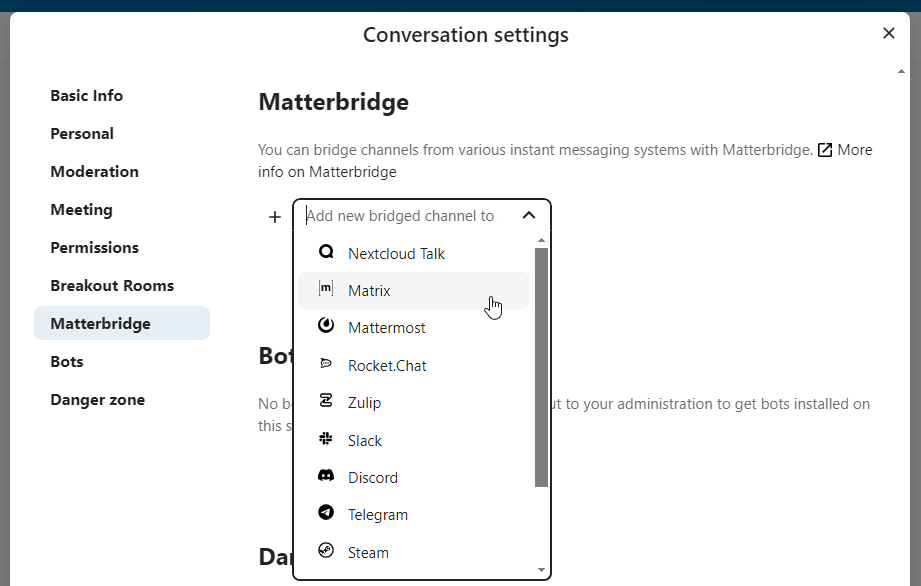
Each of the bridges has its own need in terms of configuration. Information for most is available on the Matterbridge wiki and can be accessed behind more information menu in the ... menu. You can also access the wiki directly.
Lobby
The lobby feature allows you to show guests a waiting screen until the call starts. This is ideal for webinars with external participants, for example.
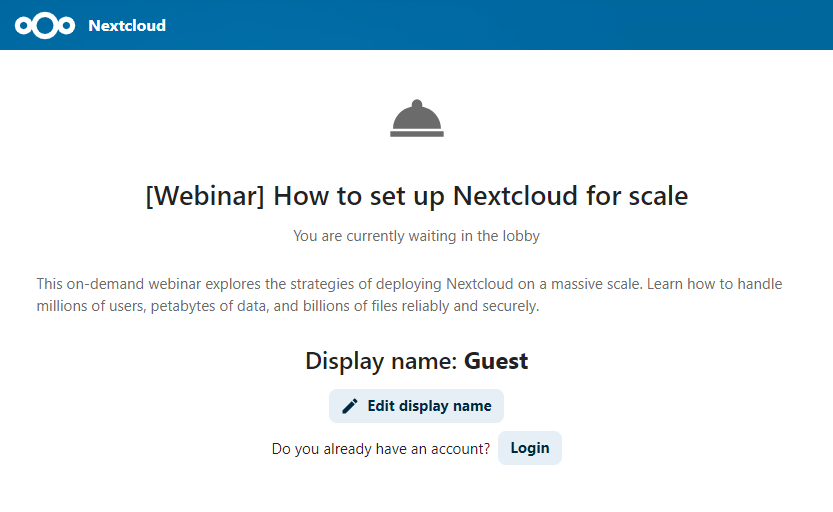
You can choose to let the participants join the call at a specific time, or when you dismiss the lobby manually.
Commands
Nextcloud allows users to execute actions using commands. A command typically looks like:
/wiki airplanes
Administrators can configure, enable and disable commands. Users can use the help command to find out what commands are available.
/help
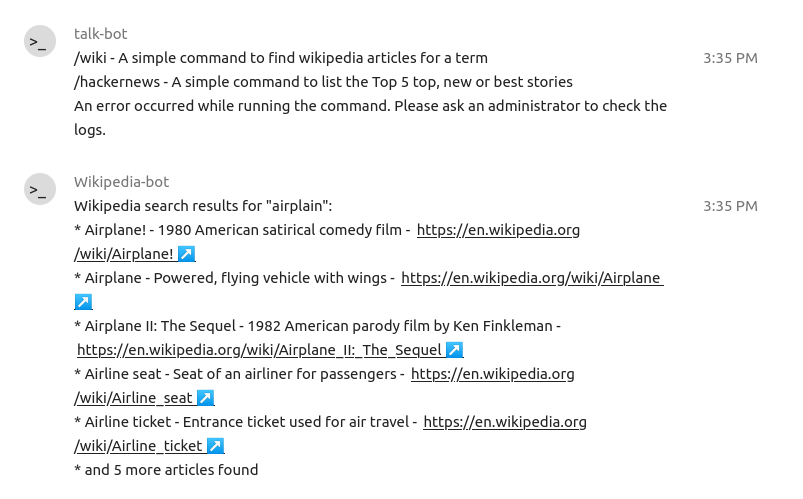
Find more information in the administrative documentation for Talk.
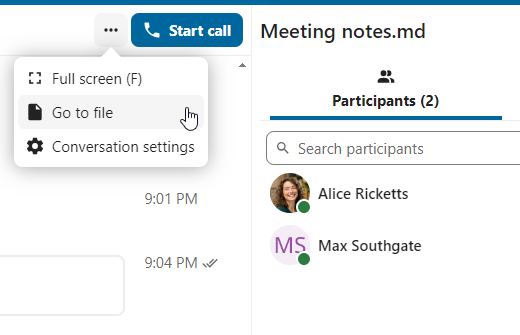
Talk from Files
In the Files app, you can chat about files in the sidebar, and even have a call while editing it. You first have to join the chat.
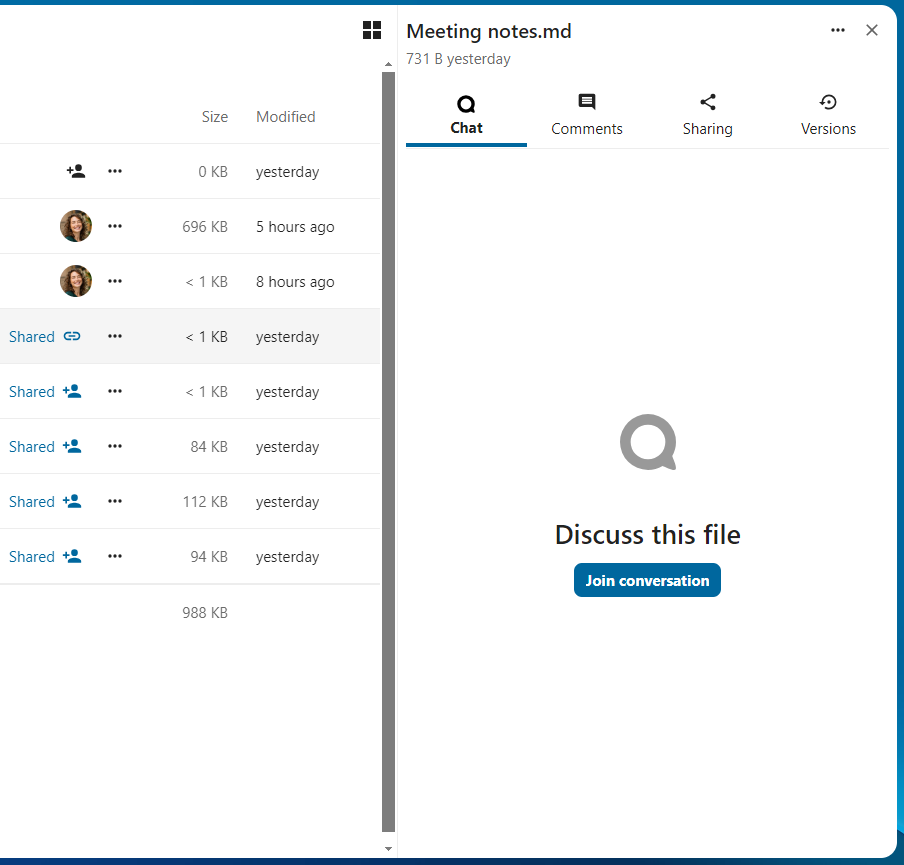
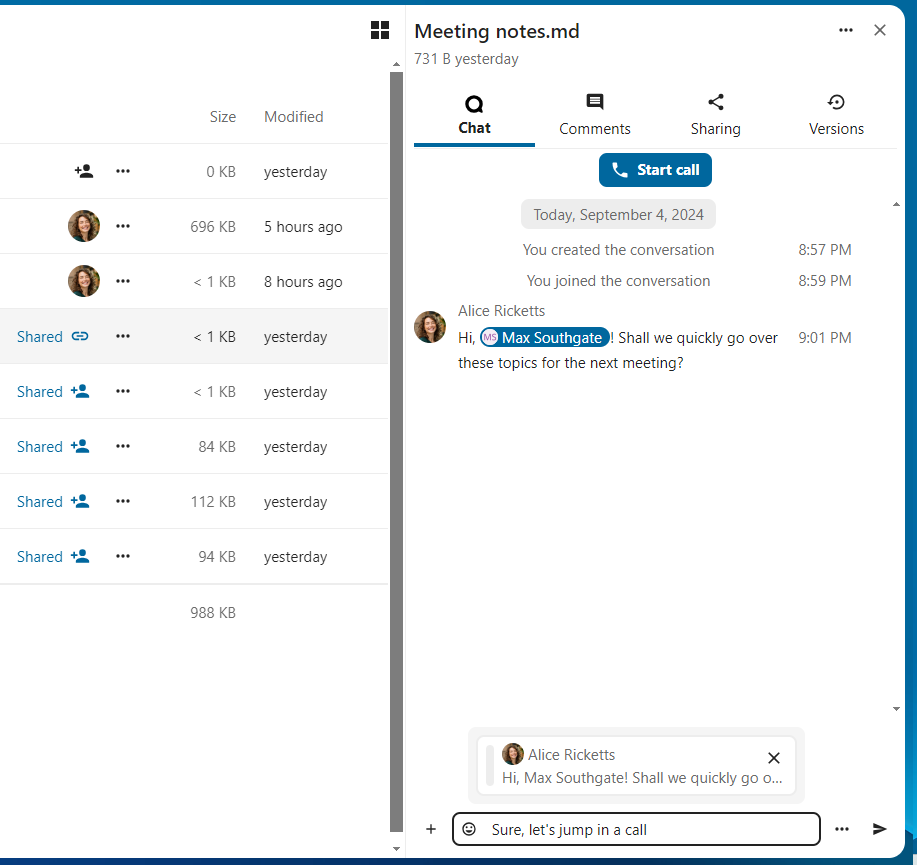
You can then chat or have a call with other participants, even when you start editing the file.
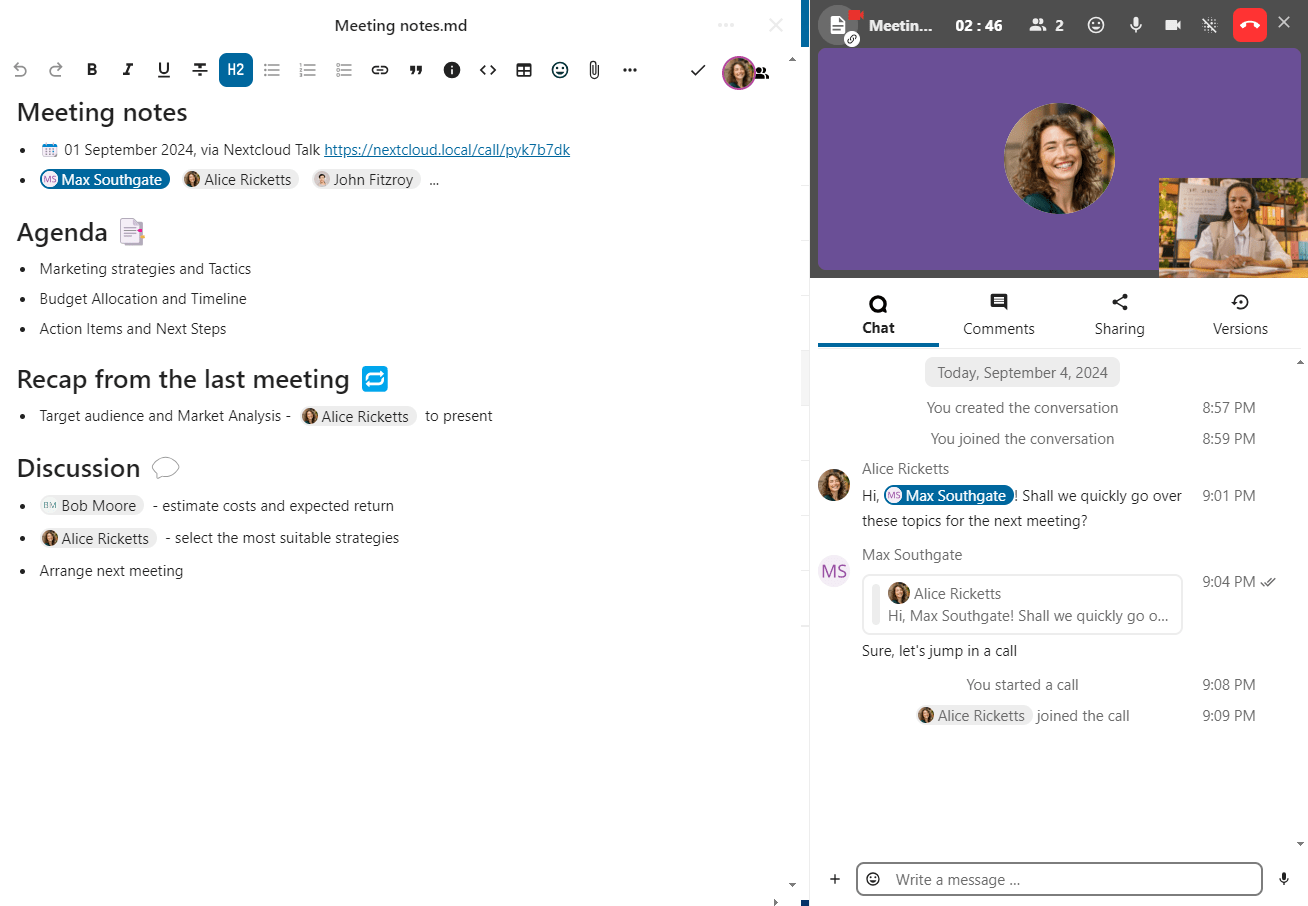
In Talk, a conversation will be created for the file. You can chat from there, or go back to the file using the ... menu in the top-right.
Create tasks from chat or share tasks in chat
If Deck is installed, you can use the ... menu of a chat message and turn the message into a Deck task.


From within Deck, you can share tasks into chat conversations.


Meetings and events
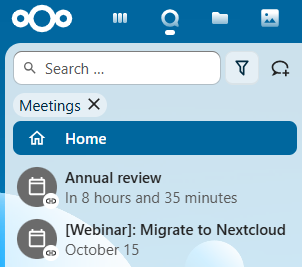
If calendar events have a Talk conversation set as event location, you will see an information about upcoming events inside of this conversation. That way you can stay informed about scheduled meetings or activities directly within your chat. If Calendar app is enabled, you can click on an event to view details.

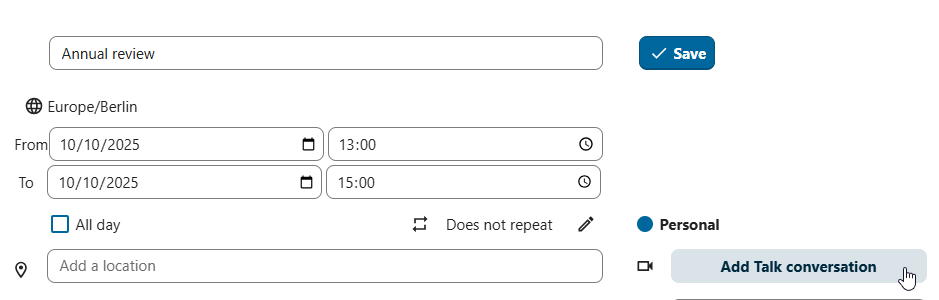
It is possible to schedule a meeting directly from a conversation. In the dialog, you can set meeting details such as title, date, time and description. You can also choose to invite all participants including email guests, or select specific ones.

Schedule from Calendar
When creating a new event in Calendar, you can set a Talk conversation as event location. This will create a new conversation if one does not exist yet.
When the event is created, you will see a link to the conversation in the event details. Conversation will also show up in the list of conversations (discoverable by Events filter).
Like instant meetings, event conversations will be automatically deleted after configured period of inactivity (by default 28 days).
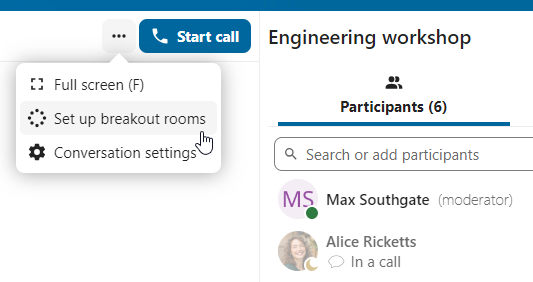
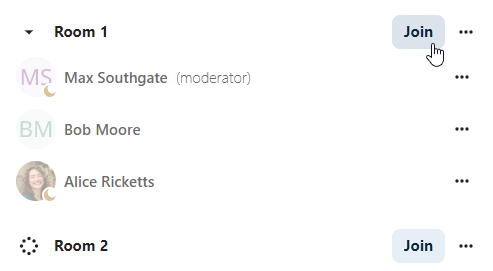
Breakout rooms
Breakout rooms allow you to divide a Nextcloud Talk call into smaller groups for more focused discussions. The moderator of the call can create multiple breakout rooms and assign participants to each room.
Note
Breakout rooms are currently not available in conversations that are joinable by guests (public conversations).
Configure breakout rooms
To create breakout rooms, you need to be a moderator in a group conversation. Click on the top-bar menu and click on «Setup breakout rooms».
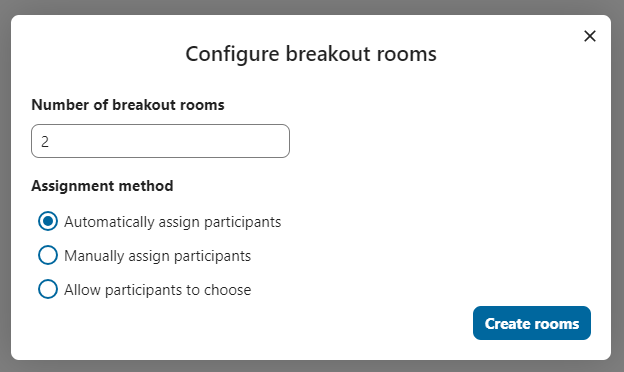
A dialog will open where you can specify the number of rooms you want to create and the participants assignment method. Here you’ll be presented with 3 options:
Automatically assign participants: Talk will automatically assign participants to the rooms.
Manually assign participants: You’ll go through a participants editor where you can assign participants to rooms.
Allow participants choose: Participants will be able to join breakout rooms themselves.
Manage breakout rooms
Once the breakout rooms are created, you will be able to see them in the sidebar.
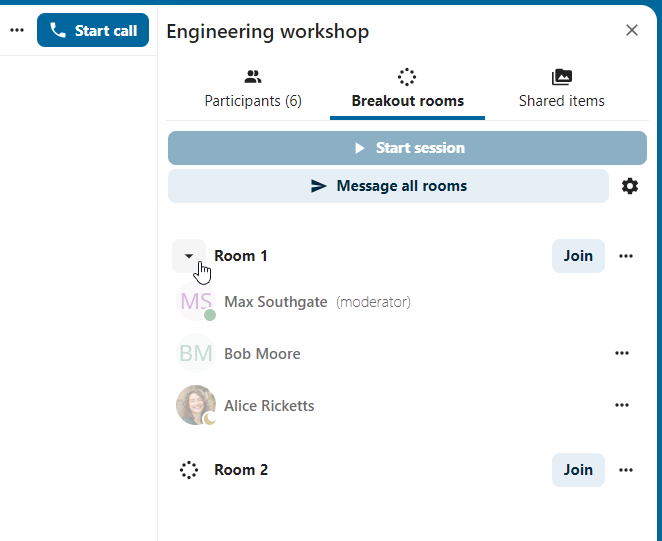
From the sidebar header
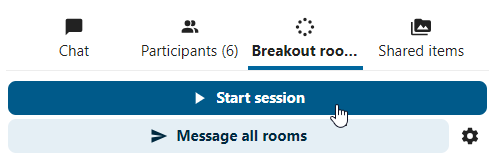
Start and stop the breakout rooms: this will move all the users in the parent conversation to their respective breakout rooms.
Broadcast a message to all the rooms: this will send a message to all the rooms at the same time.
Make changes to the assigned participants: this will open the participants editor where you can change which participants are assigned to which breakout room. From this dialog it’s also possible to delete the breakout rooms.
From the breakout room element in the sidebar, you can also join a particular breakout room or send a message to a specific room.
Call recording
The recording feature provides users with an opportunity to:
Start and stop recordings during a call.
Record the video and audio stream of the speaker, as well as screen share.
Access, share and download recorded files for future reference or distribution.
Enabling this feature requires the recording server to be set up by the system administration.
Manage a recording
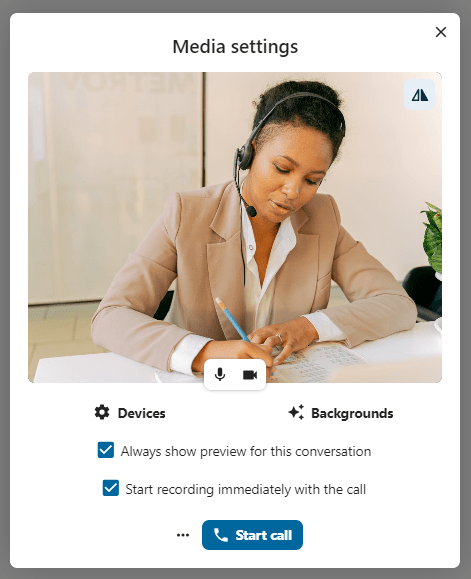
The moderator of the conversation can start a recording together with a call start or anytime during a call:
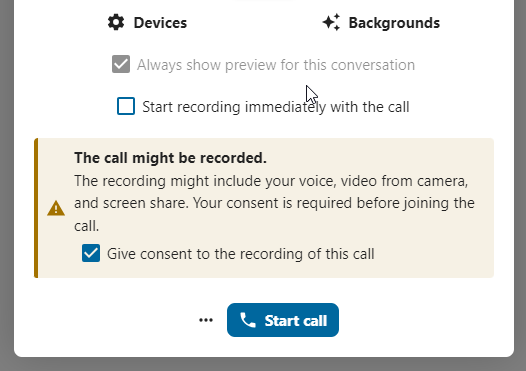
Before the call: tick the checkbox «Start recording immediately with the call» in «Media settings», then click on «Start call».
During the call: click on the top-bar menu, then click «Start recording».
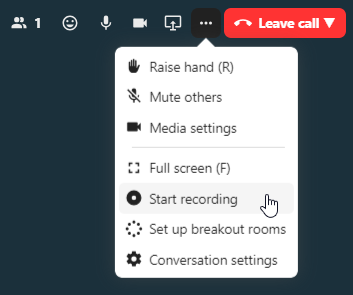
The recording will start shortly, and you will see a red indicator next to the call time. You can stop the recording at any time while the call is still ongoing by clicking on that indicator and selecting «Stop recording», or by using the same action in the top-bar menu. If you do not manually stop the recording, it will end automatically when the call ends.

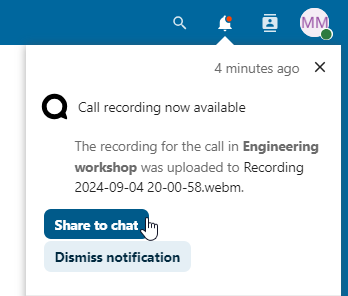
After stopping a recording, the server will take some time to prepare and save the recorded file. The moderator, who started the recording, receives a notification when the file is uploaded. From there, it can be shared in the chat.

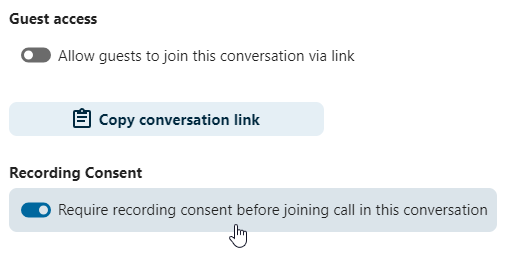
Recording consent
For compliance reasons with various privacy rights, it is possible to ask participants for consent to be recorded before joining the call. The system administration has the flexibility to utilize this feature in several ways:
Disable consent completely.
Enable mandatory consent system-wide, requiring consent for all conversations.
Allow moderators to configure this option on a conversation level. In such cases, moderators can access the conversation settings to configure this option accordingly:
If recording consent is enabled, every participant, including moderators, will see a highlighted section in the «Media settings» before joining a call. This section informs participants that the call may be recorded. To give explicit consent for recording, participants must check the box. If they do not give consent, they will not be allowed to join the call.
Federated conversation
With Federation feature, users can create conversations across different federated Talk instances and use Talk features as if they were on a same server.
Feature is required to be set up by the system administration.
Send and accept invites
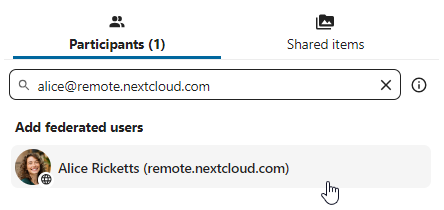
The moderator of the conversation can send an invite to participant on a different server:
When receiving a notification, user will see a counter of pending invites above the conversations list.
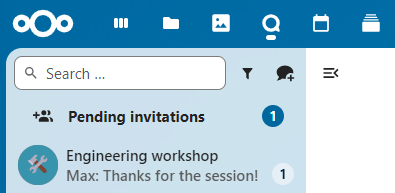
Upon clicking it, more information will be provided about inviting party, and user can either accept or decline the invitation.
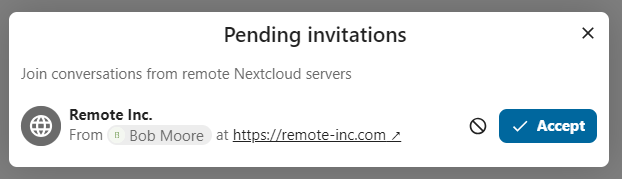
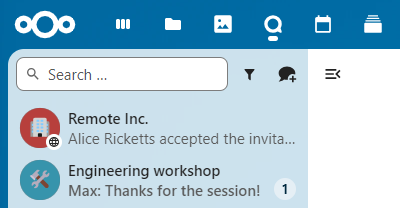
By accepting the invite, conversation will appear in the list as any other one.
You can use it further to chat with participants from other federated servers, join calls and use other available Talk features.
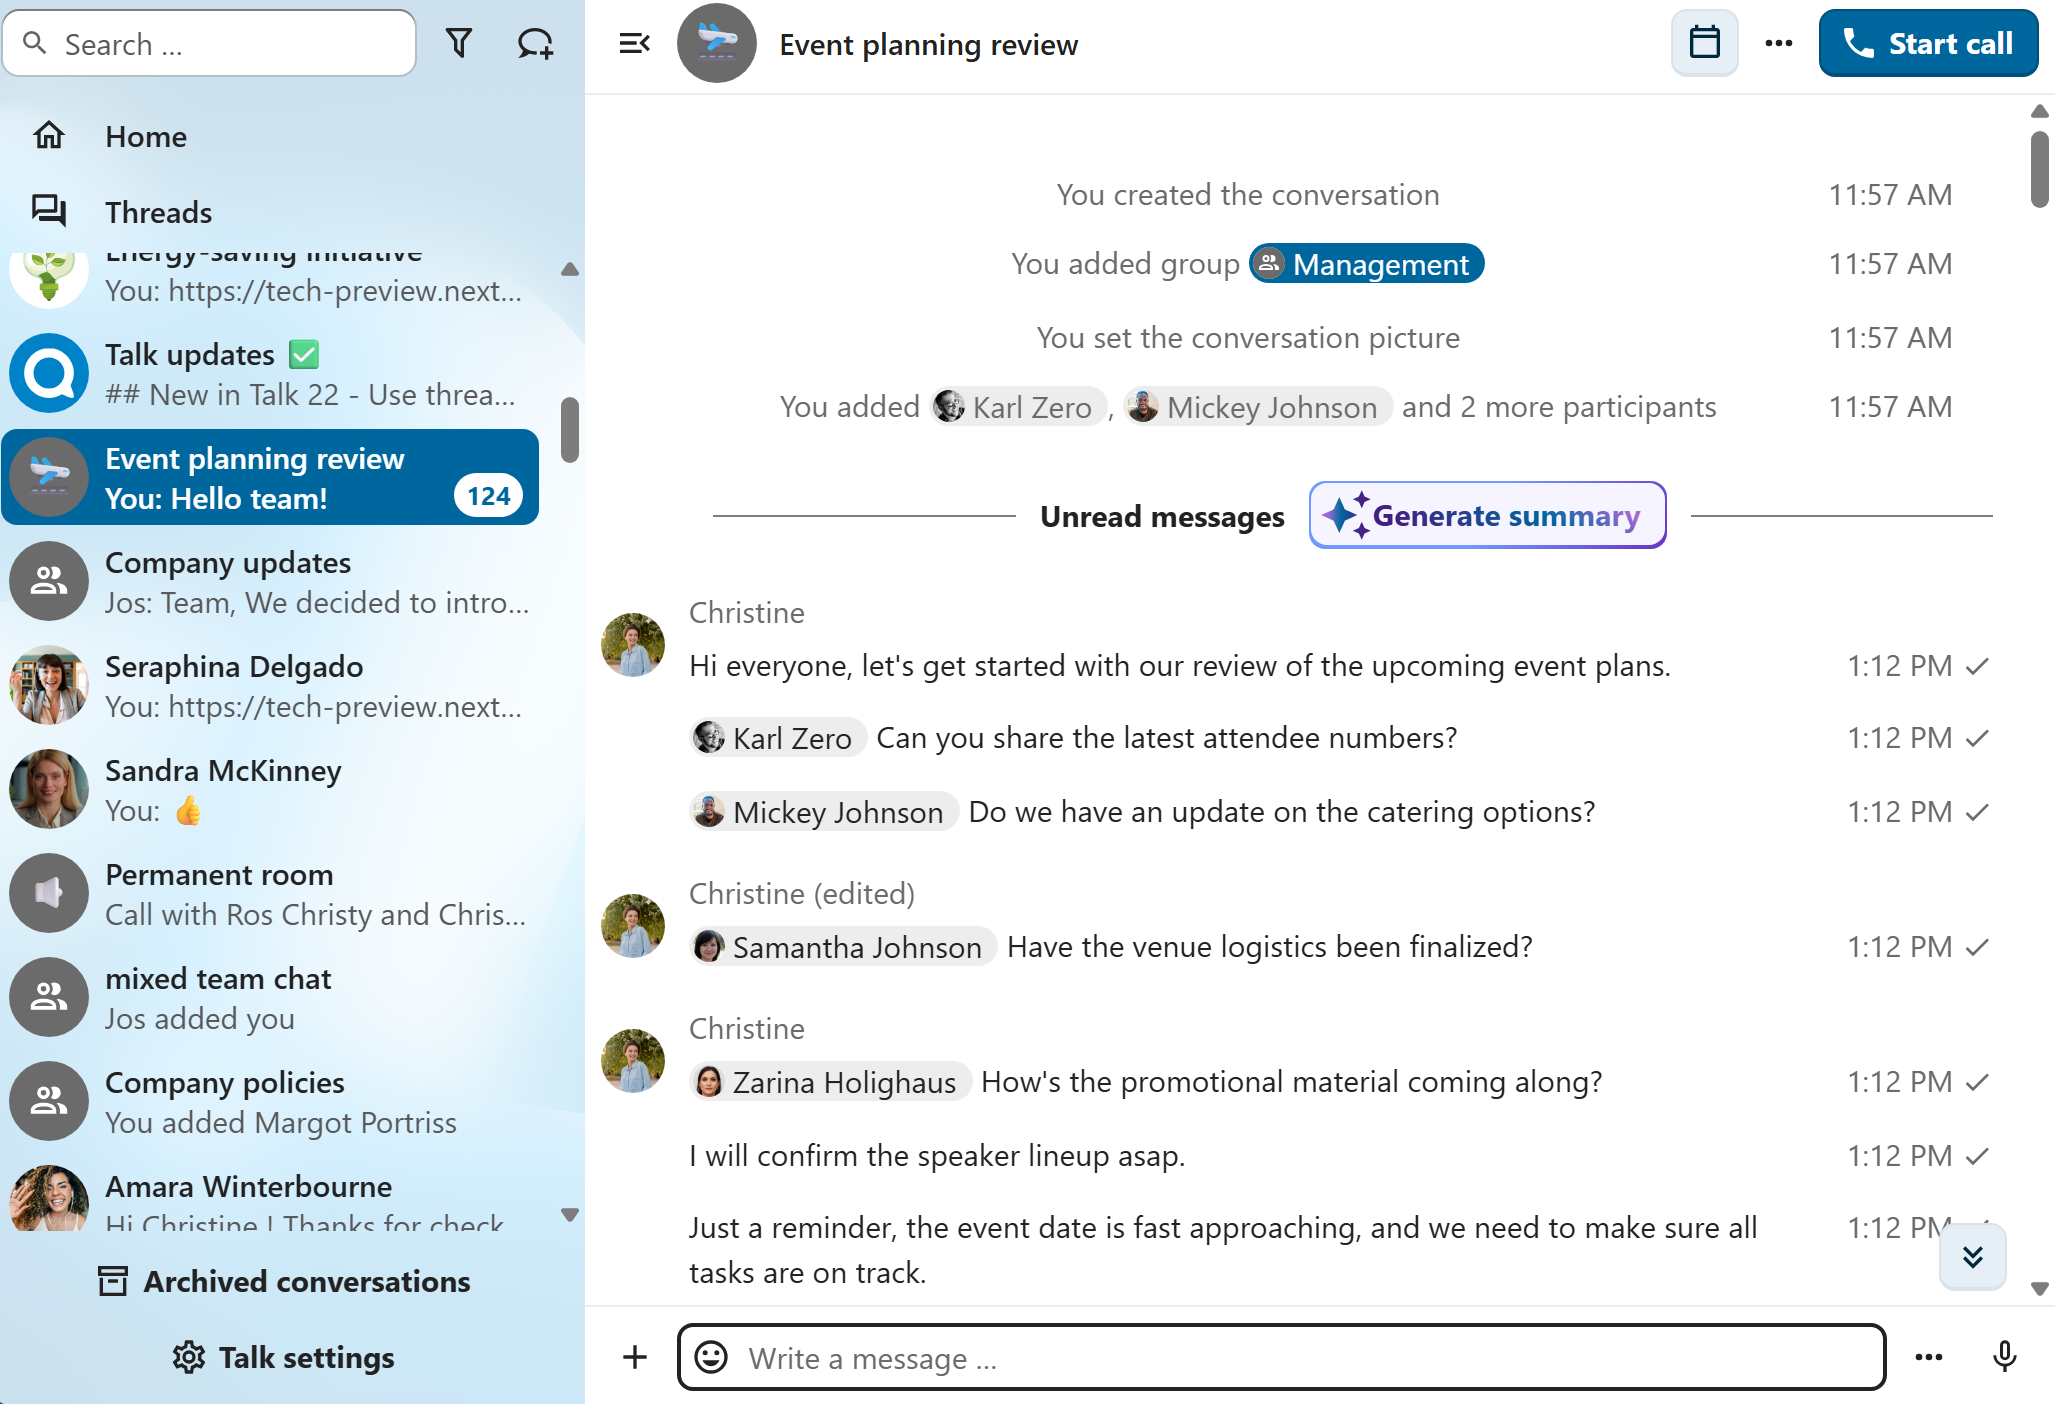
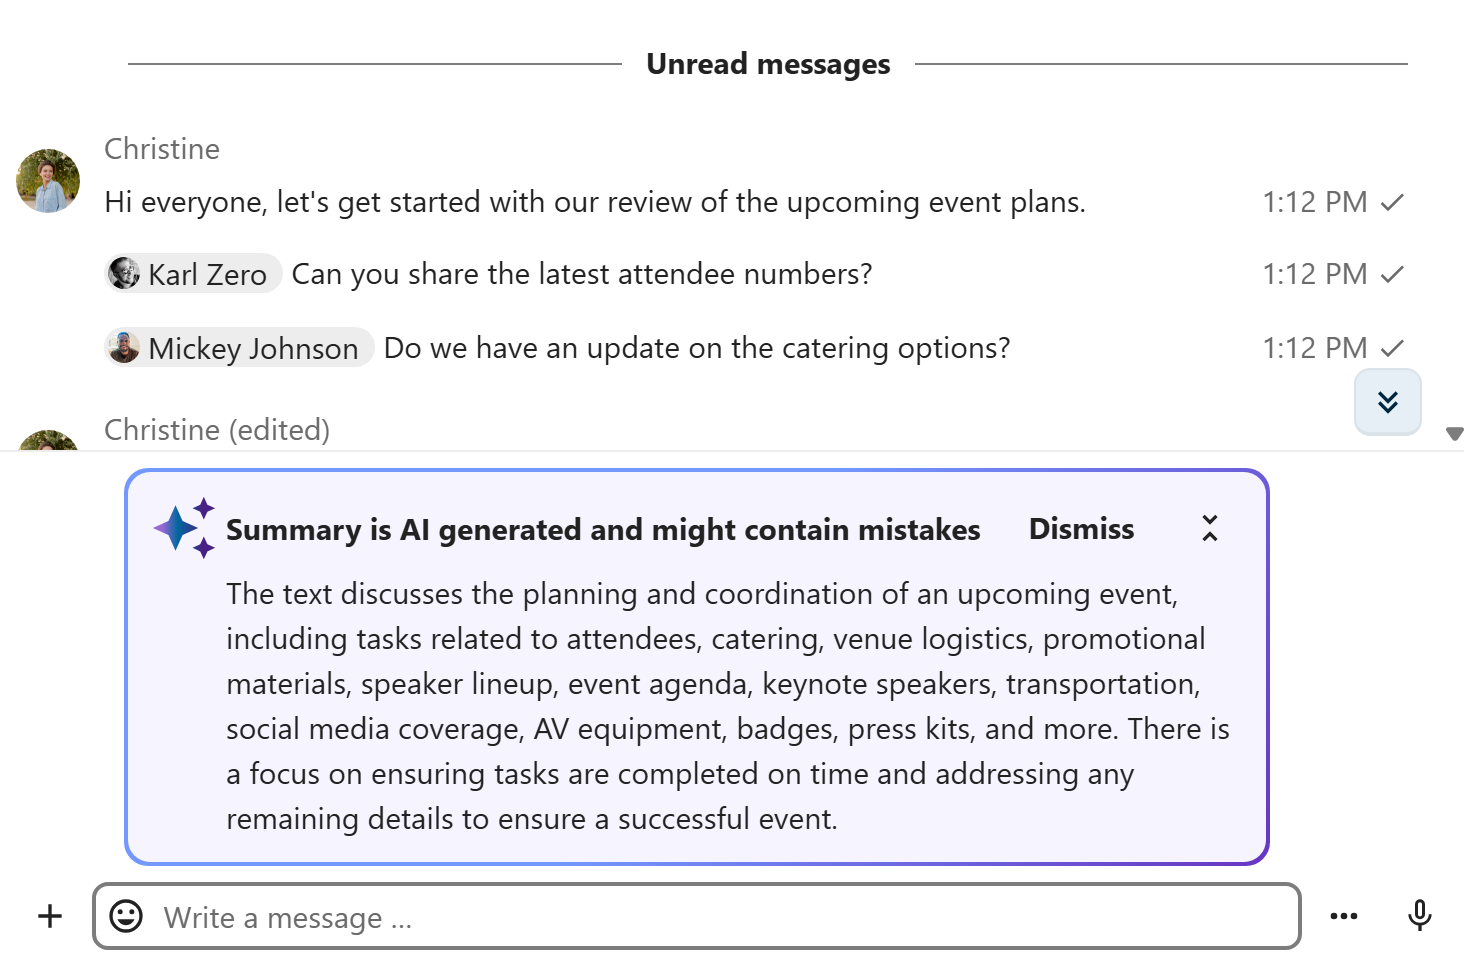
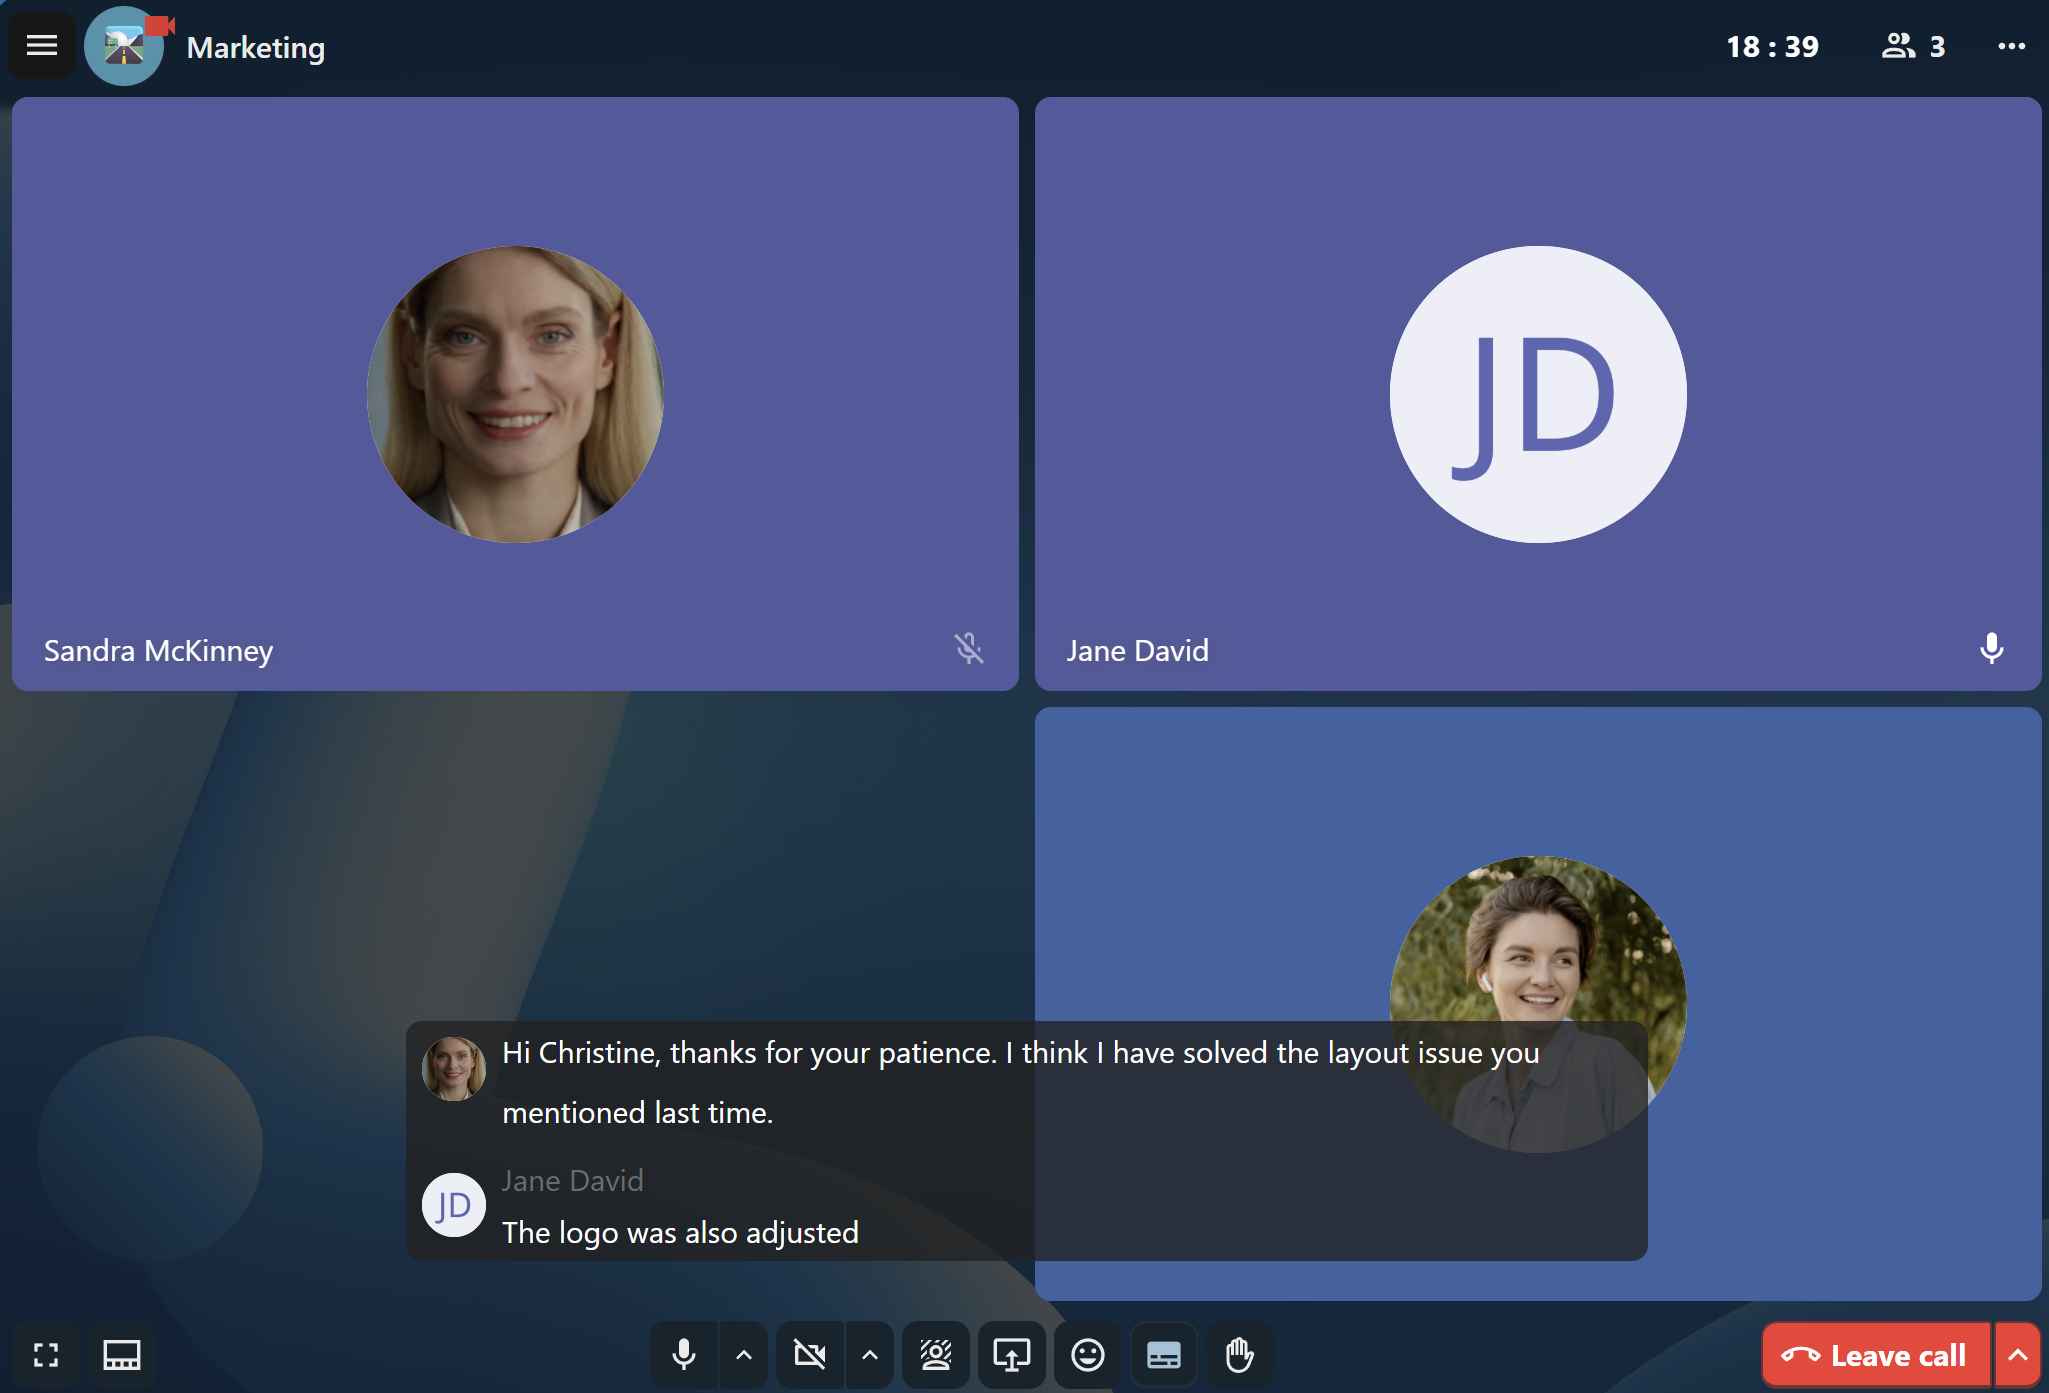
Chat summary
When AI assistant is enabled, a summary can be generated if there are more than 100 unread messages. You can generate it by pressing the button that is visible in chat above the first unread messages.
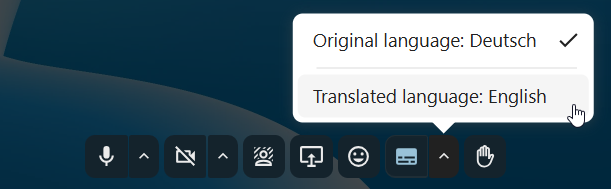
Call live transcription
Call live transcription allows to transcribe the speech in real-time during a call. It is set up by the system administration (High-performance backend and Live Transcription App are required). Moderators need to set the language of the transcription in the conversation settings. All participants then can enable or disable the transcription for themselves in the call bottom bar. When enabled, the transcription will appear in the bottom and will be updated in real-time.
With live_transcription provider app enabled, you can also use live translation. Instead of receiving the transcription in the original message, it will be translated to the language of your choice.