Het instellen van jouw voorkeuren
Als gebruiker kan je jouw persoonlijke instellingen beheren.
Om toegang te krijgen tot jouw persoonlijke instellingen:
Click your profile picture to open the menu.

Click Settings in the dropdown menu to open your personal settings.

Notitie
Ben je een beheerder, dan kun je ook gebruikers beheren en de server beheren. Deze links verschijnen niet voor een niet-beheerder gebruiker.
De opties op de pagina Persoonlijke instellingen zijn afhankelijk van de applicaties die door de beheerder zijn ingeschakeld. Enkele van de functies die je ziet, zijn de volgende:
Gebruik en beschikbare quota
Je profielfoto beheren
Volledige naam (Je kan hier alles invullen wat je wil, omdat het los staat van je Nextcloud login naam, die uniek is en niet kan worden gewijzigd)
E-mailadres
Lijst met je groepslidmaatschappen
Je wachtwoord wijzigen
User preferences
Kies de taal voor je Nextcloud interface
Kies je voorkeur voor de eerste dag van de week
Koppelingen naar desktop- en mobiele apps
Beheer je stroom van activiteiten en meldingen
Standaardmap om nieuwe documenten in op te slaan
Je Federated sharing ID
Social sharing links
Nextcloud-versie
Notitie
Available options and settings depend on your administrator’s configuration. If you are not able to change the password or the display name in your personal settings, please contact your administrator for help.
Gegevens delen in het algemene adressenboek
Some administrators share their global address book with other Nextcloud instances (so-called Trusted Servers) or even with the wider world. This is helpful when two instances want to work closely together, or when people want to use Nextcloud as a virtual telephone book for others to browse. It also allows searching for contacts, creating shares, and much more.
You can change what personal data is shared by setting the scope of your data. Click the lock icon to open the following dropdown next to each entry:

Zet je je gegevens op Privé, dan zal niemand anders dan jij ze kunnen zien.
If you set your data to Local, all logged-in users within your Nextcloud instance will be able to see the information, but no one outside of it.
If you set your data to Federated, the trusted server(s) added by your administrator will be able to see this data, in addition to all logged-in users.
If you set your data to Published, anyone can see your data. This is useful in some cases. Someone with a public-facing role such as marketing or sales might want to share their contact details with a wide variety of connections who might not be using Nextcloud.
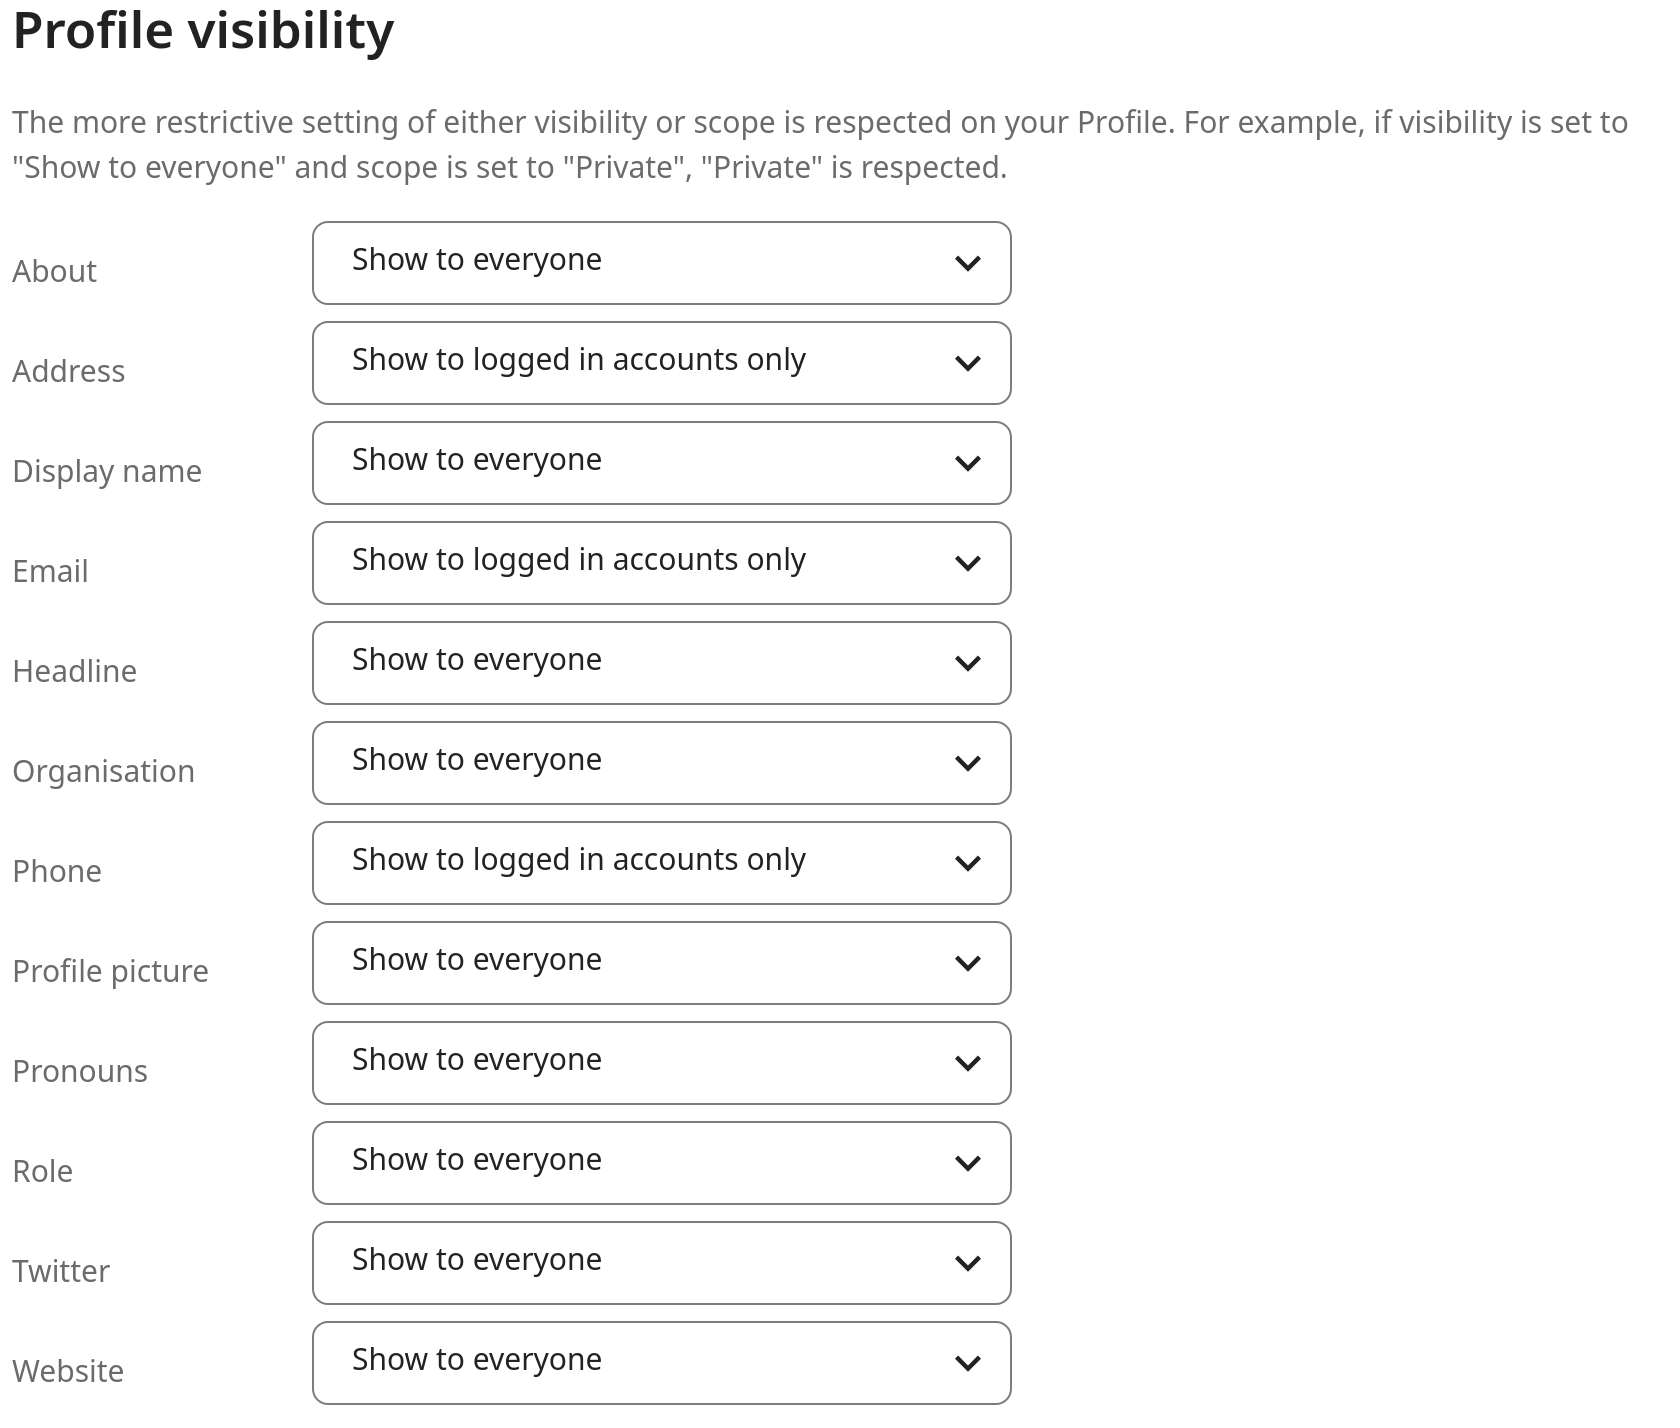
Beperken wie jouw profielgegevens kunnen zien
If the profile is enabled by your administrator, your profile data can be read by other users and guests. To control who can see which information, adjust the scopes mentioned above:
Private will only allow you and users you have added to your phone book to see the data.
Local and above will also allow guests to see your data.
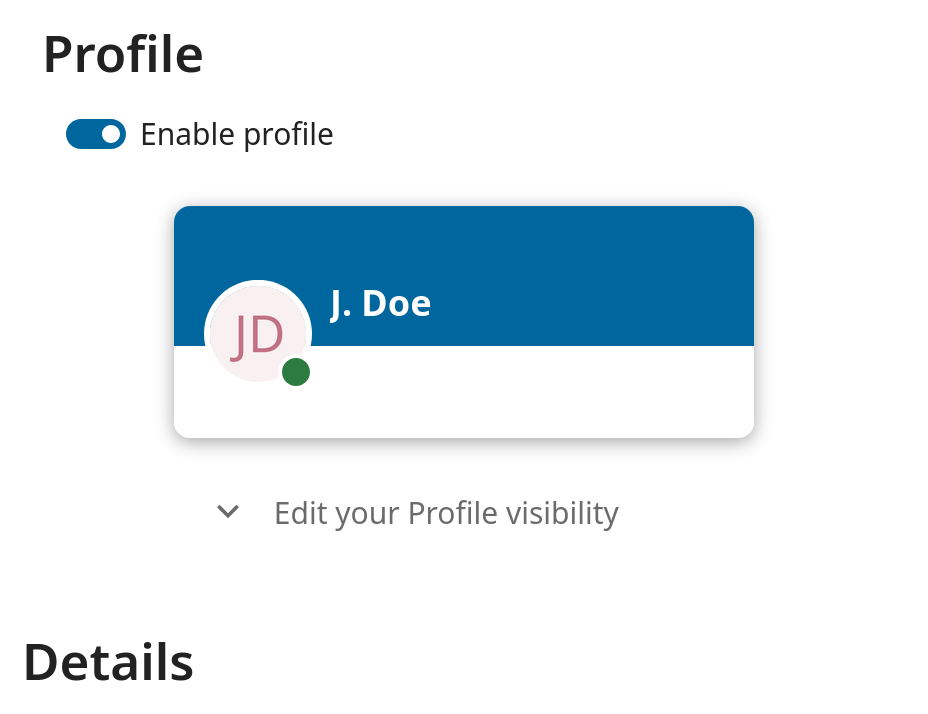
To restrict the visibility further, you can prevent guests from seeing your profile data by changing the profile visibility to logged-in users. In your personal settings, find the profile visibility button:
This allows you to configure the visibility for each profile attribute: