與 macOS 同步
設置您的帳戶
In the following steps you will add CalDAV (Calendar) and CardDAV (Contacts) to your macOS integrated Calendar and Contacts applications. At the time of writing this guide, macOS is at version 26.3.1.
Click on the Apple logo in the top left corner of your screen and select System Settings... from the dropdown menu.
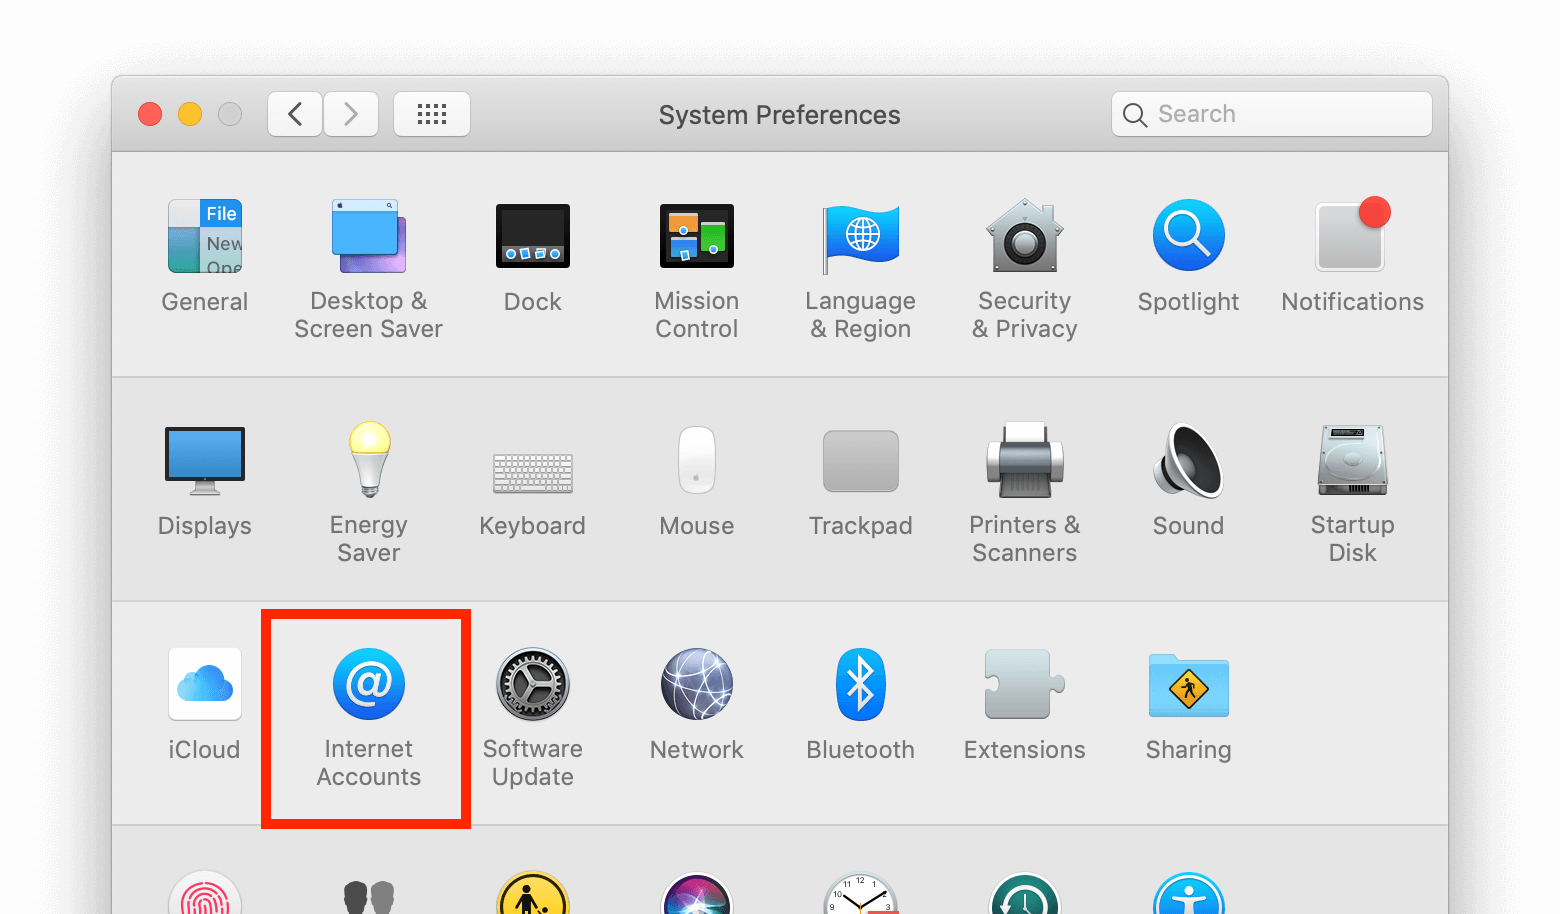
導航到 互聯網帳戶:
Click on the small blue choose from a list.
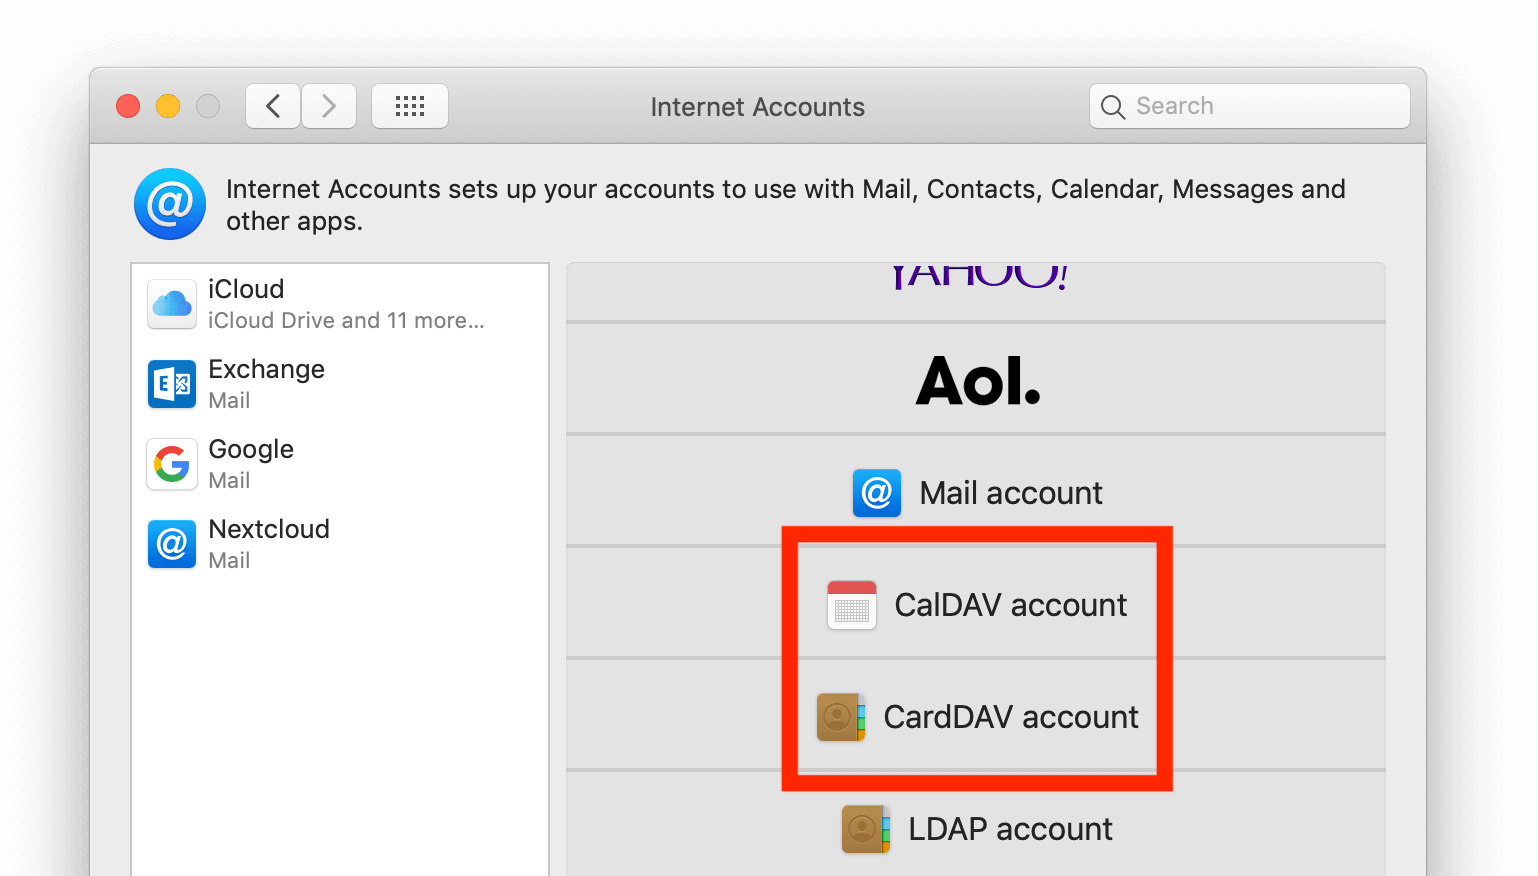
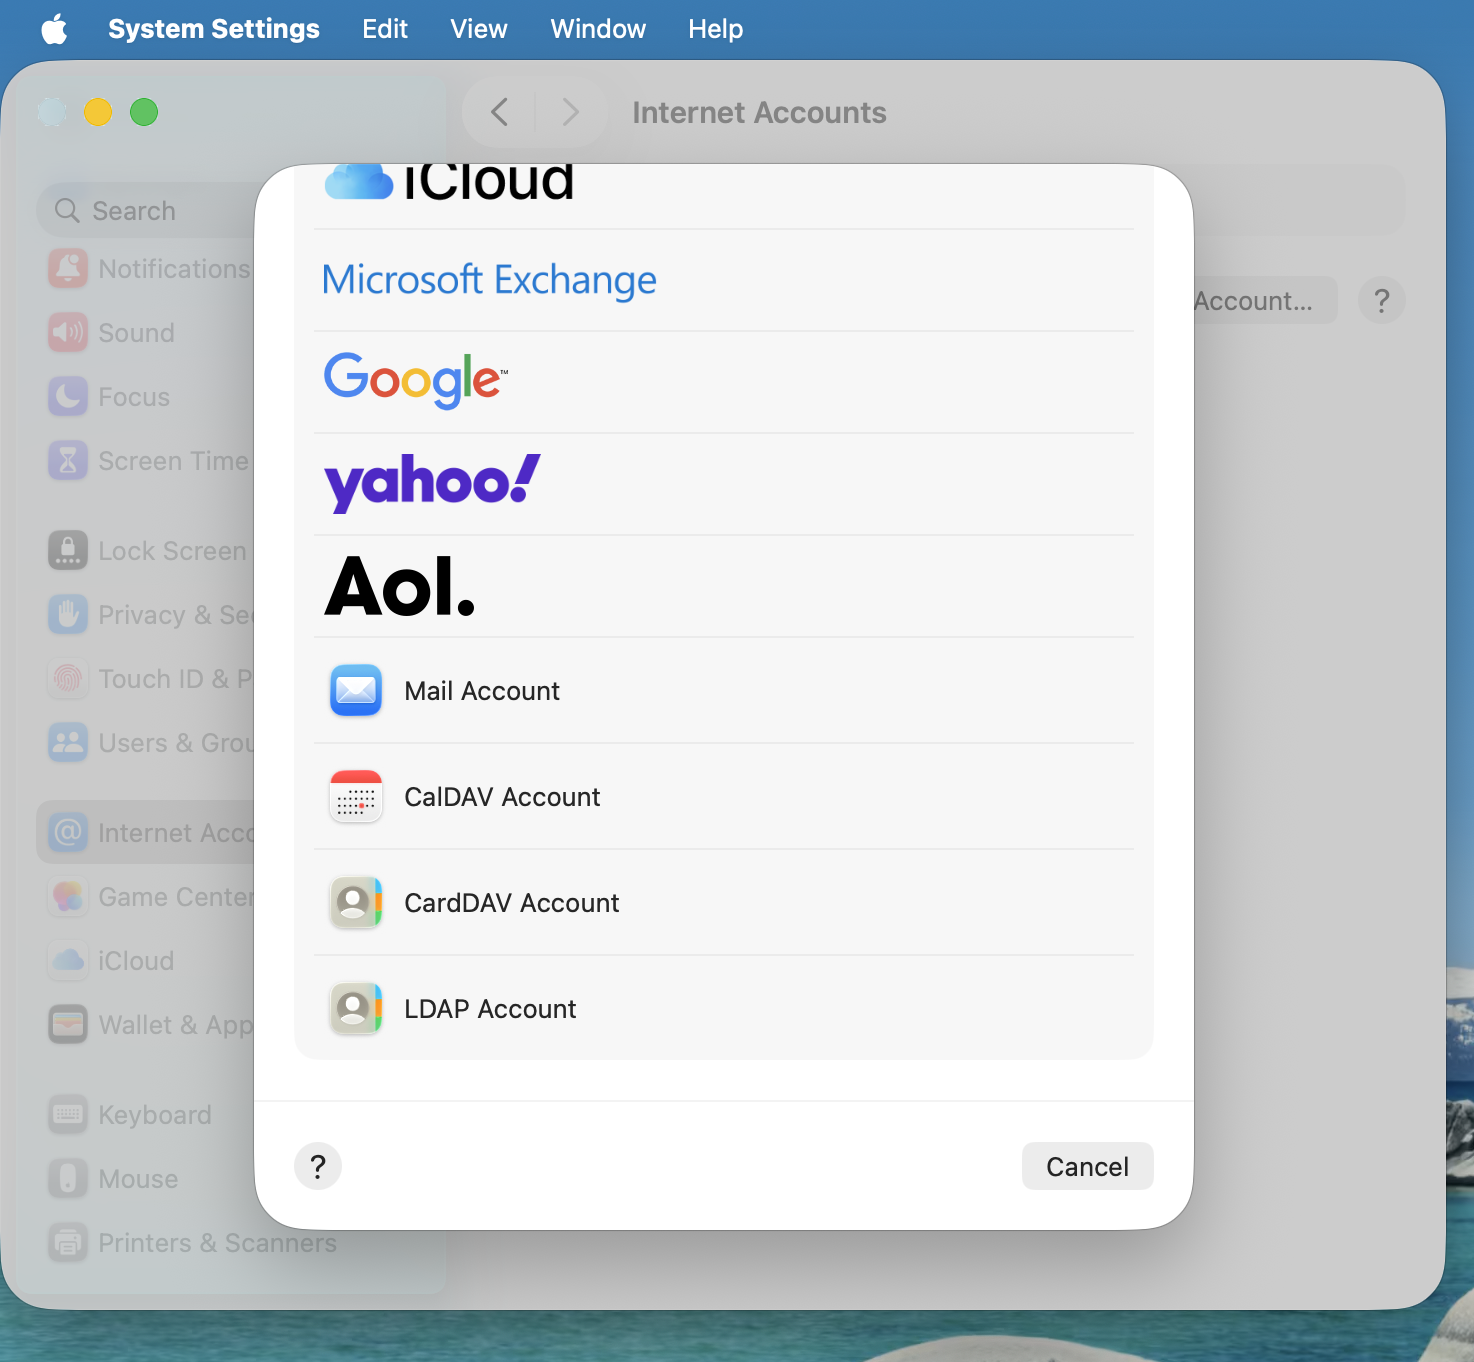
Click on add Other Account...
Select CalDAV Account for calendar and CardDAV Account for contacts.
Note
You can not setup Calendar/Contacts together. You need to setup them separately.
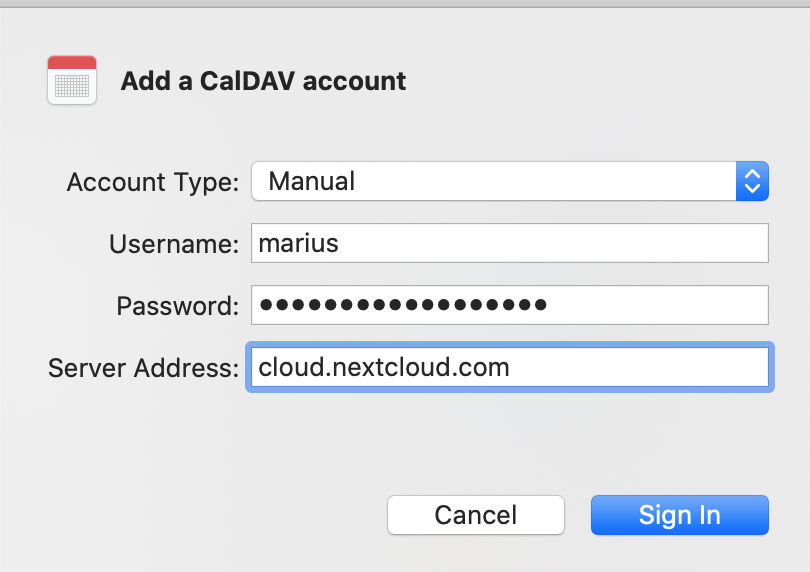
Select Manual as Account Type and type in your respective credentials:
用戶名:您的 Nextcloud 用戶名或電子郵件
Password: Either your password or if you use 2FA your generated app-password/token (Learn more).
Server Address: URL of your Nextcloud server (e.g.
https://nextcloud.yourdomain.com)
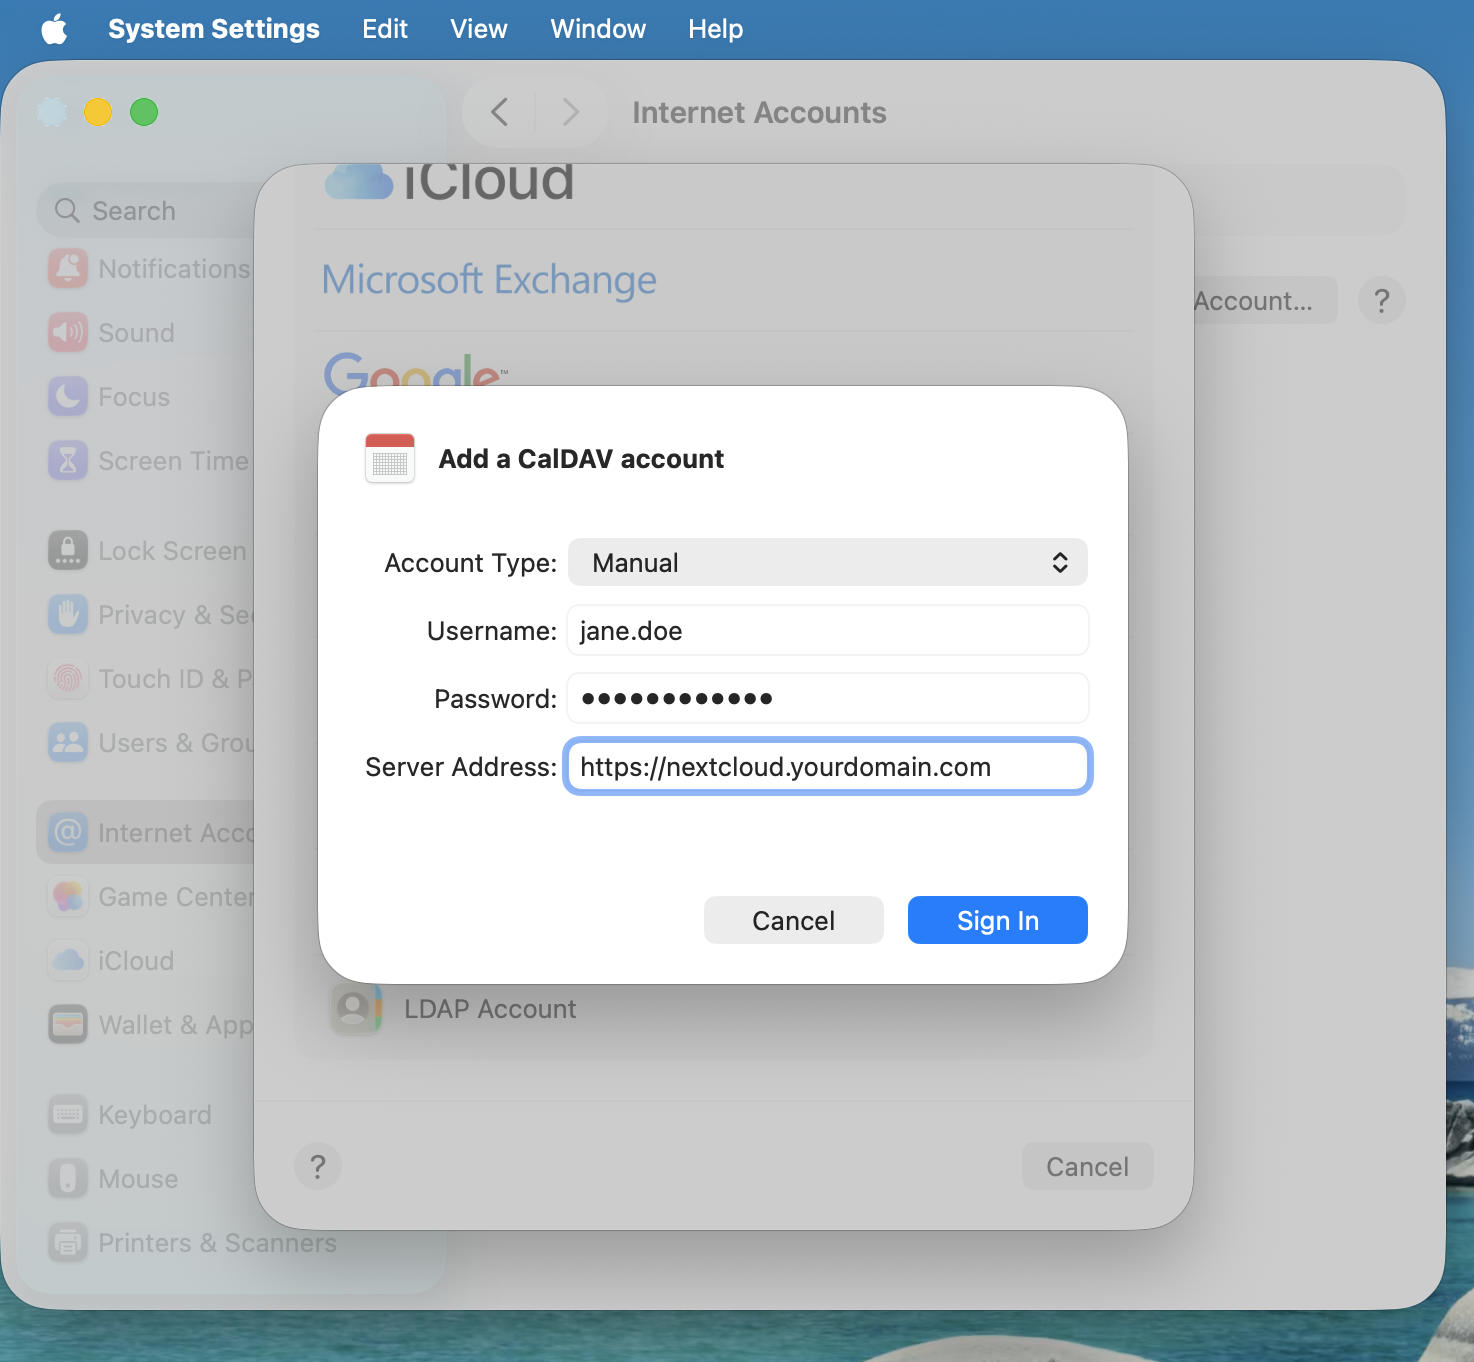
點擊 登錄。
故障排除
macOS 不 支持在未加密的
http://連接上同步 CalDAV/CardDAV。請確保您在伺服器和客戶端啟用並已配置了https://。自簽名證書 需要在 macOS 鑰匙串中正確設置。