Les bases de Nextcloud Discussion
Nextcloud Talk vous permet de dialoguer ou de passer des appels vidéo depuis votre propre serveur.
Getting started
Chats and calls take place in conversations. You can create any number of conversations. There are different types of conversations:
1. Private (one-to-one) conversations
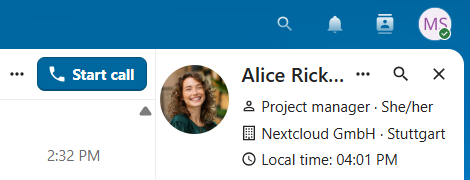
This is where you have a private chat or call with another Talk user.
In content sidebar, you can find additional information about the person you are chatting with, such as their email address, phone number, or other details they have shared in their profile.
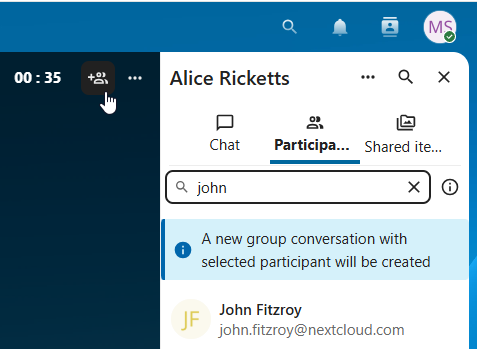
Nobody except you and the other person can see this conversation or join a call in it. You can extend an ongoing call to a new group conversation by adding more people. Call will be continued there without interruption.
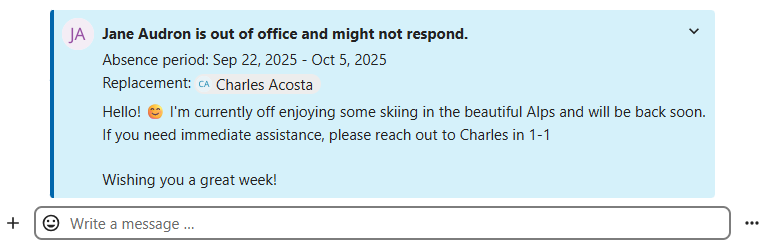
If a user becomes unavailable and set an out-of-office status in Personal settings > Availability, you will find additional information in this conversation, such as provided description, absence date, or their replacement person.
2. Group conversations
A group conversation can have any number of people in it.
You can add internal users, email guests, groups or teams to a group conversation upon creation, or when it already exists, via the Participants tab.
A group conversation can be shared with a public link, so guests can join a chat and a call. It can also be opened to registered users (or users from “Guests” app), so they can discover and join this conversation.
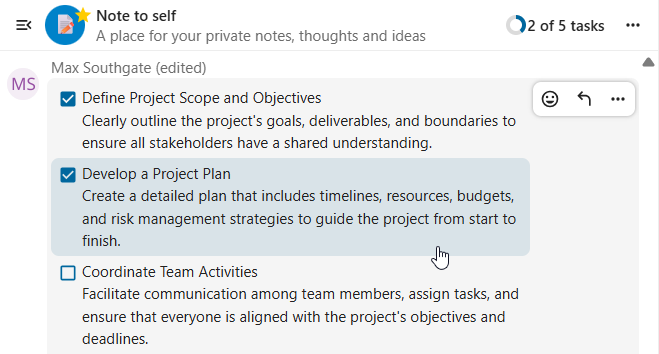
3. Note to self
This is a special conversation with yourself. Messages here do not have a limit for editing or deletion. You can use it to:
Take notes: write down ideas, reminders, or important information you want to keep handy.
Create to-do lists: use Markdown syntax to create checklists for tasks you need to complete.
Forward messages from other chat: use the message menu to forward important messages from other conversations to your Note to self.
4. Disposable conversations
These conversations cover some special cases and exist for a limited period of time. Retention period can be configured by an instance administration:
Instant meetings: these conversations can be created for quick, ad-hoc meetings. They can be started instantly from the Talk Dashboard.
Event conversations: these are created when set as an event location by Calendar app.
Phone conversations: these are dedicated for SIP dial-in & dial-out phone calls (requires a SIP gateway).
Video verification: these are created, when someone tries to access a public link, protected by password with video verification (deleted instantly after call ends).

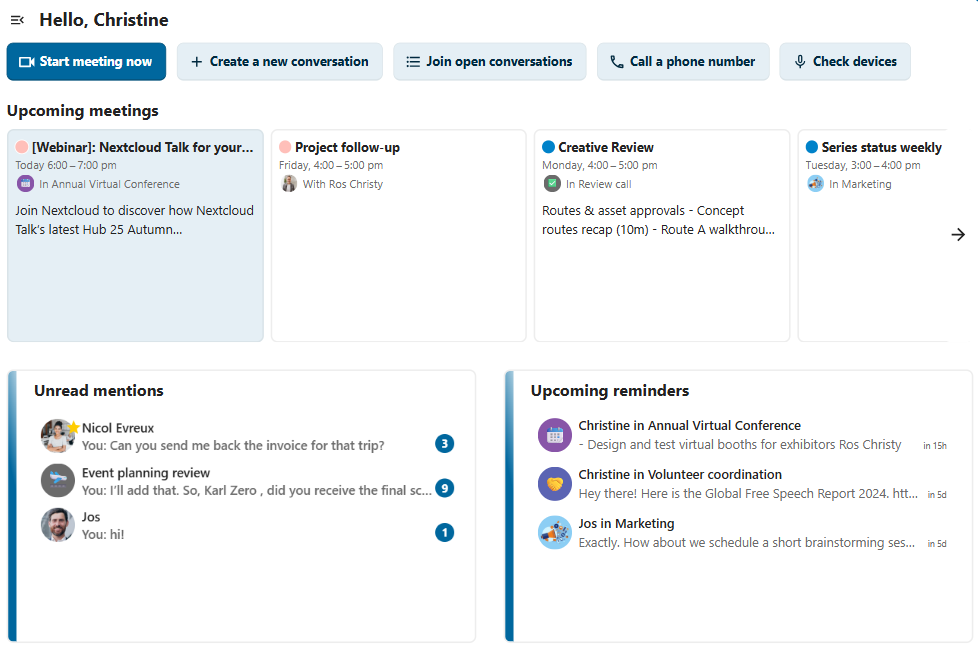
Talk Dashboard
The Talk Dashboard is your central hub for managing and accessing your conversations. It provides an overview of your:
Unread mentions and messages in private chats;
Message reminders, scheduled to be tackled on later;
Scheduled meetings, with event details and shortcut buttons to join them;
Shortcut actions to create new conversations, join open ones, or quickly check your media devices.
Créer une discussion
You can create a private (one-to-one) chat by searching for the name of a user, a group or a team and clicking it. For a single user, a conversation is immediately created and you can start your chat. For a group or circle you get to pick a name and settings before you create the conversation and add the participants.

Si vous souhaitez créer une discussion de groupe, cliquez sur le bouton situé à côté du champ de recherche et du bouton des filtres , puis sur Créer une nouvelle conversation

Vous pouvez ensuite choisir un nom pour la conversation, mettre une description et configurer un avatar (avec une photo ou un emoji téléchargé), et choisir si la conversation doit être ouverte aux utilisateurs externes, et si d’autres utilisateurs sur le serveur peuvent voir et rejoindre la conversation.

Dans la deuxième étape, vous aurez à ajouter les participants et finaliser la création de la discussion.

Après confirmation, vous serez redirigé vers la nouvelle conversation et vous pourrez directement commencer à communiquer.

Voir toutes les conversations publiques
You can view all the conversations that you can join by clicking the button next to the search field, then clicking Join open conversations.

Filtrez vos conversations
You can filter your conversations using the filter button next to the search field. There are several options for filtering: 1. Unread mentions: view unread private conversations, or group conversations, where you have been mentioned. 2. Unread messages: view unread messages in all conversations you are a part of. 2. Event conversations: view all conversations, created for upcoming or past events.

Vous pouvez ensuite effacer le filtre à partir du menu des filtres.

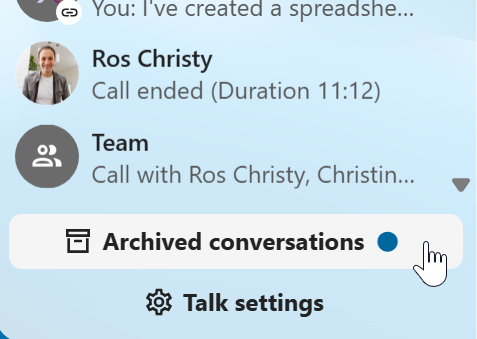
Archive conversations
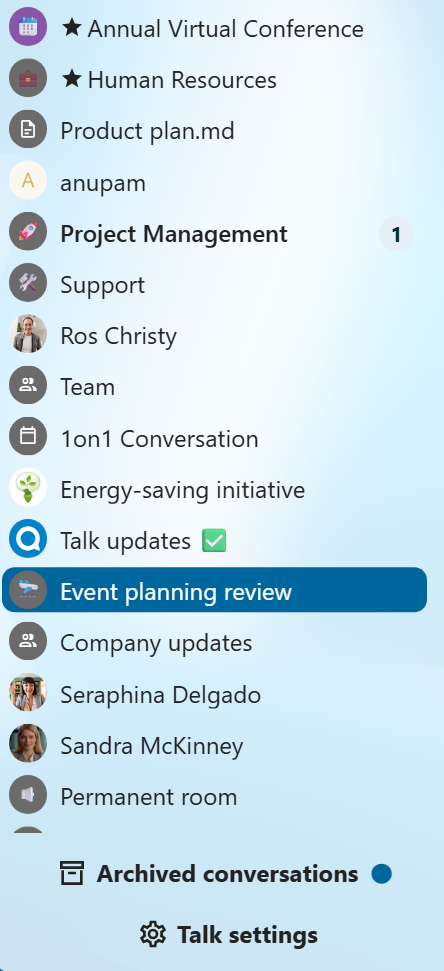
You can archive conversations that you no longer need to see in your main conversation list. When a conversation is archived, it will be moved to the Archived conversations section.
An archived conversation will not appear in your main conversation list, but it will still align with notification level set in its settings.
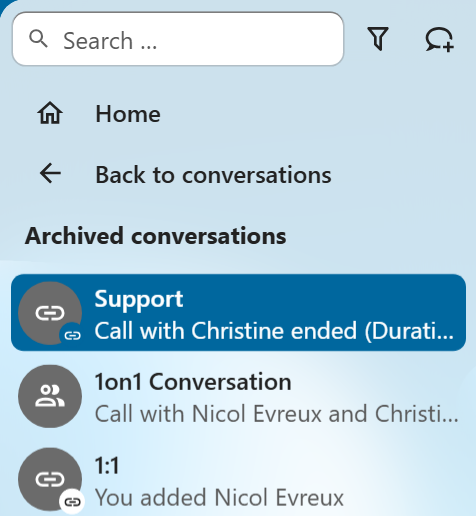
The list is accessible from the button at the bottom of the navigation bar.
Partager des fichiers dans une discussion
Vous pouvez partager des fichiers dans une discussion de 3 manières différentes,
Premièrement, vous pouvez simplement les glisser-déposer dans la discussion.

Deuxièmement, vous pouvez sélectionner un fichier depuis Nextcloud Files ou un gestionnaire de fichier en choisissant le petit trombone et en sélectionnant d’où vous désirez sélectionner le fichier.


Vous pouvez ajouter autant de fichiers que souhaité, puis décider de les partager. Vous pouvez ajouter un texte descriptif aux fichiers partagés pour leur donner un contexte.

All users will be able to click the files to view, edit or download them, regardless of whether they have a Nextcloud account. Users with an account will have the file automatically shared with them while external guest users will get them shared as a public link.

Insérer un emoji
Vous pouvez ajouter un emoji en utilisant le sélectionneur à la gauche du champs de saisie de texte.

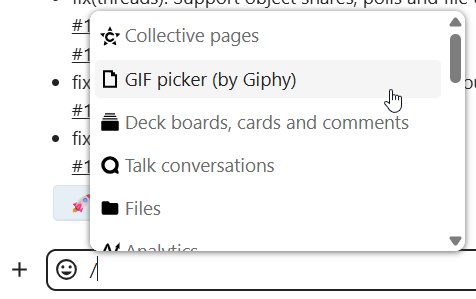
Smart Picker
Smart picker shortcut makes it easier to insert links, files, or other content into your conversations. Just choose the type of content you want to insert (files, Talk conversations, Deck cards, GIFs, etc.) You can also type / in the chat input to open the selector.
Editer les messages
Vous pouvez éditer les messages et les descriptions de fichiers jusqu’à 6 heures après leur envoi.

Utiliser le format Markdown
Vous pouvez agrémenter vos messages à l’aide de la syntaxe Markdown. Voici la liste des usages :
Titres et sous-titres
# Heading 1
## Heading 2
### Heading 3
#### Heading 4
##### Heading 5
###### Heading 6

Heading
===
Normal text
***
Normal text
Mise en forme
**bold text** __bold text__
*italicized text* _italicized text_
`inline code` ``inline code``
```
.code-block {
  display: pre;
}
```
Listes
1. Ordered list
2. Ordered list

* Unordered list
- Unordered list
+ Unordered list
Citations
> blockquote
second line of blockquote
Listes de tâches
- [ ] task to be done
- [x] completed task
Tableaux
Column A | Column B
-- | --
Data A | Data B
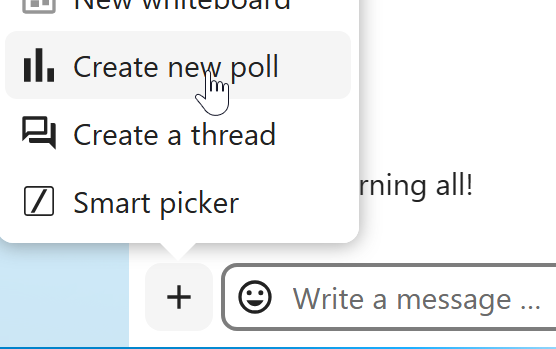
Polls in chat
You can create a poll in groups chats from the new message additional actions.
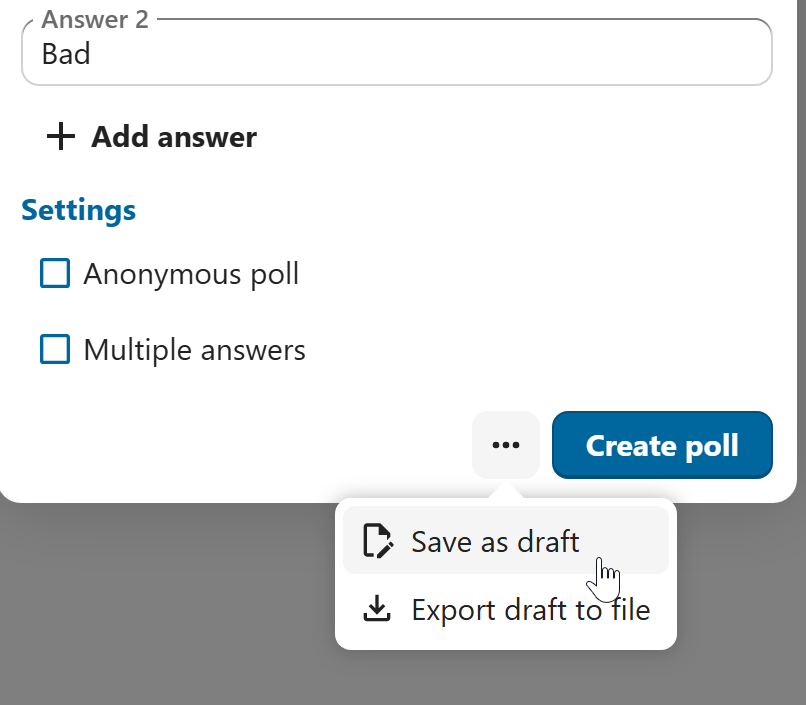
A poll has two settings:
Anonymous polls: Participants cannot see who voted for which option.
Allow multiple choices: Participants can select more than one option.
You can also import polls for auto-fill and export polls as JSON files to save it locally.
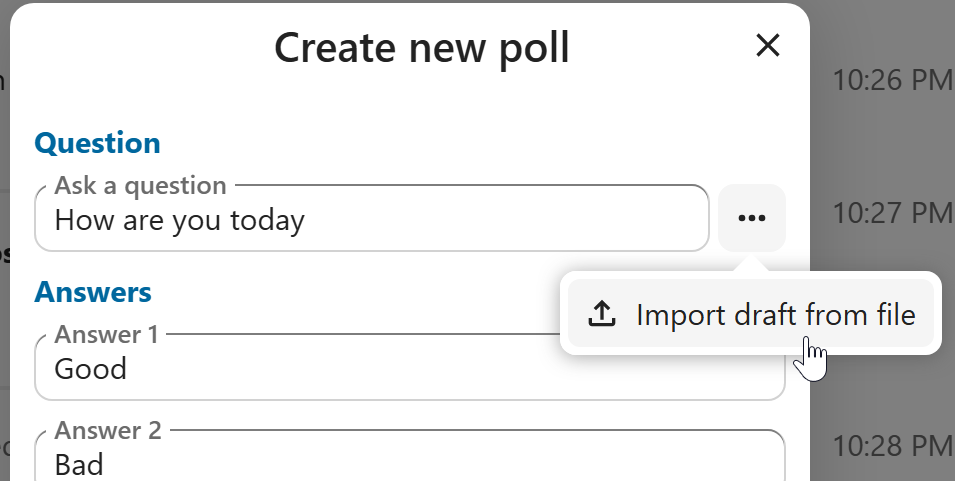
Closing poll is possible from the poll dialog.
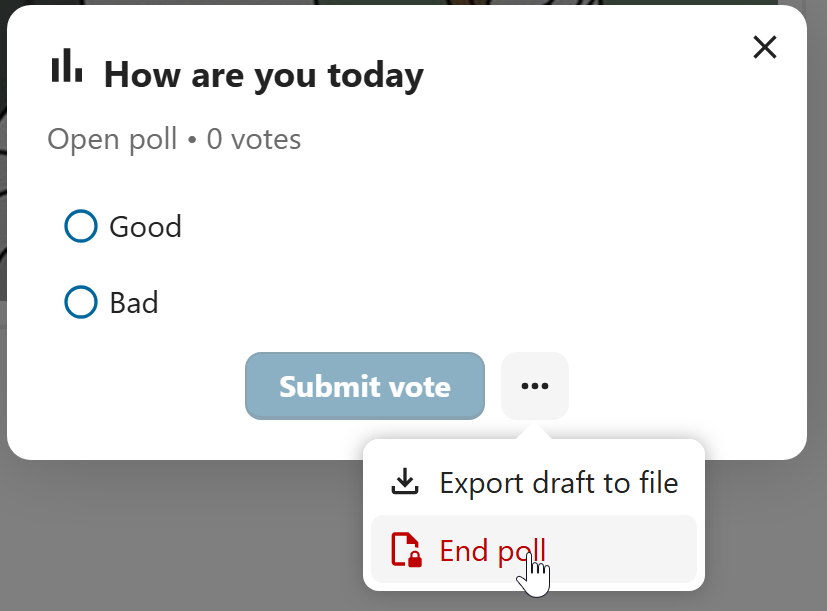
As a moderator, you can create the poll directly or you can save it as a draft to edit it later.
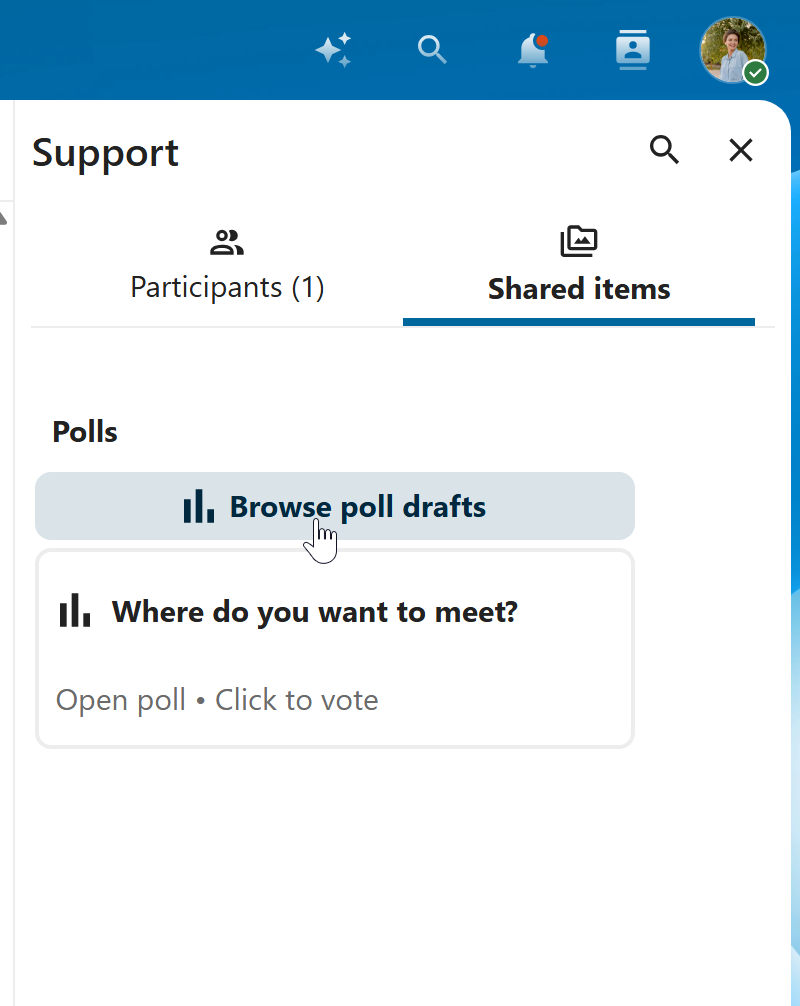
You can find poll drafts in Shared items tab or next to the poll title input field.
Définir un rappel sur les messages
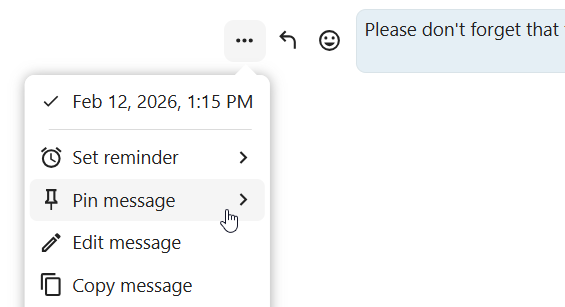
Vous pouvez définir des rappels sur des messages spécifiques. Si un message important est envoyé et que vous souhaitez en être notifié plus tard, déployez le menu et cliquez sur l’icône associée.

Dans le sous-menu, vous pouvez choisir une date ou heure appropriée pour recevoir une notification.

Répondre aux messages et plus encore
Vous pouvez répondre à un message via la flèche qui apparaît au survol d’un message.

In the ... menu you can also choose to reply privately. This will open a one-to-one chat.

Ici vous pouvez également créer un lien direct vers le message ou le marquer comme non-lu, ce qui vous y ramènera la prochaine fois que vous entrerez dans la discussion. Quand c’est un fichier, vous pouvez visualiser le fichier dans Fichiers.
Messages silencieux
Si vous ne souhaitez pas déranger qui que ce soit au milieu de la nuit, un mode silencieux est disponible pour discuter. Lorsqu’il est activé, les autres participants ne reçoivent pas de notifications de vos messages.

Scheduling messages
If you want to send a message not right now, but at a specific time, you can schedule it. Just select the desired date and time in the quick actions next to the input field.
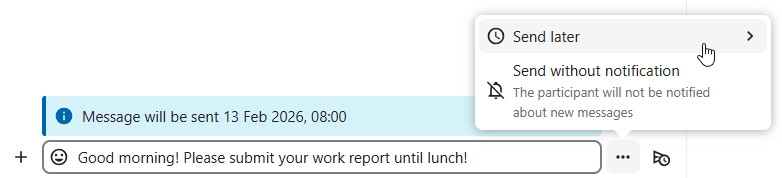
You can find all your scheduled messages by clicking on the clock icon next to the input field. There you can edit, reschedule or delete currently prepared messages.

Pinning messages
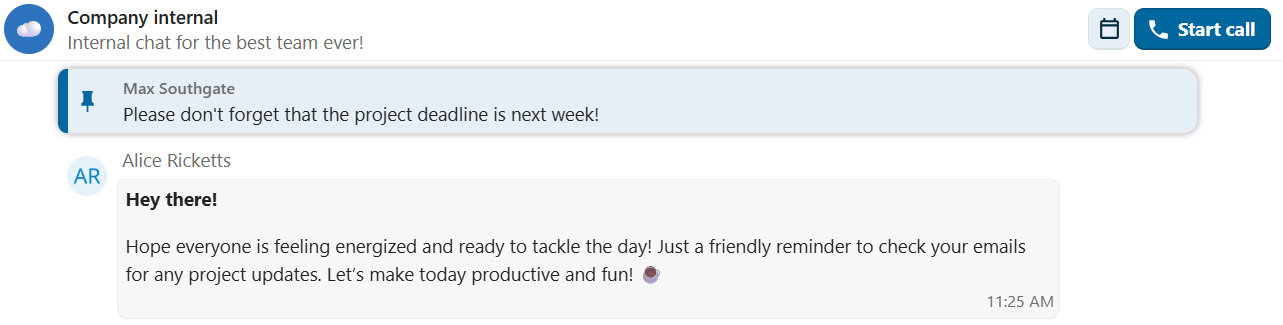
A moderator can pin important messages in a conversation, for certain period of time or until it’s no longer relevant.
Pinned messages are highlighted and accessible above the chat or in the Shared items tab of the content sidebar. If you no longer need a pinned message, you can unpin it for everyone or only yourself from quick actions.
Gérer une conversation
Vous êtes toujours modérateur de vos nouvelles discussions. Vous pouvez promouvoir d’autres participants comme modérateur depuis la liste des participants en utilisant le menu ... à la droite de leur nom d’utilisateur, leur donner des permissions personnalisées ou les retirer de la discussion.
La modification des autorisations d’un utilisateur qui a rejoint une conversation publique l’ajoutera également de manière permanente à la conversation.

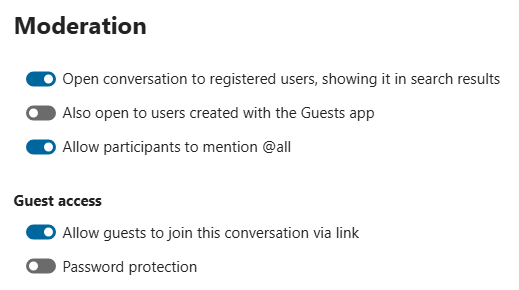
Les modérateurs peuvent configurer la conversation. Sélectionnez Paramètres de conversation dans le menu ... de la conversation en haut pour accéder aux paramètres.

Ici vous pouvez configurer la description, l’accès des invités, si la conversation est visible aux autres du serveur, etc.

Ban participants
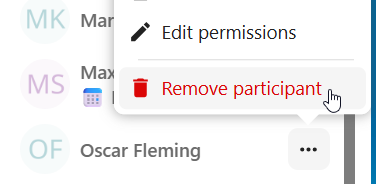
To help keep discussions safe and under control, moderators can ban participants from conversations. It could be internal users or guests (in this case their IP-addresse will additionally be banned).
In the participants list, select the user or guest you, and click Remove participant.
There, toggle checkbox Also ban from this conversation and provide a reason for the ban. The banned user will be removed and prevented from rejoining.
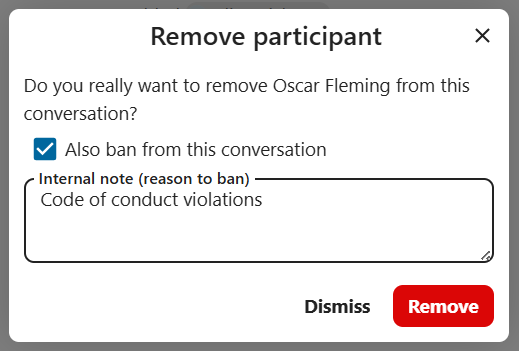
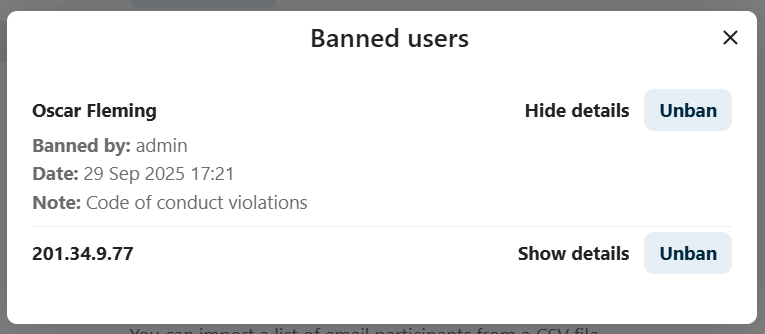
You can later find the list of banned users in the Moderation section of conversation settings.
Here, you can see the reason for the ban and revert it if needed.
Expiration des messages
Un modérateur peut configurer l’expiration des messages dans les Paramètres de la conversation, au sein de la section Modération. Une fois la durée d’expiration atteinte, le message est automatiquement supprimé de la conversation. Les durées disponibles sont : 1 heure, 8 heures, 1 jour, 1 semaine, 4 semaines ou jamais (valeur par défaut).

Démarrer un appel
Lorsque vous êtes en conversation, vous pouvez démarrer un appel à tout moment grâce au bouton Démarrer l'appel. Les autres participants seront avertis et pourront rejoindre l’appel.

Si quelqu’un d’autre a déjà démarré un appel, le bouton se transformera en un bouton vert Rejoindre l'appel.

During a call, you can mute your microphone and disable your video with the buttons on the right side of the top bar, or using the shortcuts M to mute audio and V to disable video. You can also use the space bar for push-to-talk: holding space temporarily unmutes you while muted, or temporarily mutes you while unmuted.
Vous pouvez cacher votre propre vidéo (utile pendant un partage d’écran) avec la petite flèche juste au dessus du flux vidéo. Vous pouvez à nouveau la rétablir avec la petite flèche.
Vous pouvez accéder à vos paramètres et choisir une autre webcam, un autre microphone et d’autres paramètres depuis le menu … dans la barre supérieure.

Dans les Paramètres médias, vous pouvez également changer l’arrière-plan de votre capture vidéo.

All these settings are also available as direct actions in the bottom bar.

Vous pouvez modifier d’autres paramètres dans la boîte de dialogue Paramètres de conversation.

Démarrer un partage d’écran
Vous pouvez cliquer sur l’icône en forme d’écran pour partager votre écran. Selon votre navigateur, vous aurez la possibilité de partager un moniteur, une fenêtre d’application ou un onglet de navigateur. Si la vidéo de votre caméra est également active, les autres participants la verront dans un petit encart à côté du partage d’écran.

You can zoom in and out of the shared screen with mouse wheel, double click or touchpad gestures.
Changer la vue pendant un appel
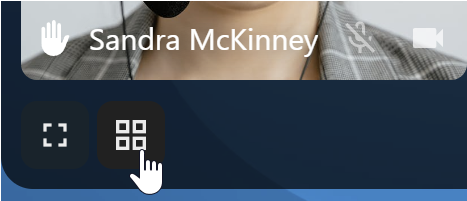
You can switch the view in a call in the bottom bar between promoted view and grid view.
The grid view will show as many people as the screen can fit, allowing navigation with buttons on the left and right.

La vue mise en avant zoome sur la personne qui parle et montre les autres sur un rang en dessous. Si tout le monde ne peut pas tenir dans l’écran des boutons apparaîtront à droite et à gauche pour vous permettre de naviguer.

Download call participants list
You can download the list of participants in a call from the ... menu in the top bar. This will download a CSV file with the names and email addresses of all participants in the call.
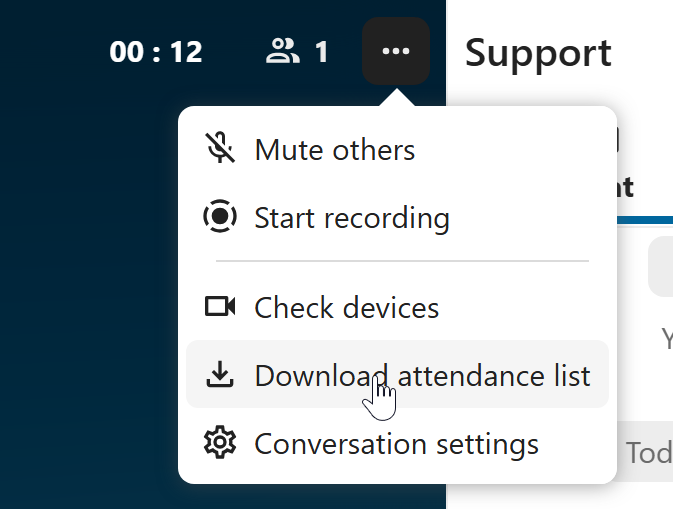
The table in the CSV file contains the following columns:
Name: The name of the participant.
Email: The email address of the participant.
Type: Indicates whether the participant is a registered user or a guest.
Identifier: Unique identifier for the participant.
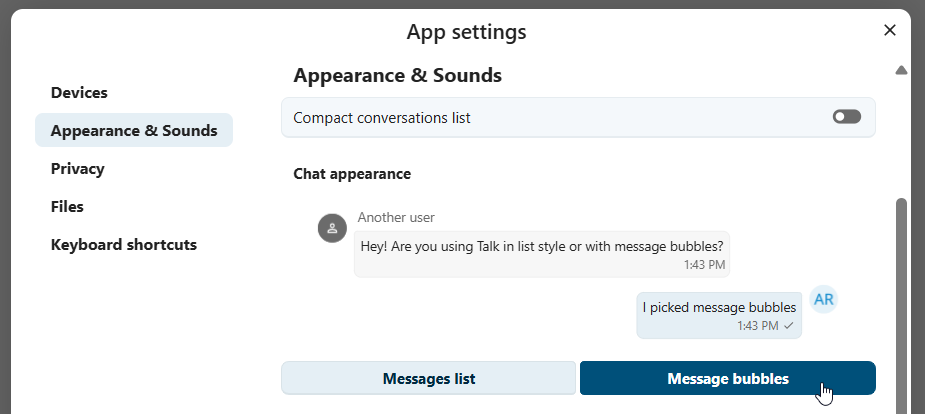
Appearance
Compact view of conversations list
Compact view allows to hide last message preview in the conversation list, providing a more focused interface.
Chat messages
Chat appearance settings allow you to customize the look of your conversation chats. You can choose between classic list or message bubbles, with your own messages on the side.
You can change both settings from the Talk settings dialog in Appearance section.
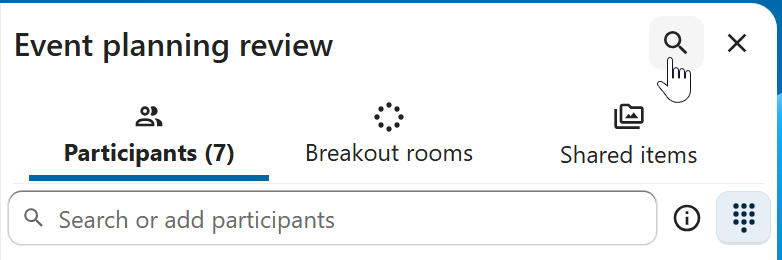
Messages search in a conversation
In addition to global unified search, you can search for messages within a specific conversation. In the content sidebar of a conversation, click the search icon to open the search tab.
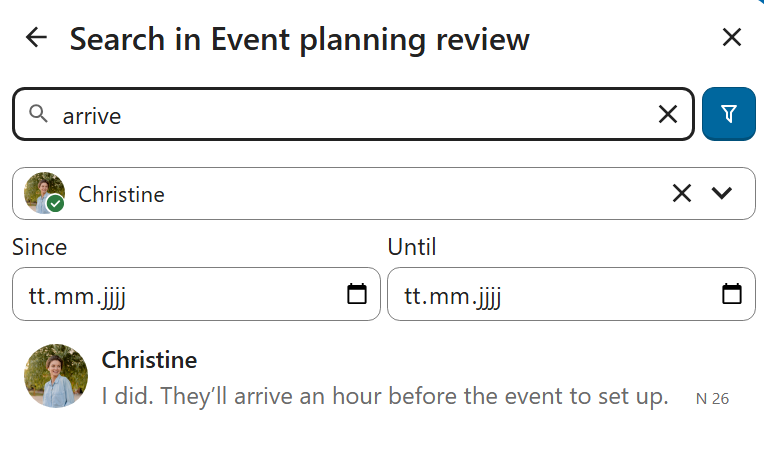
You can narrow down your search by using filters such as date range, and sender.
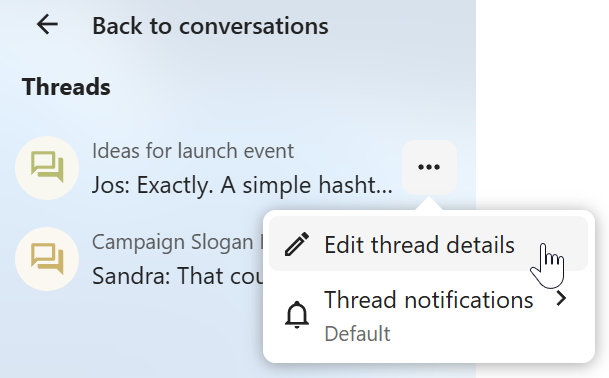
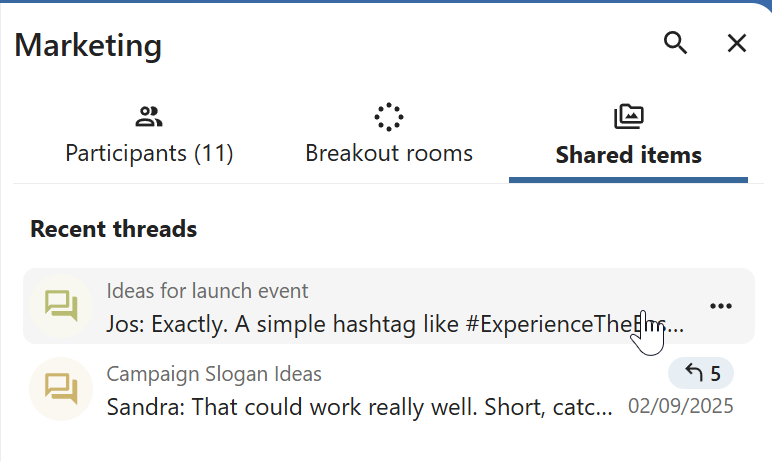
Threaded messages
You can create threads in conversations to keep discussions organized. The thread creation option is available in the new message additional actions.
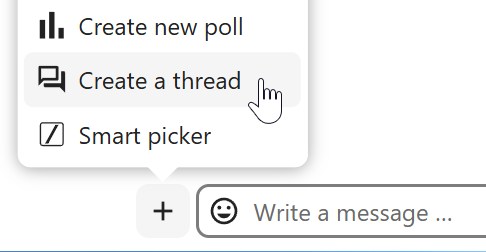
Then, you can add a title and description for the thread and start the discussion.

You can view all replies in a thread either from the replies button on the message or from Shared items tab in the content sidebar.
You can subscribe to a thread to receive notifications about new replies. It is possible to subscribe from the thread itself or from the sidebar.
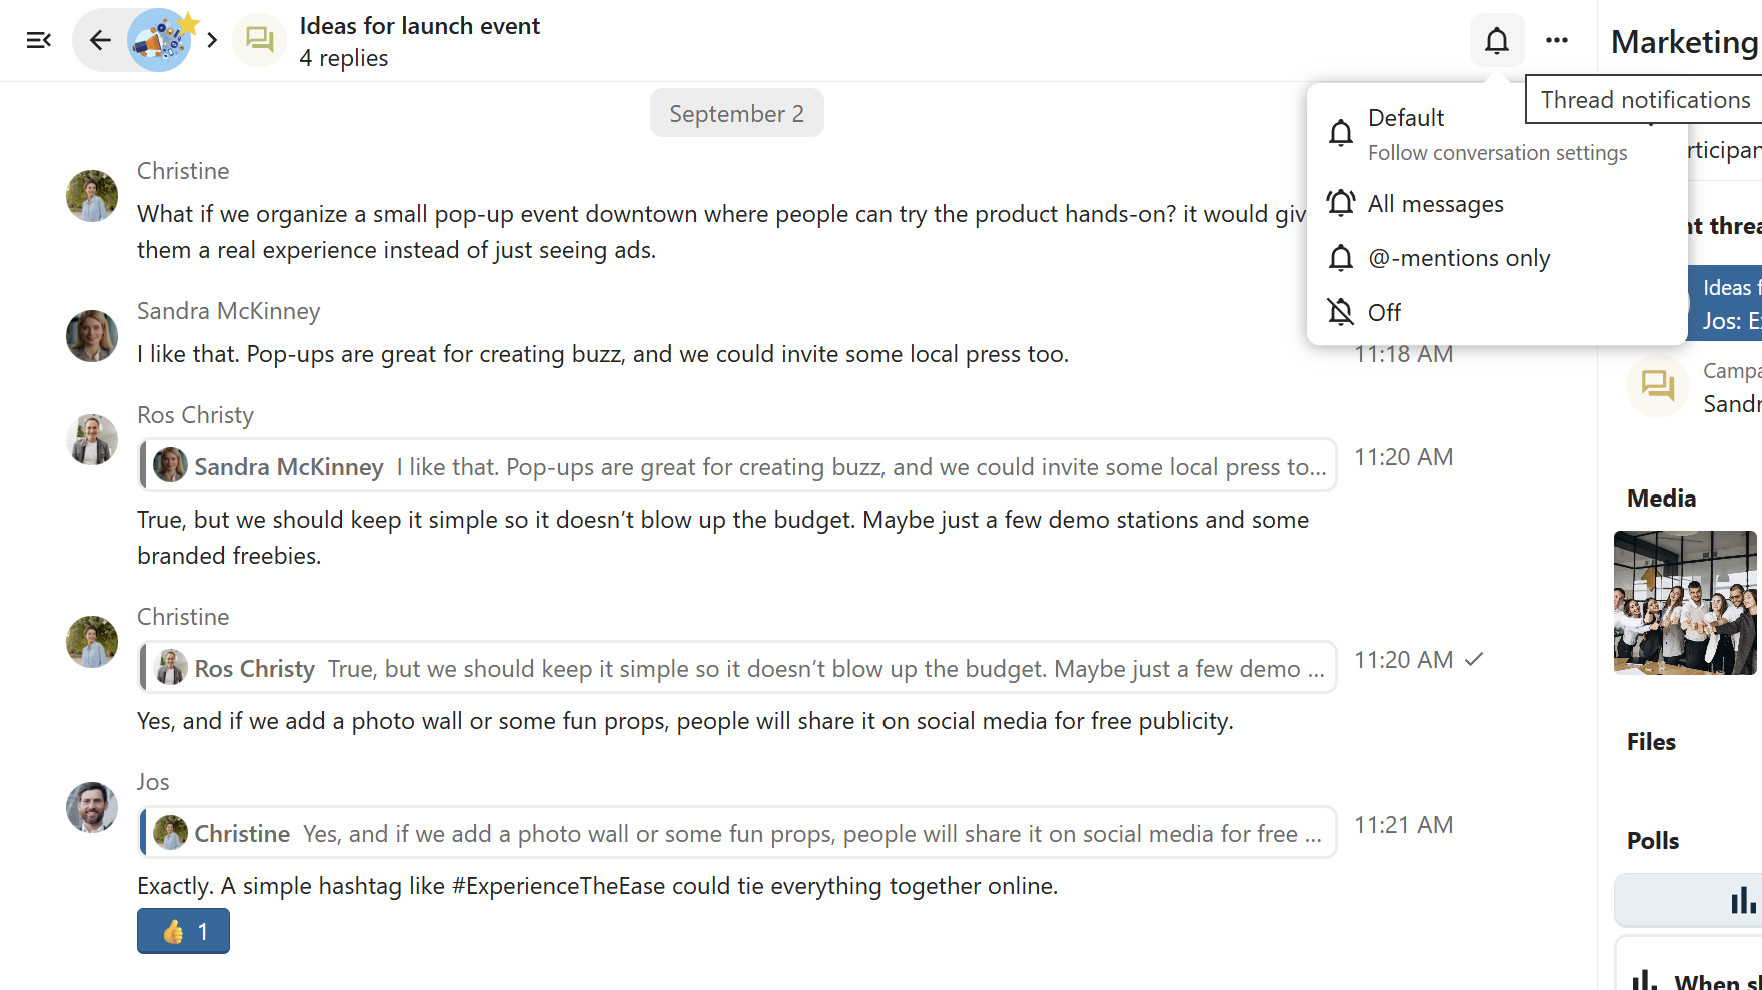
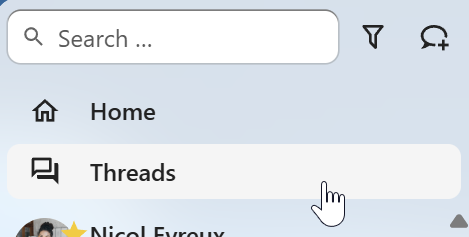
Subscribed threads are easily accessible from the navigation bar in Threads navigation.
Editing thread title is possible from the thread itself or from the sidebars.