Synchronisatie met Thunderbird
Thunderbird is een volwassen mailclient met vele functies die kan worden omgezet in een volwaardige Personal Information Manager (PIM). Sinds versie 102 ondersteunt het synchronisatie van adresboeken via CardDAV en automatische ontdekking van agenda’s en adresboeken die beschikbaar zijn op de server.
Aanbevolen methode
Vanaf Thunderbird 102 worden de CardDAC- & CalDAV-protocollen volledig ondersteund.
Contacten
Klik in het adresboekscherm op de pijl omlaag bij Nieuw Adresboek en kies Voeg CardDAV Adresboek Toe.
Voer in het volgende venster de Gebruikersnaam en Locatie (Server URL) in.
Het volgende venster zal om de gebruikersnaam en het wachtwoord voor dit account vragen.
Het voorgaande venster zal worden ververst, en vragen welk adresboek moet worden gesynchroniseerd.
Kies en klik dan Doorgaan.
Als later een nieuw adresboek moet worden toegevoegd, kunnen deze stappen herhaald worden. Alleen niet-gesynchroniseerde adresboeken zullen worden voorgesteld.
Notitie
Als jouw account tweefactorauthenticatie gebruikt, heb je een specifiek app-wachtwoord nodig voor inloggen in plaats van je reguliere wachtwoord.
Agenda’s
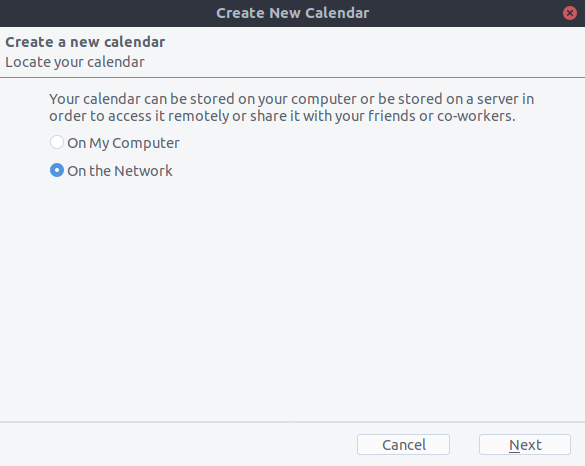
Ga naar het Agenda-scherm in Thunderbird en klik op de Nieuwe agenda… knop linksonder op het paneel.
Kies Op het netwerk:
Voer Gebruikersnaam en Locatie (Server URL) in en klik daarna op Zoek agenda’s.
Kies welke agenda’s moeten worden toegevoegd en klik Abonneer
Hetzelfde hier: als later meer agenda’s moeten worden toegevoegd, herhaal dan de procedure.
Alternatief: Gebruik van de Cardbook add-on (alleen voor contacten)
CardBook is een geavanceerd alternatief voor het adresboek van Thunderbird, incl. ondersteuning voor CardDAV.
Klik op het Carbook-icoon rechtsboven in Thunderbird:

In Cardbook:
Ga naar Adresboek > Nieuw adresbook Op Afstand > Volgende
Kies CardDAV, vul het adres van de Nexctloud server in, en gebruikersnaam en wachtwoord

Klik op “Valideer”, klik Volgende, kies de naam van het adresboek en klik weer op Volgende:

Als dit gedaan is, zal Cardbook de adresboeken synchroniseren. Een synchronisatie kan altijd handmatig worden gestart door te klikken op “Synchroniseer”, linksboven in Cardbook:
