Synchronisierung mit macOS
Richten Sie Ihre Konten ein
In den folgenden Schritten fügen Sie CalDAV (Kalender) und CardDAV (Kontakte) zu Ihren in macOS integrierten Kalender- und Kontakte-Apps hinzu. Zum Zeitpunkt der Erstellung dieser Anleitung ist macOS in der Version 26.3.1 verfügbar.
Click on the Apple menu and select System Settings… from the dropdown menu.

Gehen Sie zu Internetkonten:

Klicken Sie auf das kleine blaue Symbol aus einer Liste auswählen.

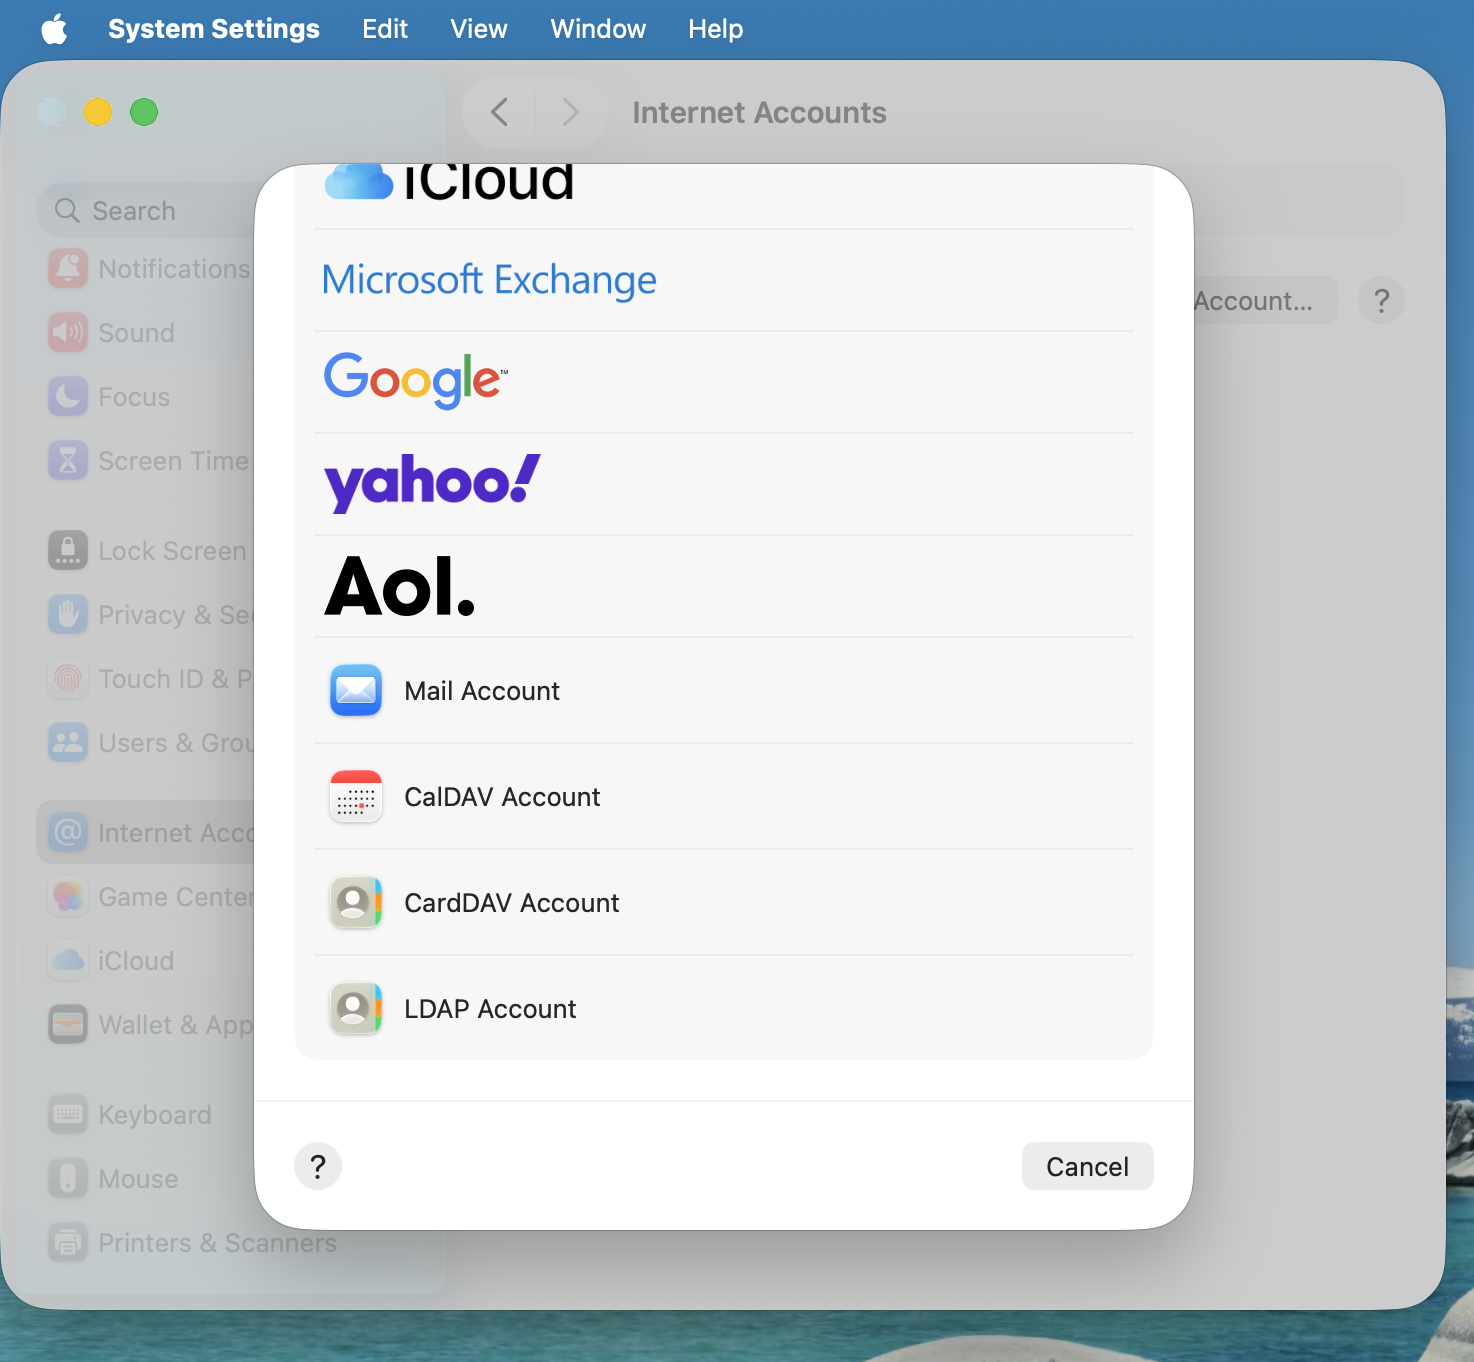
Klicken Sie auf anderes Konto hinzufügen…

Wählen Sie CalDAV-Konto für den Kalender und CardDAV-Konto für die Kontakte.
Bemerkung
Kalender und Kontakte können nicht gleichzeitig eingerichtet werden. Sie müssen separat eingerichtet werden.
Wählen Sie Manuell als Kontotyp aus und geben Sie Ihre entsprechenden Anmeldedaten ein:
Benutzername: Benutzername oder E-Mail-Adresse für Ihre Nextcloud
Passwort: Entweder Ihr Passwort oder, falls Sie 2FA verwenden, Ihr generiertes App-Passwort/Token (Learn more).
Serveradresse: URL Ihres Nextcloud-Servers (z. B.
https://nextcloud.deinedomain.com)
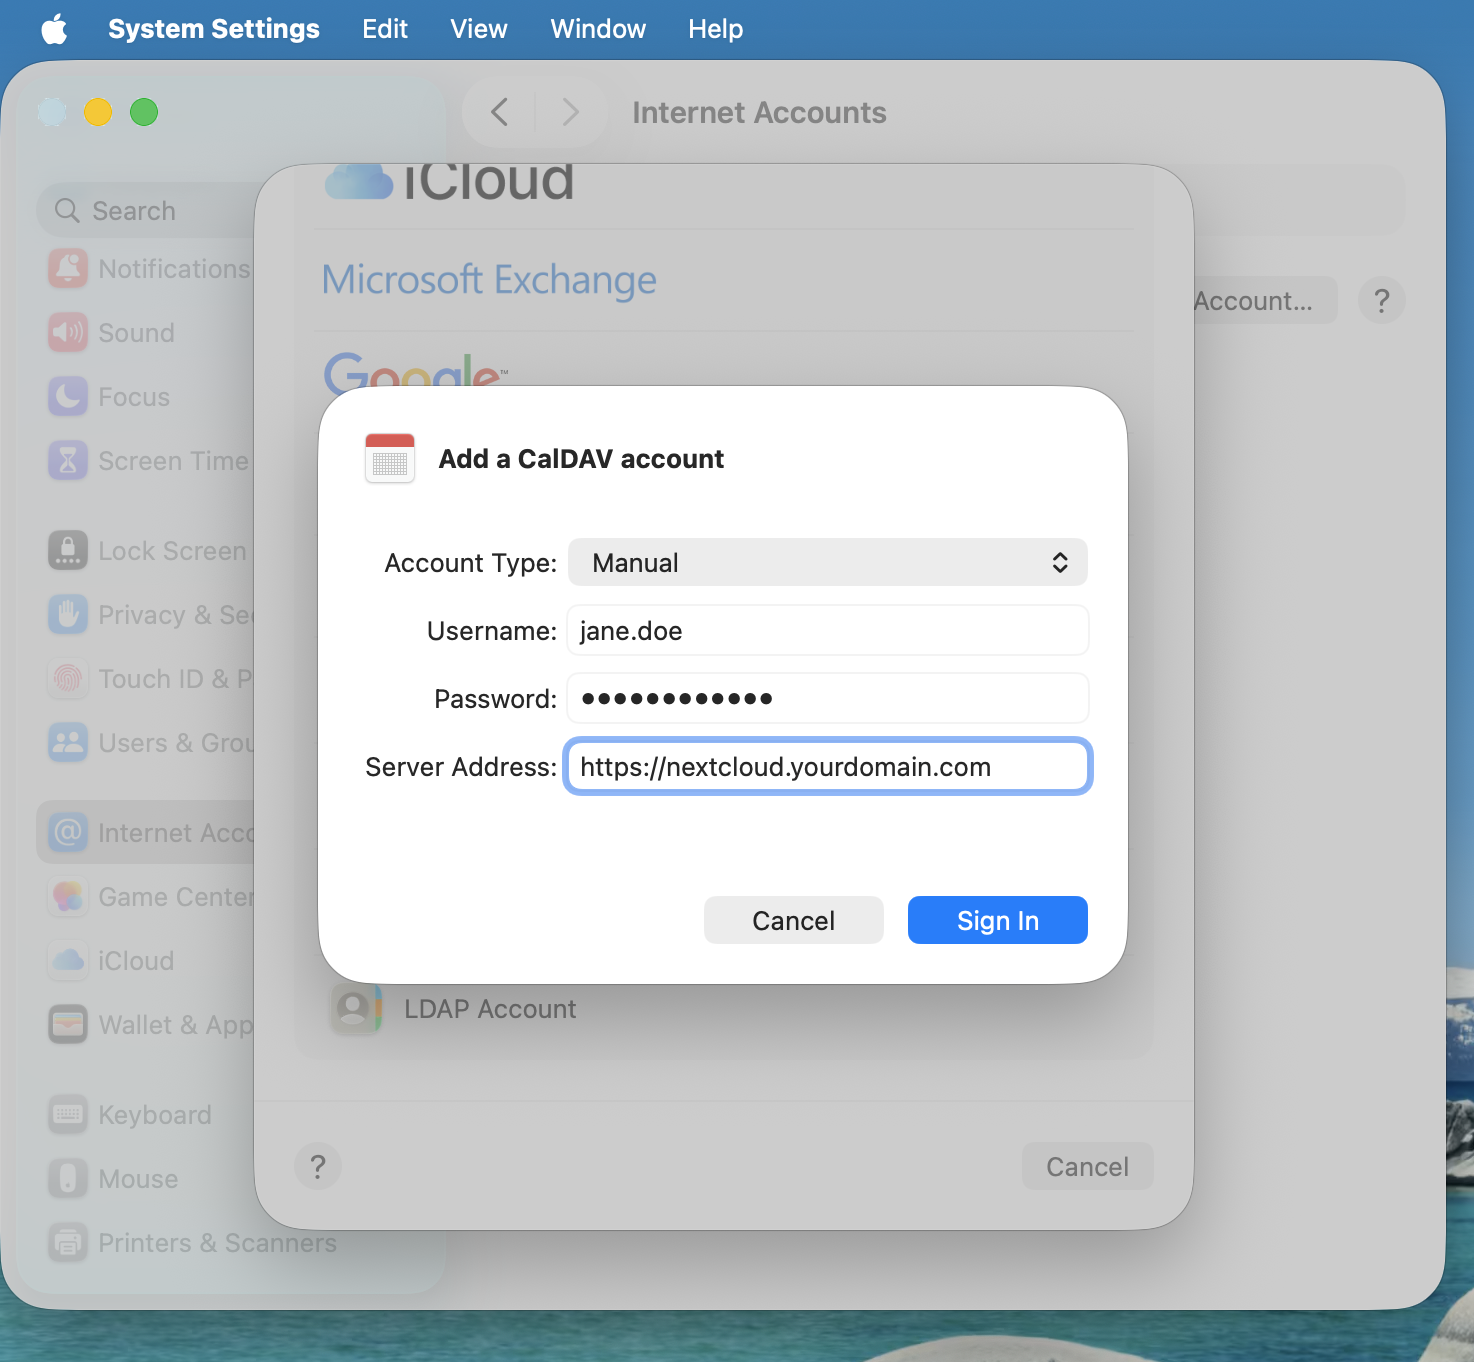
Klicken Sie auf Anmelden.
Fehlerbehebung
macOS unterstützt nicht die Synchronisierung von CalDAV / CardDAV über unverschlüsselte
http://Verbindungen. Stellen Sie sicher, dass Siehttps://auf Server- und Clientseite aktiviert und konfiguriert haben.Selbstsignierte Zertifikate müssen ordnungsgemäß in der macOS-Keychain eingerichtet sein.