Funzionalità avanzate di Talk
Nextcloud Talk ha una serie di funzionalità avanzate che gli utenti potrebbero trovare utili.
Notifications and privacy
By default, Nextcloud Talk will notify you about:
New messages in private conversations;
Replies to messages you sent;
Messages mentioning you or group/team you are member of;
Started calls in conversations you are part of.
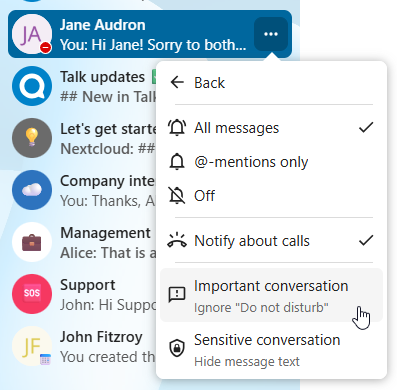
You can change this behavior in the conversation settings. Additionally, you can configure:
Important conversations: you will be always notificed about new messages, even if you are in «Do Not Disturb» mode;
Sensitive conversations: content of messages will not be shown in the conversation list and obscured from notifications.
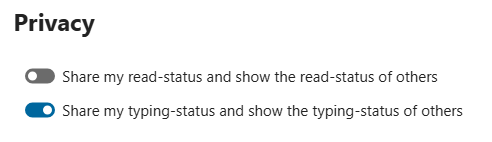
To have more control over your privacy, you can also configure the visibility of your typing and read indicators in Talk settings:
Matterbridge
L’integrazione di Matterbridge in Nextcloud Talk consente di creare «ponti» tra le conversazioni di Talk e le conversazioni su altri servizi di chat come MS Teams, Discord, Matrix e altri. Puoi trovare un elenco dei protocolli supportati sulla pagina github di Matterbridge.
Un moderatore può aggiungere una connessione Matterbridge nelle impostazioni della conversazione chat.
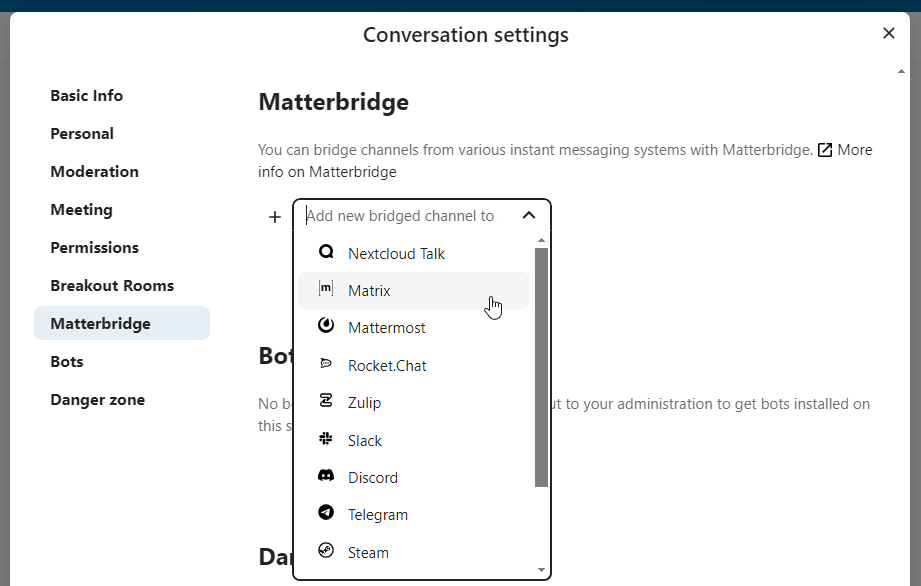
Ciascuno dei bridge ha le sue esigenze in termini di configurazione. Le informazioni per la maggior parte sono disponibili sul wiki di Matterbridge e sono accessibili tramite il menu altre informazioni nel menu .... Puoi anche accedere direttamente al wiki.
Ingresso
La funzione sala di attesa, consente di mostrare agli ospiti una schermata di attesa fino all’inizio della chiamata. È ideale per i webinar con partecipanti esterni, ad esempio.
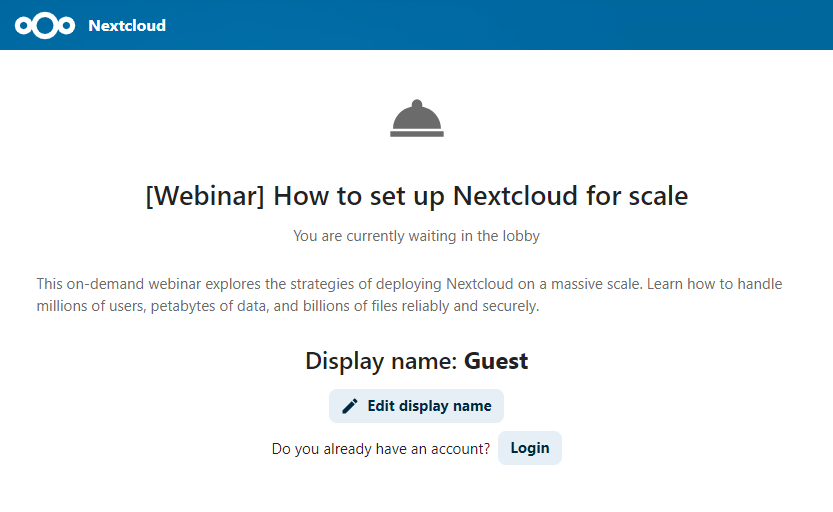
Puoi scegliere di consentire ai partecipanti di unirsi alla chiamata in un momento specifico oppure di chiudere manualmente la sala d’attesa.
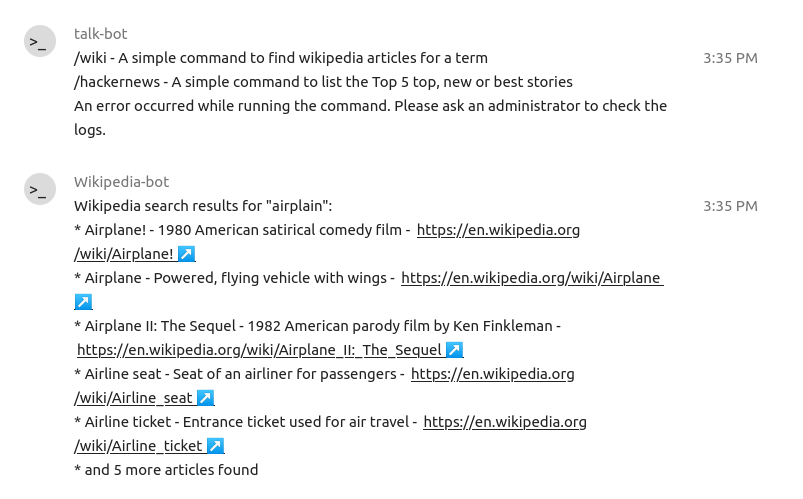
Comandi
Nextcloud consente agli utenti di eseguire azioni tramite comandi. Un comando in genere appare come:
/wiki airplanes
Gli amministratori possono configurare, abilitare e disabilitare i comandi. Gli utenti possono usare il comando help per scoprire quali comandi sono disponibili.
/help
Trova maggiori informazioni nella documentazione amministrativa per Talk.
Talk da file
Nell’app File, puoi chattare sui file nella barra laterale e persino fare una chiamata mentre li modifichi. Devi prima unirti alla chat.
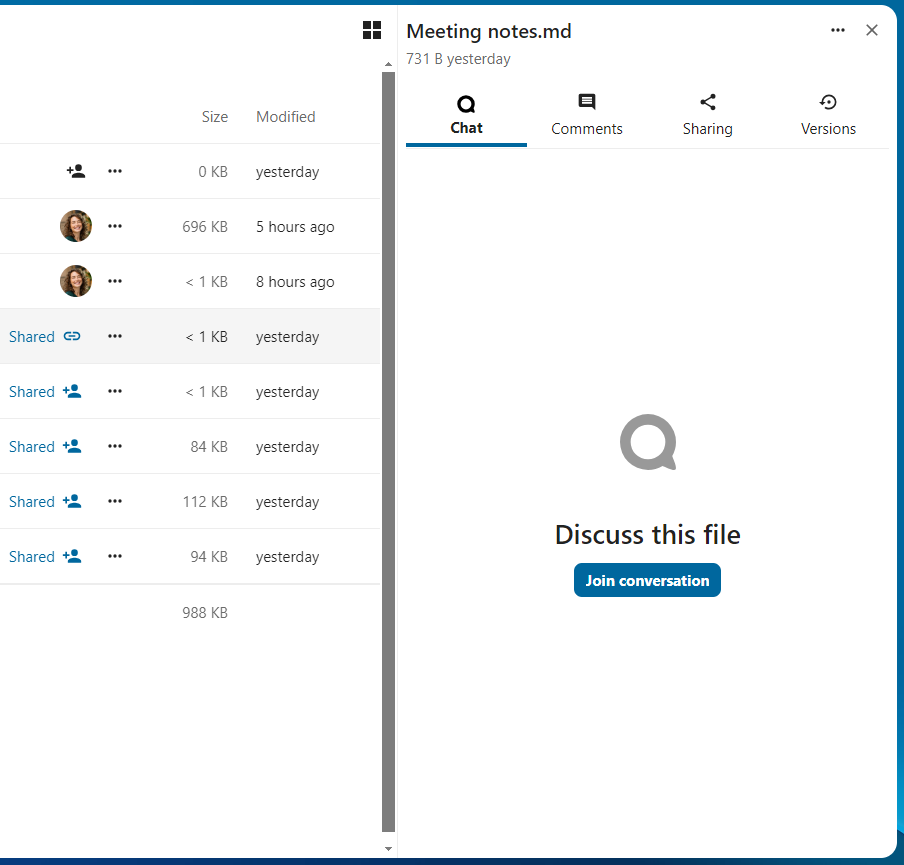
Puoi quindi chattare o effettuare una chiamata con gli altri partecipanti, anche mentre inizi a modificare il file.
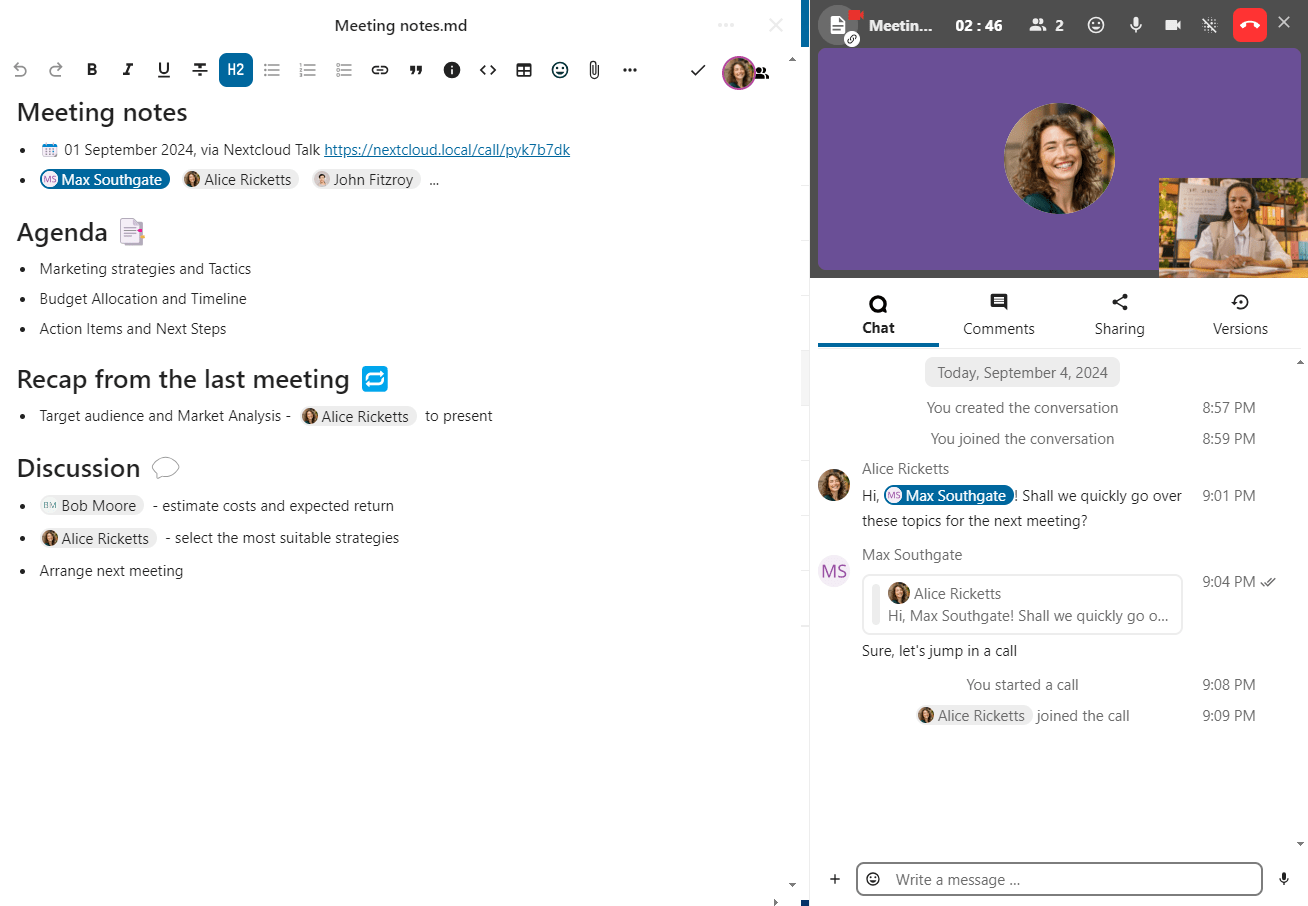
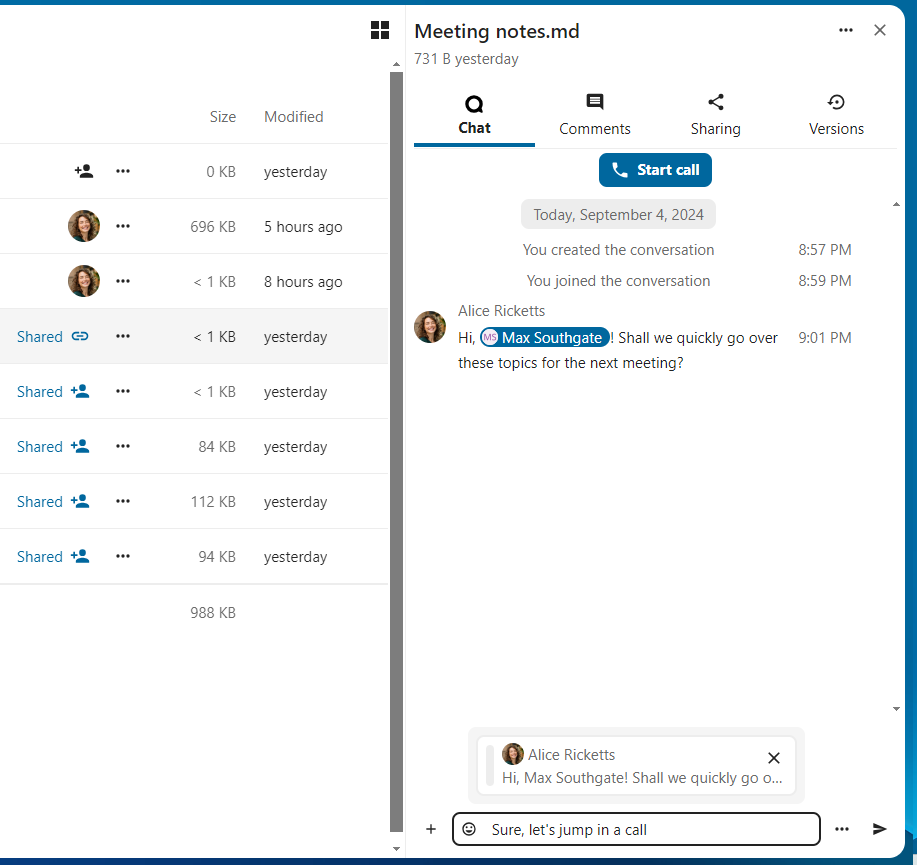
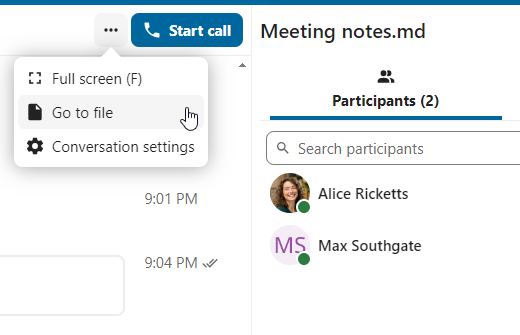
In Talk, verrà creata una conversazione per il file. Puoi chattare da lì, o tornare al file usando il menu ... in alto a destra.
Crea attività dalla chat o condividi attività nella chat
Se Deck è installato, puoi utilizzare il menu ... di un messaggio di chat e trasformare il messaggio in un’attività Deck.


Da Deck puoi condividere le attività nelle conversazioni in chat.


Meetings and events
If calendar events have a Talk conversation set as event location, you will see an information about upcoming events inside of this conversation. That way you can stay informed about scheduled meetings or activities directly within your chat. If Calendar app is enabled, you can click on an event to view details.

It is possible to schedule a meeting directly from a conversation. In the dialog, you can set meeting details such as title, date, time and description. You can also choose to invite all participants including email guests, or select specific ones.

Schedule from Calendar
When creating a new event in Calendar, you can set a Talk conversation as event location. This will create a new conversation if one does not exist yet.
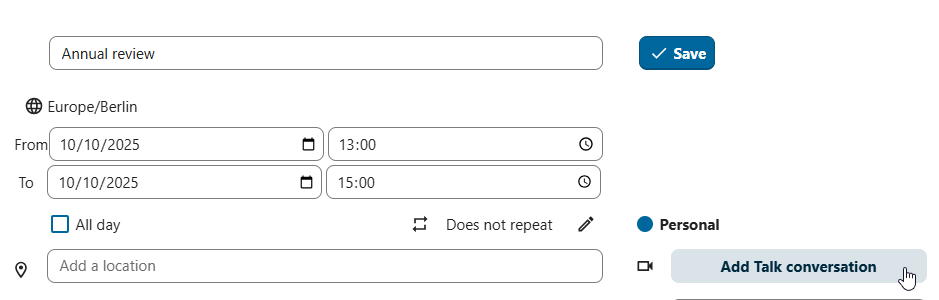
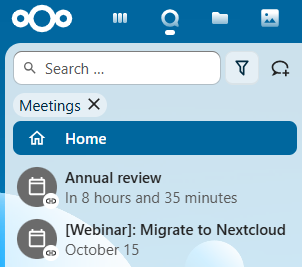
When the event is created, you will see a link to the conversation in the event details. Conversation will also show up in the list of conversations (discoverable by Events filter).
Like instant meetings, event conversations will be automatically deleted after configured period of inactivity (by default 28 days).
Stanze di breakout
Le stanze di breakout consentono di dividere una chiamata Nextcloud Talk in gruppi più piccoli per discussioni più mirate. Il moderatore della chiamata può creare più stanze di breakout e assegnare partecipanti a ciascuna stanza.
Nota
Al momento le stanze separate non sono disponibili nelle conversazioni a cui possono partecipare gli ospiti (conversazioni pubbliche).
Configurare le stanze breakout
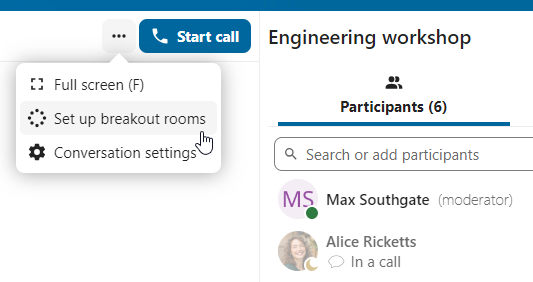
Per creare stanze breakout, devi essere un moderatore in una conversazione di gruppo. Fai clic sul menu della barra in alto e fai clic su «Imposta stanze di breakout».
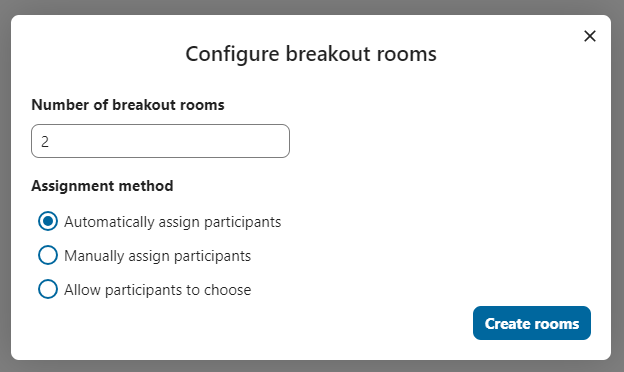
Si aprirà una finestra di dialogo in cui puoi specificare il numero di stanze che vuoi creare e il metodo di assegnazione dei partecipanti. Qui ti verranno presentate 3 opzioni:
Assegna automaticamente i partecipanti: Talk assegnerà automaticamente i partecipanti alle stanze.
Assegnazione manuale dei partecipanti: visualizzerai un editor dei partecipanti in cui potrai assegnare i partecipanti alle stanze.
Consenti ai partecipanti di scegliere: i partecipanti potranno unirsi autonomamente alle stanze di breakout.
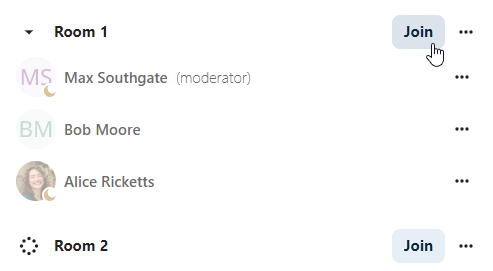
Gestire le stanze di breakout
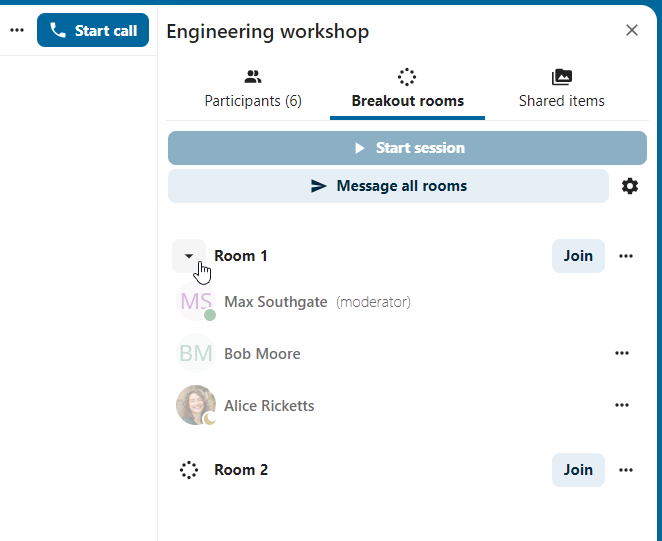
Una volta create le stanze di breakout, potrai vederle nella barra laterale.
Dall’intestazione della barra laterale
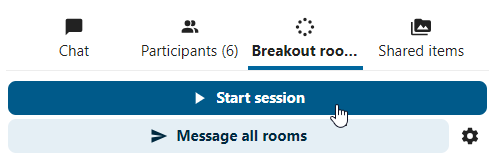
Avvia e arresta le stanze di breakout: questa azione sposterà tutti gli utenti della conversazione principale nelle rispettive stanze di breakout.
Trasmetti un messaggio a tutte le stanze: invierà un messaggio a tutte le stanze contemporaneamente.
Apporta modifiche ai partecipanti assegnati: questo aprirà l’editor dei partecipanti dove puoi cambiare quali partecipanti sono assegnati a quale stanza di breakout. Da questa finestra di dialogo è anche possibile eliminare le stanze di breakout.
Dall’elemento stanze di breakout nella barra laterale puoi anche unirti a una particolare stanza di breakout o inviare un messaggio a una stanza specifica.
Registrazione delle chiamate
La funzione di registrazione offre agli utenti la possibilità di:
Avvia e interrompi le registrazioni durante una chiamata.
Registra il flusso video e audio dell’oratore e condividi lo schermo.
Accedi, condividi e scarica i file registrati per consultarli o distribuirli in futuro.
Per abilitare questa funzione è necessario che il server di registrazione venga configurato dall’amministratore del sistema.
Gestire una registrazione
Il moderatore della conversazione può avviare una registrazione contemporaneamente all’inizio di una chiamata o in qualsiasi momento durante una chiamata:
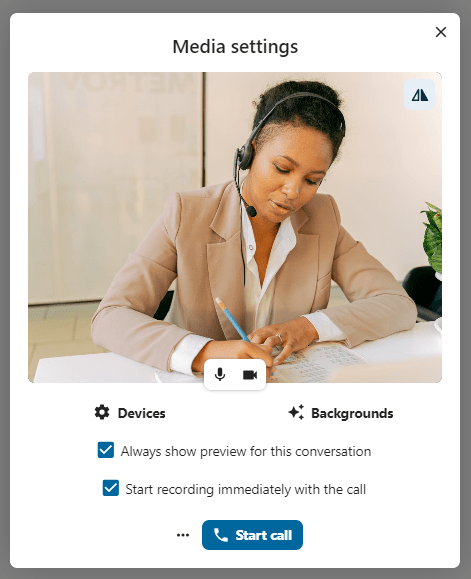
Prima della chiamata: seleziona la casella di controllo «Avvia subito la registrazione con la chiamata» in «Impostazioni multimediali», quindi clicca su «Avvia chiamata».
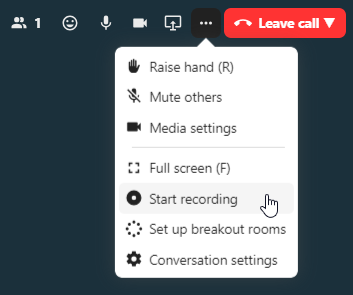
Durante la chiamata: fare clic sul menu nella barra superiore, quindi fare clic su «Avvia registrazione».
La registrazione inizierà a breve e vedrai un indicatore rosso accanto all’orario della chiamata. Puoi interrompere la registrazione in qualsiasi momento mentre la chiamata è ancora in corso cliccando sull’indicatore e selezionando «Interrompi registrazione», oppure utilizzando la stessa azione nel menu in alto. Se non interrompi manualmente la registrazione, questa terminerà automaticamente al termine della chiamata.

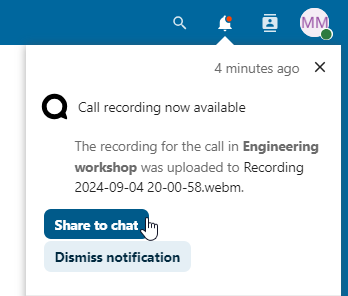
Dopo aver interrotto una registrazione, il server impiegherà del tempo per preparare e salvare il file registrato. Il moderatore che ha avviato la registrazione riceverà una notifica quando il file verrà caricato. Da lì, potrà condividerlo nella chat.

Consenso alla registrazione
Per motivi di conformità con i diversi diritti alla privacy, è possibile chiedere ai partecipanti il consenso alla registrazione prima di unirsi alla chiamata. L’amministratore di sistema ha la flessibilità di utilizzare questa funzionalità in diversi modi:
Disattivare completamente il consenso.
Abilita il consenso obbligatorio in tutto il sistema, richiedendo il consenso per tutte le conversazioni.
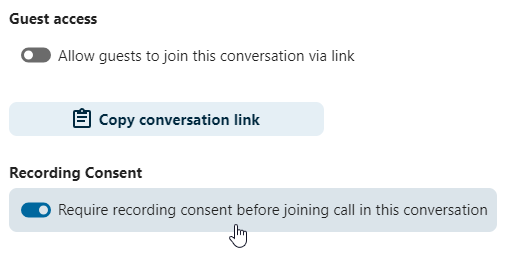
Consenti ai moderatori di configurare questa opzione a livello di conversazione. In questi casi, i moderatori possono accedere alle impostazioni della conversazione per configurare questa opzione di conseguenza:
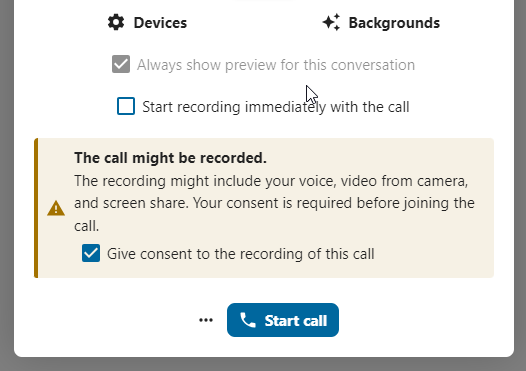
Se il consenso alla registrazione è abilitato, tutti i partecipanti, inclusi i moderatori, vedranno una sezione evidenziata nelle «Impostazioni multimediali» prima di unirsi a una chiamata. Questa sezione informa i partecipanti che la chiamata potrebbe essere registrata. Per dare il consenso esplicito alla registrazione, i partecipanti devono selezionare la casella. Se non danno il consenso, non potranno partecipare alla chiamata.
Conversazione federata
Grazie alla funzionalità Federation, gli utenti possono creare conversazioni su diverse istanze federate di Talk e utilizzare le funzionalità di Talk come se fossero sullo stesso server.
La funzionalità deve essere configurata dall’amministratore del sistema.
Invia e accetta inviti
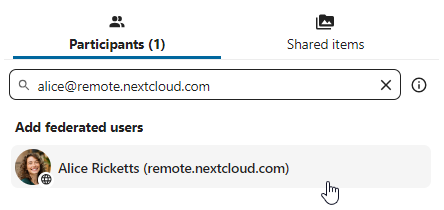
Il moderatore della conversazione può inviare un invito al partecipante su un server diverso:
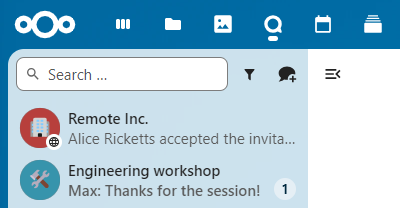
Quando si riceve una notifica, l’utente vedrà un contatore degli inviti in sospeso sopra l’elenco delle conversazioni.
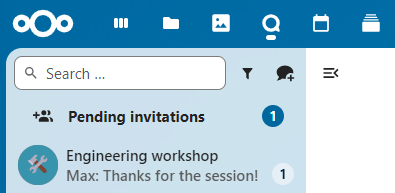
Cliccandoci sopra, verranno fornite maggiori informazioni sulla parte invitante e l’utente potrà accettare o rifiutare l’invito.
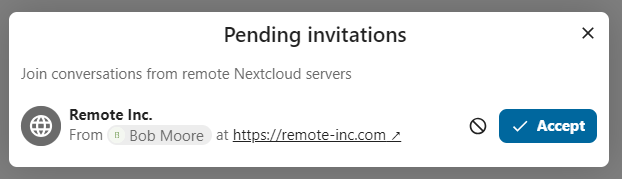
Accettando l’invito, la conversazione apparirà nell’elenco come qualsiasi altra.
You can use it further to chat with participants from other federated servers, join calls and use other available Talk features.
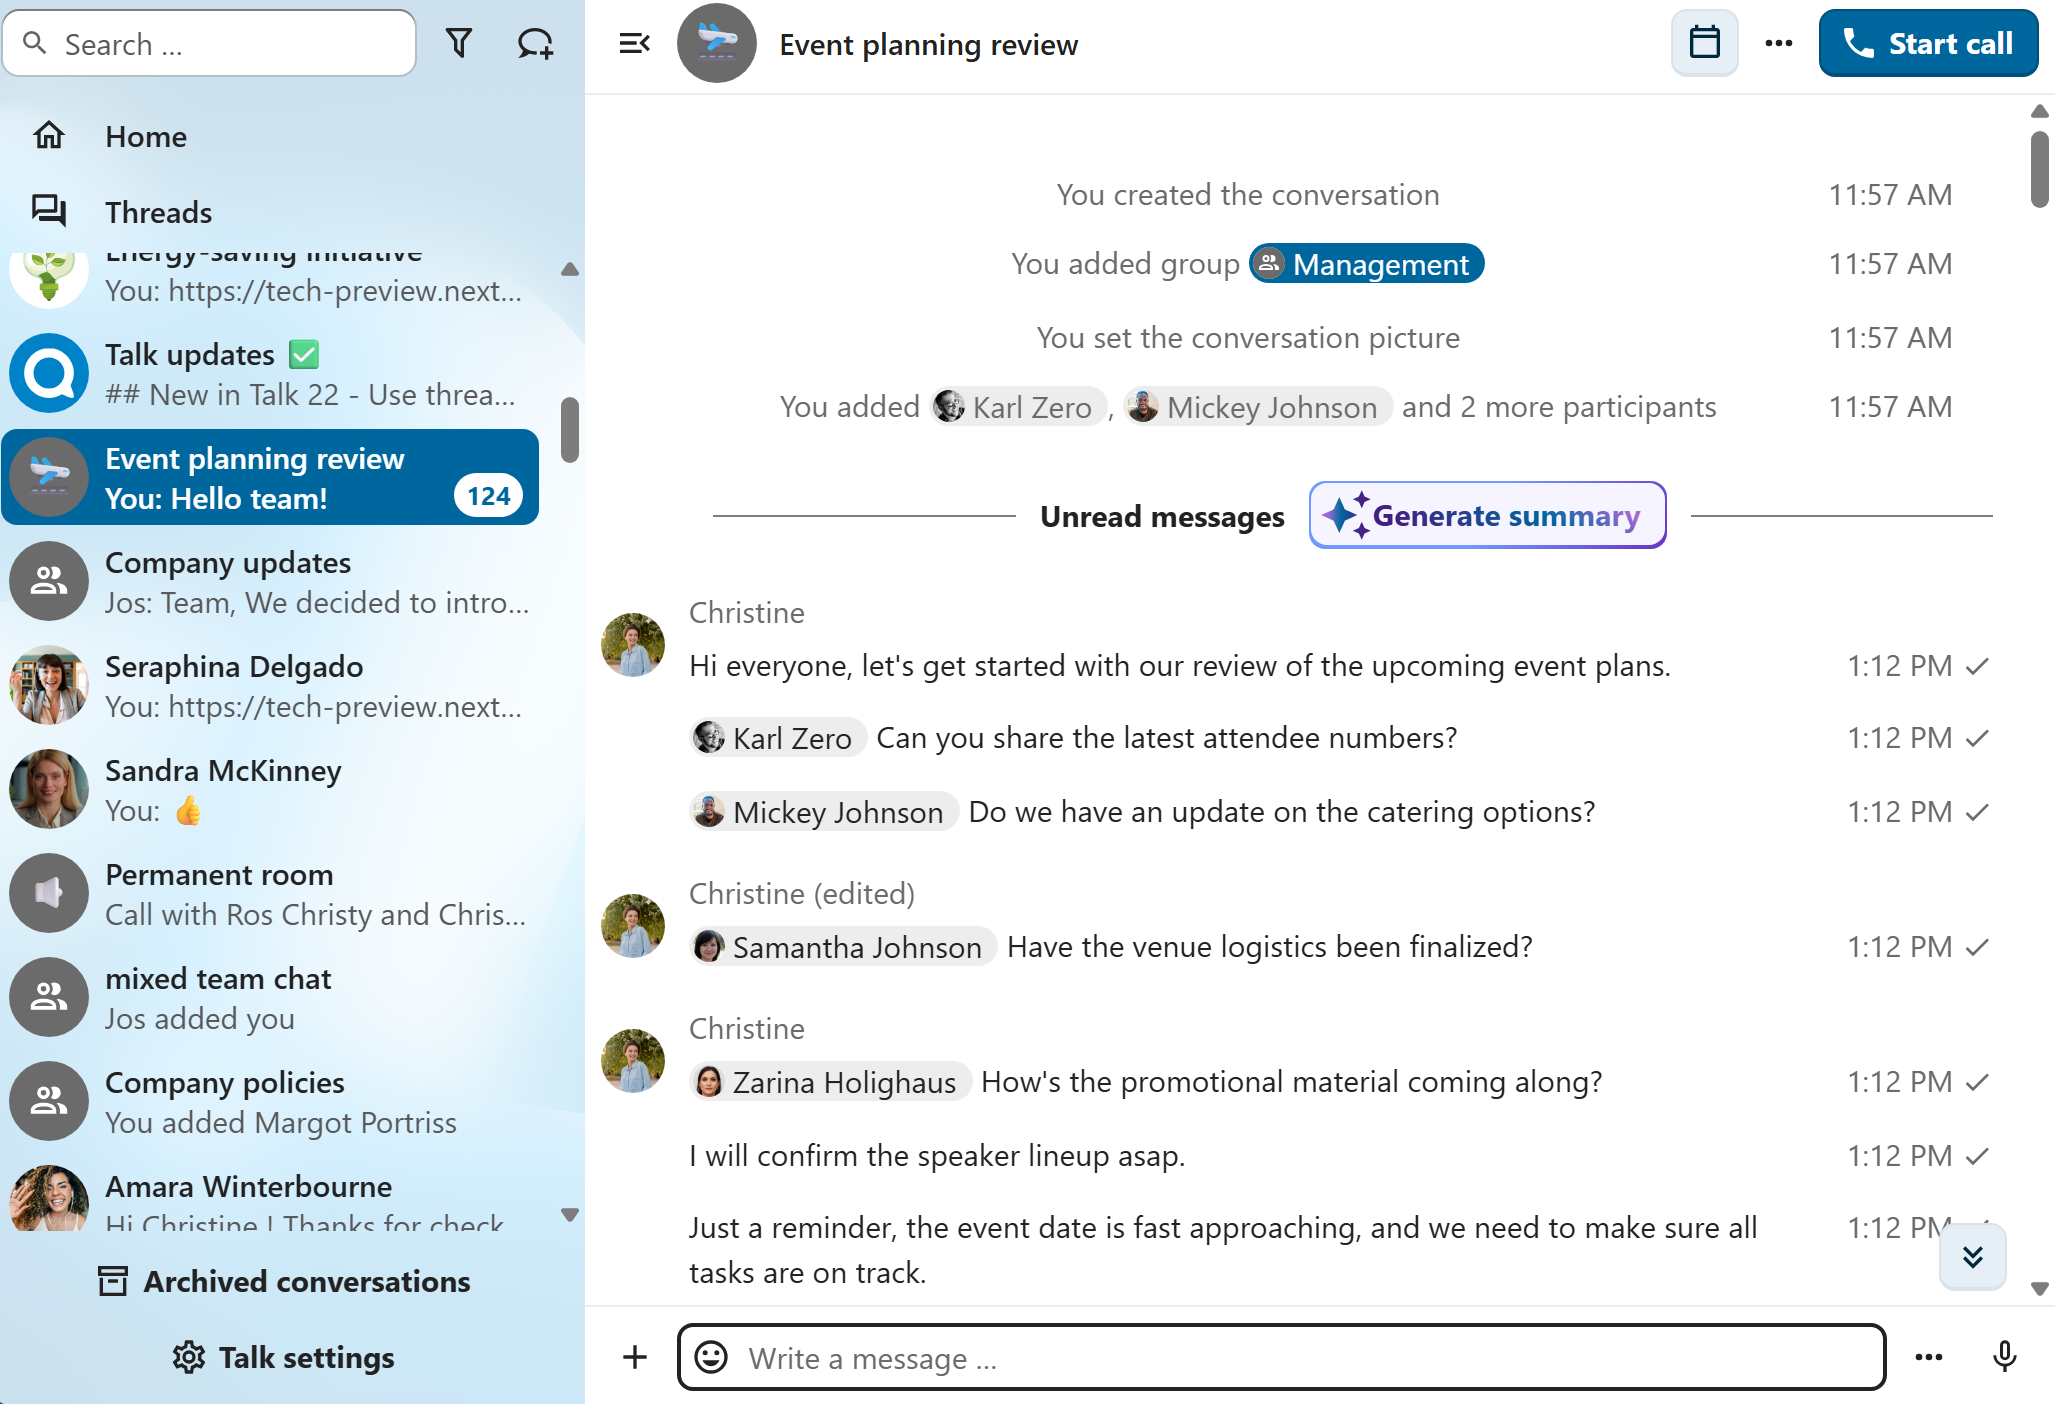
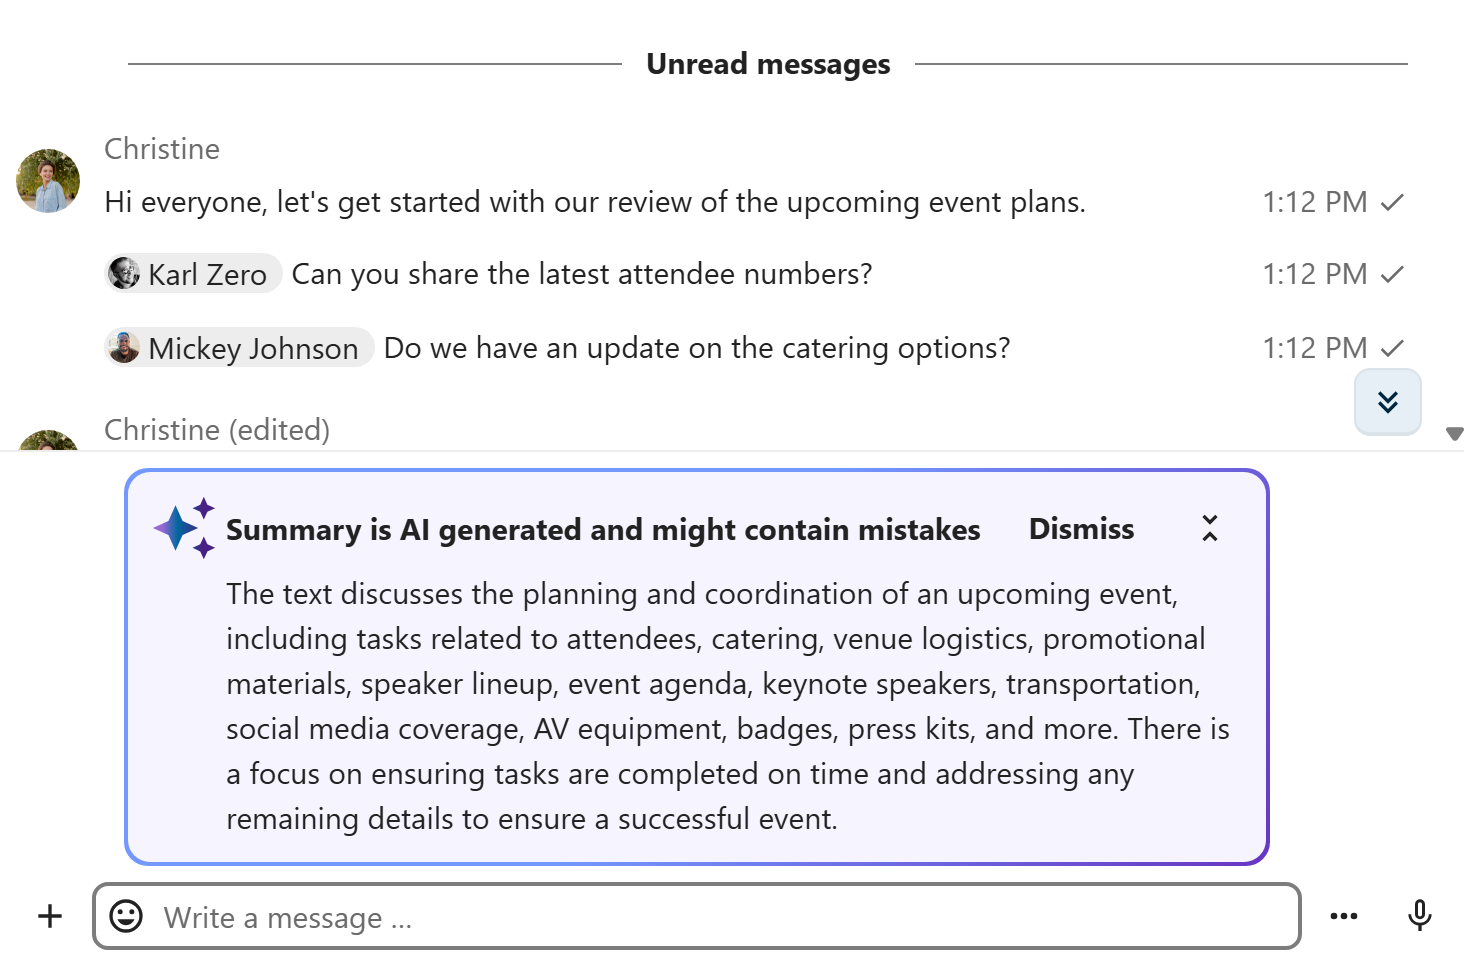
Chat summary
When AI assistant is enabled, a summary can be generated if there are more than 100 unread messages. You can generate it by pressing the button that is visible in chat above the first unread messages.
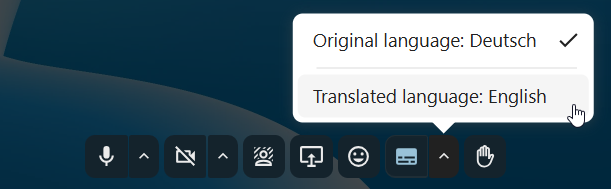
Call live transcription
Call live transcription allows to transcribe the speech in real-time during a call. It is set up by the system administration (High-performance backend and Live Transcription App are required). Moderators need to set the language of the transcription in the conversation settings. All participants then can enable or disable the transcription for themselves in the call bottom bar. When enabled, the transcription will appear in the bottom and will be updated in real-time.
With live_transcription provider app enabled, you can also use live translation. Instead of receiving the transcription in the original message, it will be translated to the language of your choice.