Nozioni di base di Nextcloud Talk
Nextcloud Talk ti consente di chattare e effettuare videochiamate sul tuo server.
Getting started
Chats and calls take place in conversations. You can create any number of conversations. There are different types of conversations:
1. Private (one-to-one) conversations
This is where you have a private chat or call with another Talk user.
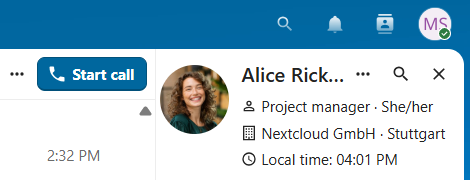
In content sidebar, you can find additional information about the person you are chatting with, such as their email address, phone number, or other details they have shared in their profile.
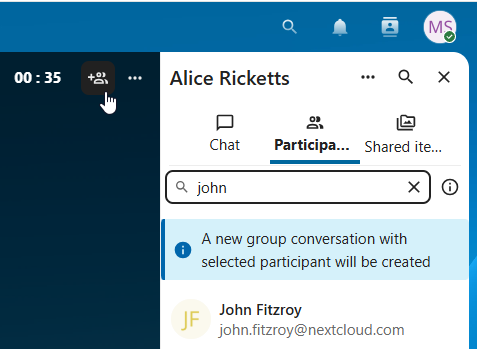
Nobody except you and the other person can see this conversation or join a call in it. You can extend an ongoing call to a new group conversation by adding more people. Call will be continued there without interruption.
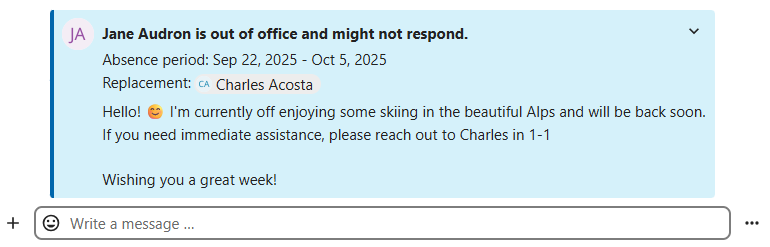
If a user becomes unavailable and set an out-of-office status in Personal settings > Availability, you will find additional information in this conversation, such as provided description, absence date, or their replacement person.
2. Group conversations
A group conversation can have any number of people in it.
You can add internal users, email guests, groups or teams to a group conversation upon creation, or when it already exists, via the Participants tab.
A group conversation can be shared with a public link, so guests can join a chat and a call. It can also be opened to registered users (or users from “Guests” app), so they can discover and join this conversation.
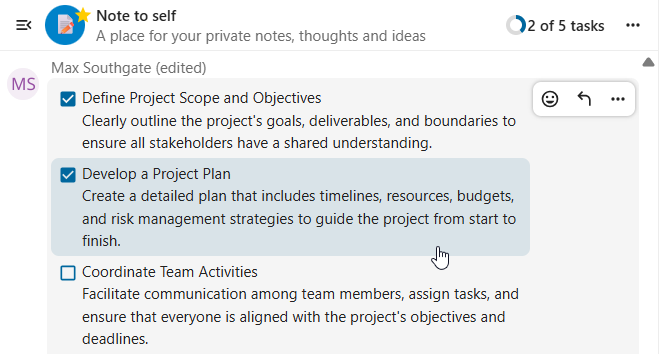
3. Note to self
This is a special conversation with yourself. Messages here do not have a limit for editing or deletion. You can use it to:
Take notes: write down ideas, reminders, or important information you want to keep handy.
Create to-do lists: use Markdown syntax to create checklists for tasks you need to complete.
Forward messages from other chat: use the message menu to forward important messages from other conversations to your Note to self.
4. Disposable conversations
These conversations cover some special cases and exist for a limited period of time. Retention period can be configured by an instance administration:
Instant meetings: these conversations can be created for quick, ad-hoc meetings. They can be started instantly from the Talk Dashboard.
Event conversations: these are created when set as an event location by Calendar app.
Phone conversations: these are dedicated for SIP dial-in & dial-out phone calls (requires a SIP gateway).
Video verification: these are created, when someone tries to access a public link, protected by password with video verification (deleted instantly after call ends).

Talk Dashboard
The Talk Dashboard is your central hub for managing and accessing your conversations. It provides an overview of your:
Unread mentions and messages in private chats;
Message reminders, scheduled to be tackled on later;
Scheduled meetings, with event details and shortcut buttons to join them;
Shortcut actions to create new conversations, join open ones, or quickly check your media devices.

Crea una chat
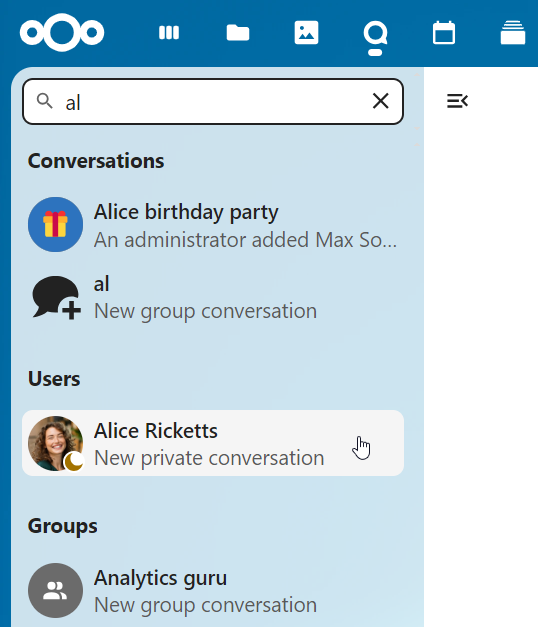
You can create a private (one-to-one) chat by searching for the name of a user, a group or a team and clicking it. For a single user, a conversation is immediately created and you can start your chat. For a group or circle you get to pick a name and settings before you create the conversation and add the participants.
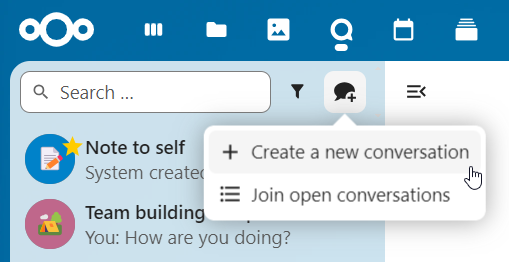
Se vuoi creare una conversazione di gruppo personalizzata, clicca sul pulsante accanto al campo di ricerca e al pulsante dei filtri, quindi su Crea una nuova conversazione.
Puoi quindi scegliere un nome per la conversazione, inserire una descrizione e impostare un avatar (con una foto caricata o un’emoji), quindi selezionare se la conversazione deve essere aperta agli utenti esterni e se altri utenti sul server possono vedere e partecipare alla conversazione.
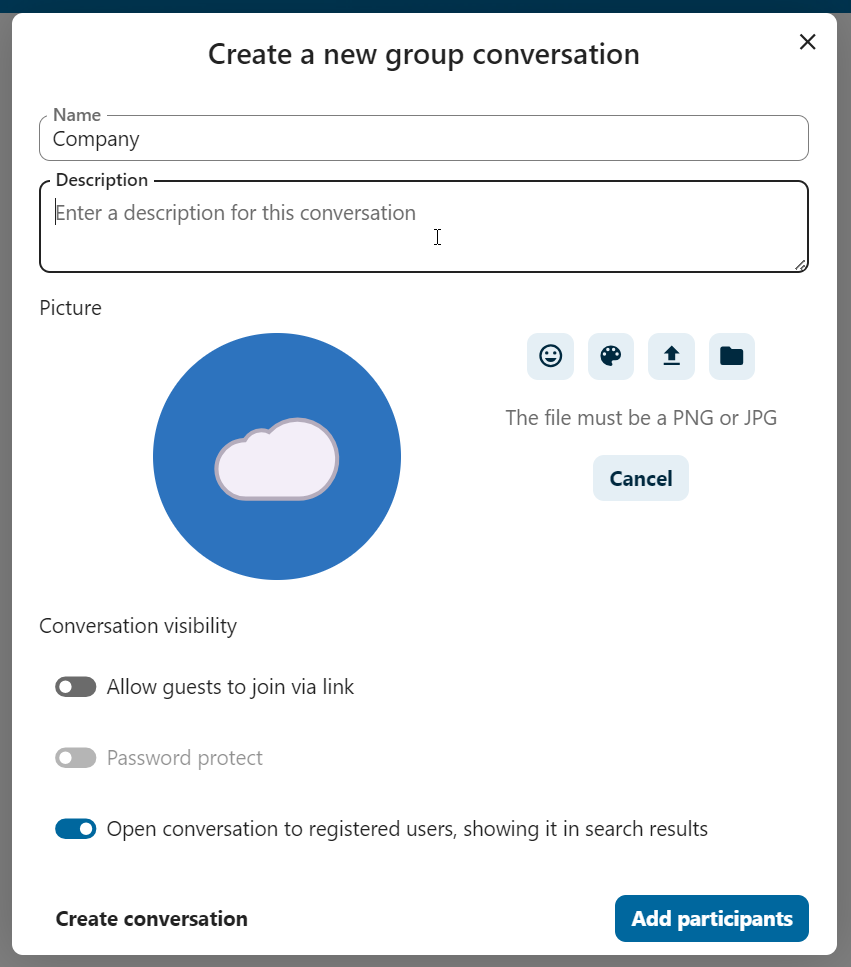
Nel secondo passaggio puoi aggiungere i partecipanti e finalizzare la creazione della conversazione.
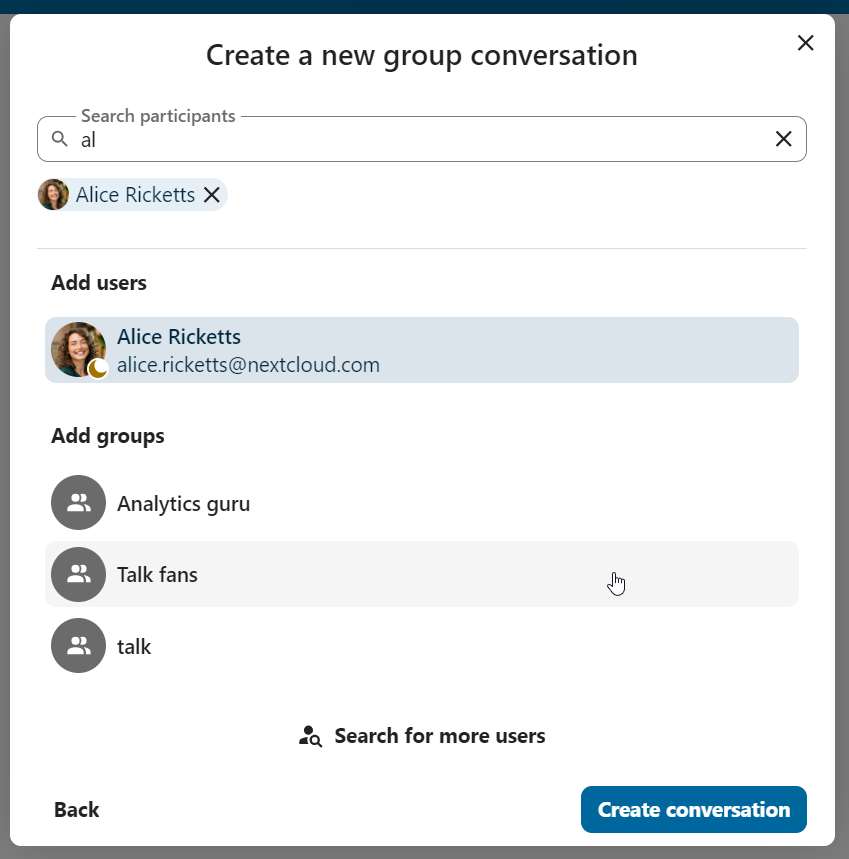
Dopo la conferma verrai reindirizzato alla nuova conversazione e potrai iniziare subito a comunicare.
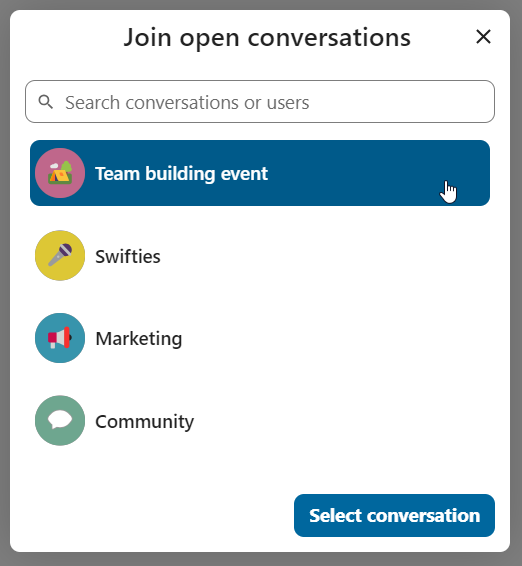
Visualizza tutte le conversazioni aperte
Puoi visualizzare tutte le conversazioni a cui puoi partecipare cliccando sul pulsante accanto al campo di ricerca e al pulsante dei filtri e poi su Partecipa alle conversazioni aperte.
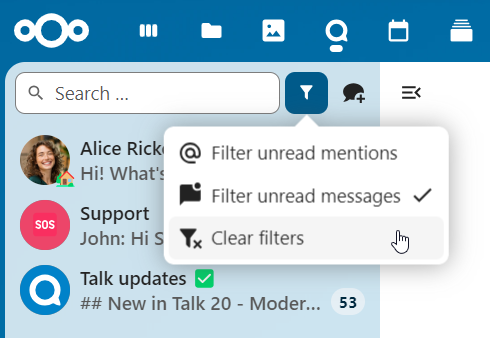
Filtra le tue conversazioni
You can filter your conversations using the filter button next to the search field. There are several options for filtering: 1. Unread mentions: view unread private conversations, or group conversations, where you have been mentioned. 2. Unread messages: view unread messages in all conversations you are a part of. 2. Event conversations: view all conversations, created for upcoming or past events.
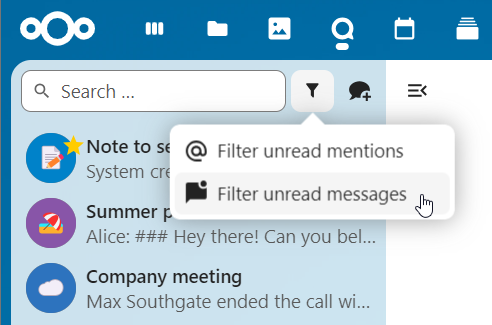
È quindi possibile cancellare il filtro dal menu dei filtri.
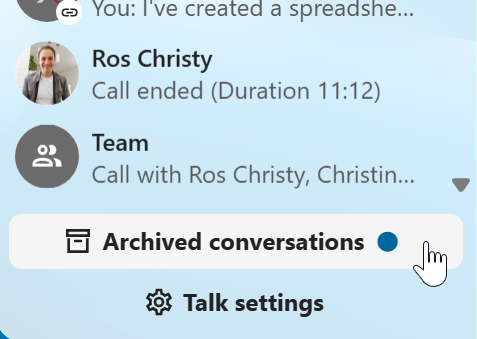
Archive conversations
You can archive conversations that you no longer need to see in your main conversation list. When a conversation is archived, it will be moved to the Archived conversations section.
An archived conversation will not appear in your main conversation list, but it will still align with notification level set in its settings.
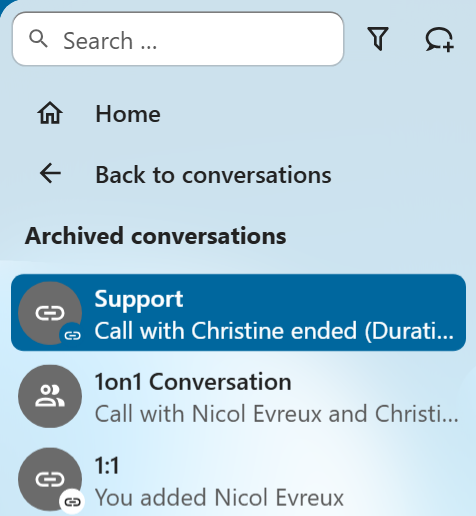
The list is accessible from the button at the bottom of the navigation bar.
Condivisione di file in una chat
Puoi condividere file in una chat in 3 modi.
Per prima cosa, puoi semplicemente trascinarli e rilasciarli nella chat.
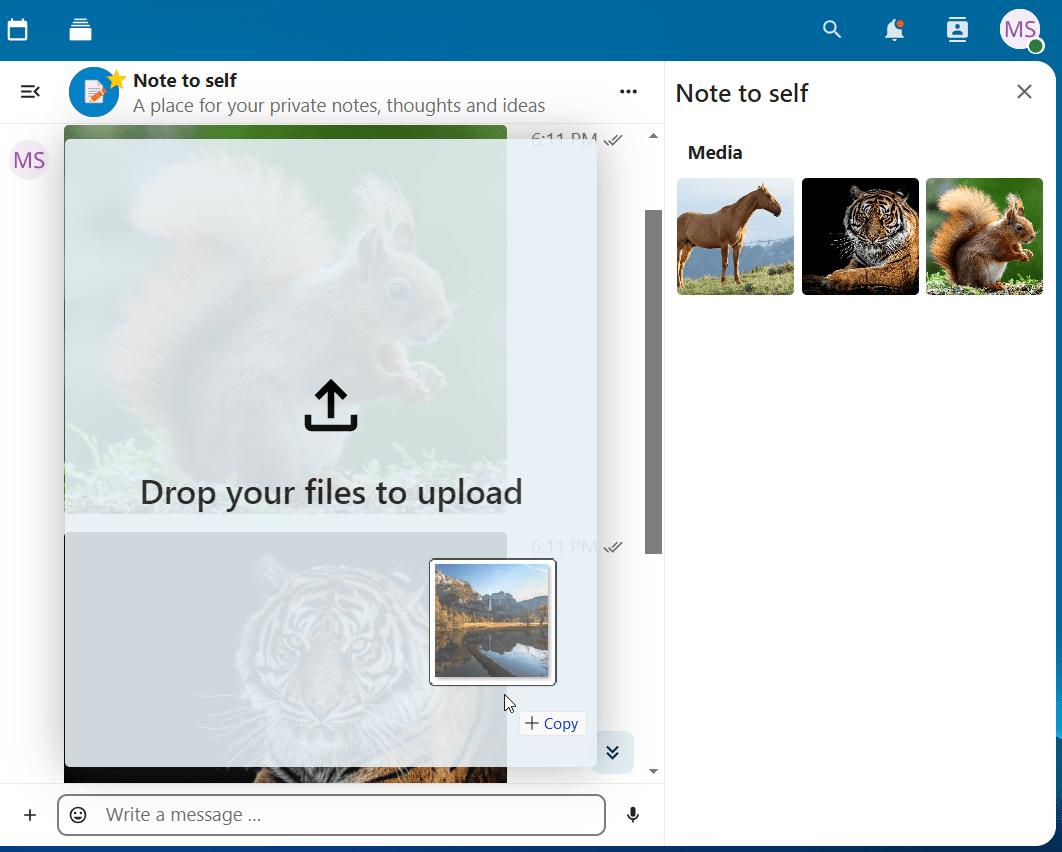
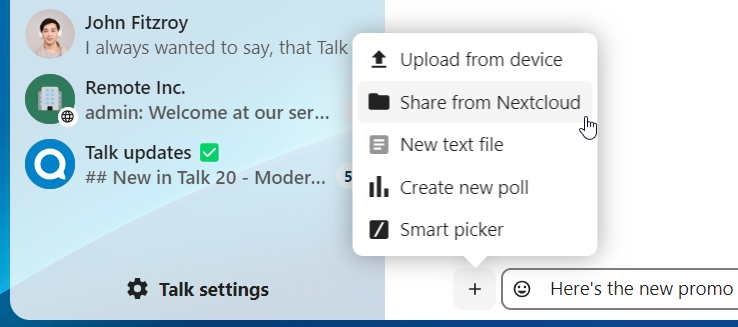
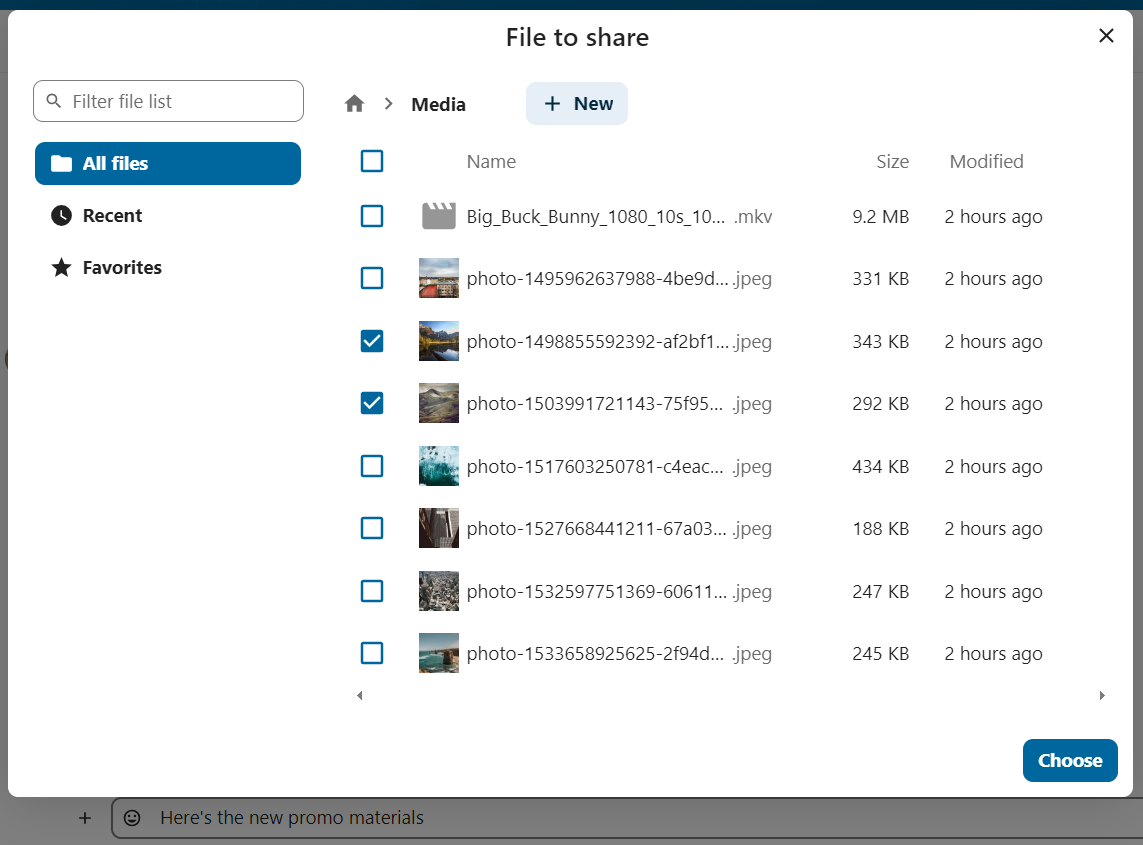
In secondo luogo, puoi selezionare un file dai tuoi file Nextcloud o da un file manager scegliendo la piccola graffetta e selezionando da dove desideri prelevare il file.
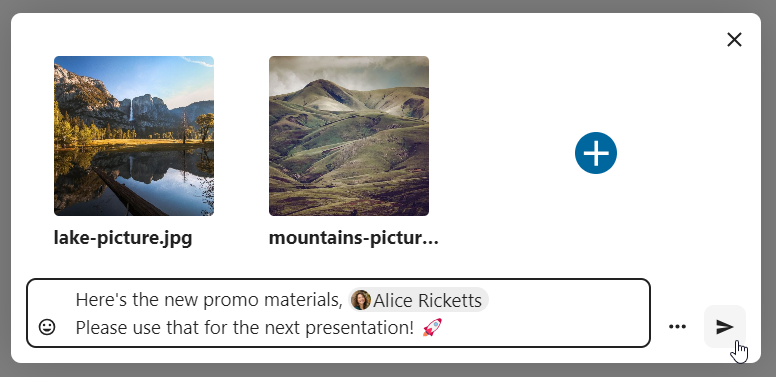
Puoi aggiungere altri file finché non hai finito e decidi di condividerli. Puoi anche aggiungere una didascalia di testo ai file condivisi, fornendo una breve descrizione o contesto.
Tutti gli utenti potranno cliccare sui file per visualizzarli, modificarli o scaricarli, indipendentemente dal fatto che abbiano un account utente. Gli utenti con un account avranno il file automaticamente condiviso con loro, mentre gli utenti ospiti esterni lo avranno condiviso come link pubblico.
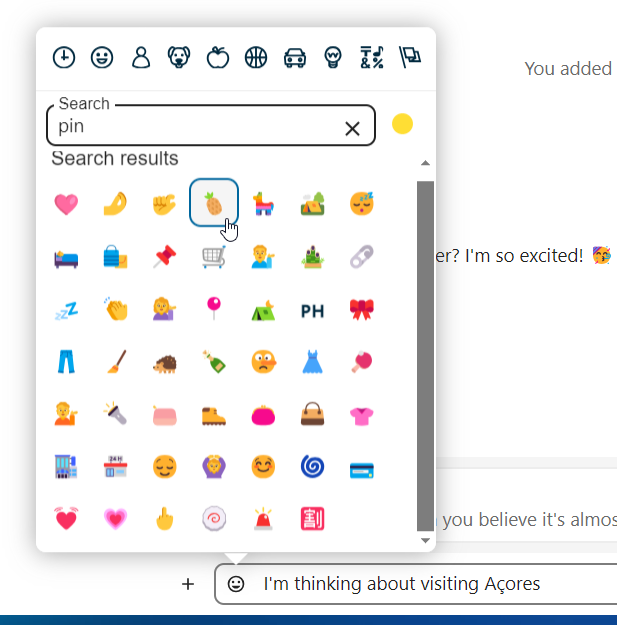
Inserimento emoji
Puoi aggiungere emoji utilizzando il selettore a sinistra del campo di inserimento del testo.
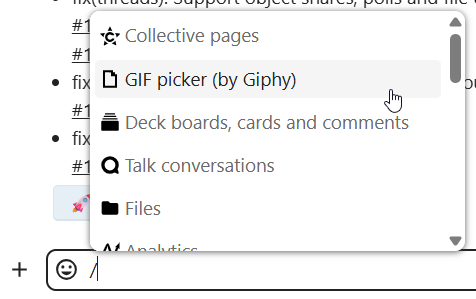
Smart Picker
Smart picker shortcut makes it easier to insert links, files, or other content into your conversations. Just choose the type of content you want to insert (files, Talk conversations, Deck cards, GIFs, etc.) You can also type / in the chat input to open the selector.
Modifica dei messaggi
Puoi modificare i messaggi e le didascalie dei file condivisi fino a 6 ore dopo l’invio.

Utilizzo di Markdown
Puoi migliorare i tuoi messaggi con il supporto della sintassi markdown. Vedi l’elenco per l’utilizzo:
Titoli e divisori
# Heading 1
## Heading 2
### Heading 3
#### Heading 4
##### Heading 5
###### Heading 6

Heading
===
Normal text
***
Normal text
Decorazioni in linea
**bold text** __bold text__
*italicized text* _italicized text_
`inline code` ``inline code``
```
.code-block {
  display: pre;
}
```
Elenchi
1. Ordered list
2. Ordered list

* Unordered list
- Unordered list
+ Unordered list
Citazioni
> blockquote
second line of blockquote
Elenchi di attività
- [ ] task to be done
- [x] completed task
Tabelle
Column A | Column B
-- | --
Data A | Data B
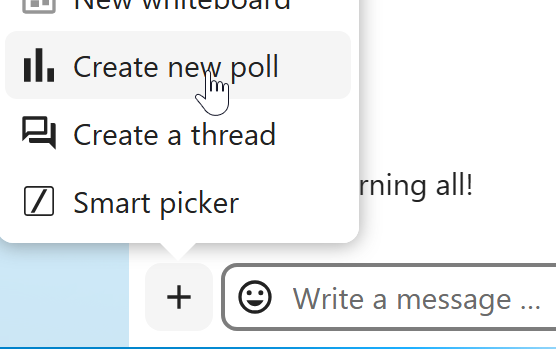
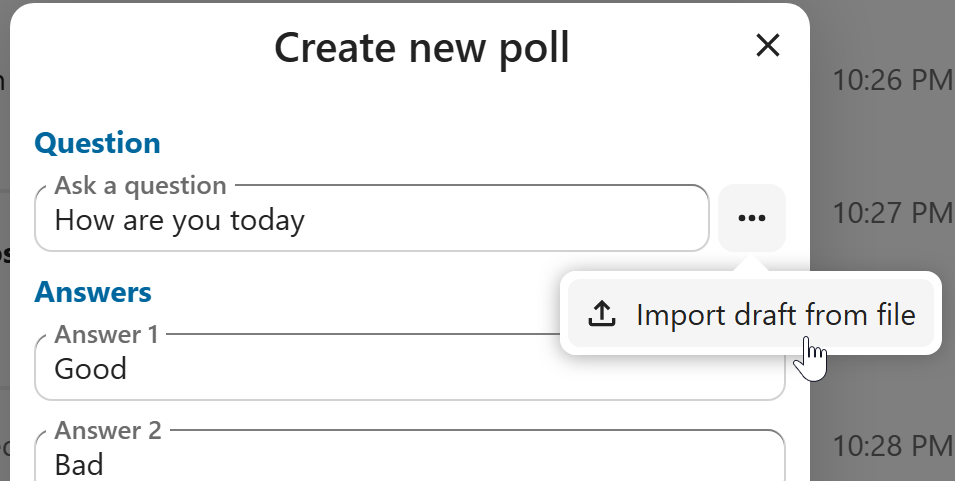
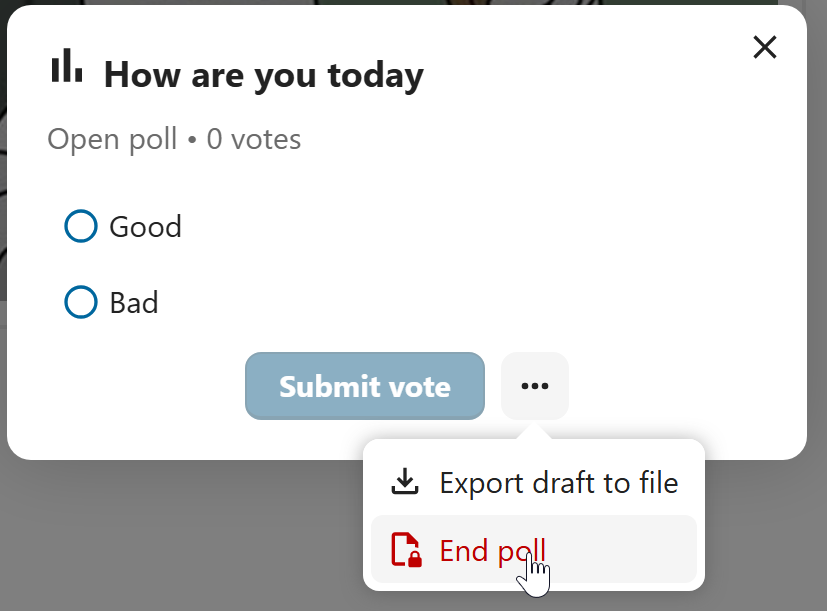
Polls in chat
You can create a poll in groups chats from the new message additional actions.
A poll has two settings:
Anonymous polls: Participants cannot see who voted for which option.
Allow multiple choices: Participants can select more than one option.
You can also import polls for auto-fill and export polls as JSON files to save it locally.
Closing poll is possible from the poll dialog.
As a moderator, you can create the poll directly or you can save it as a draft to edit it later.
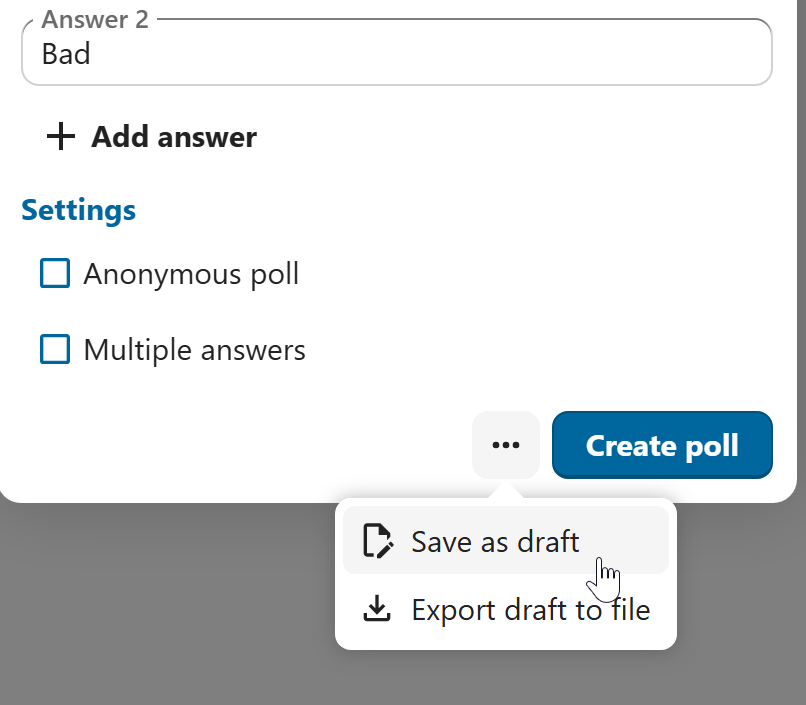
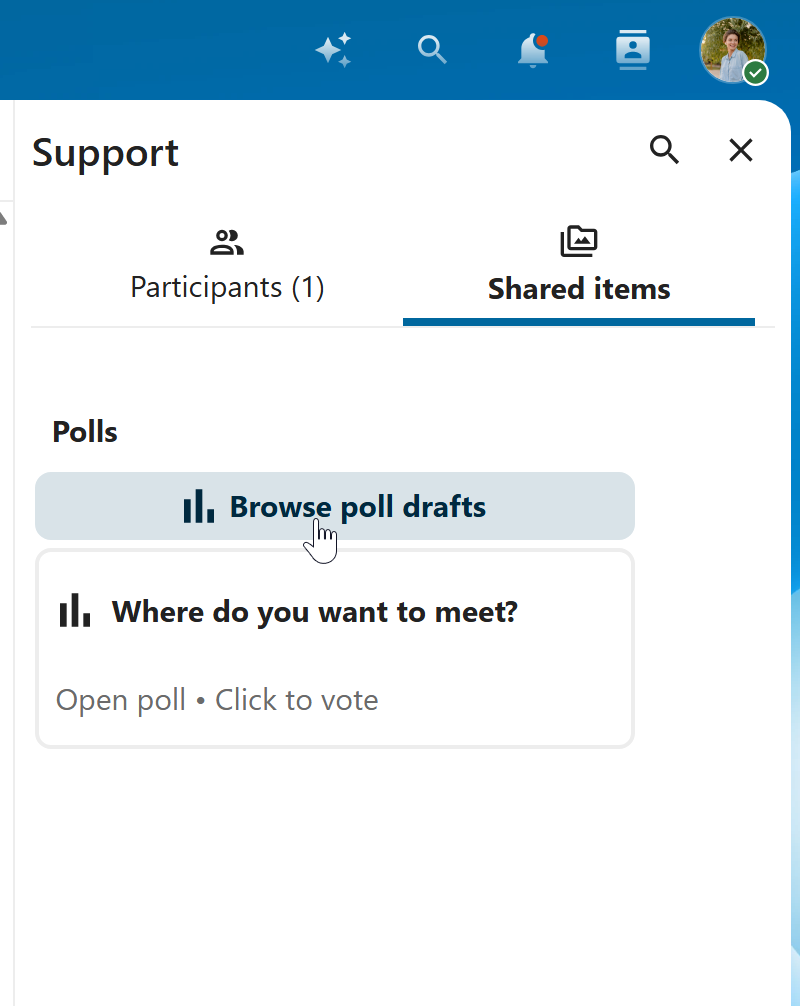
You can find poll drafts in Shared items tab or next to the poll title input field.
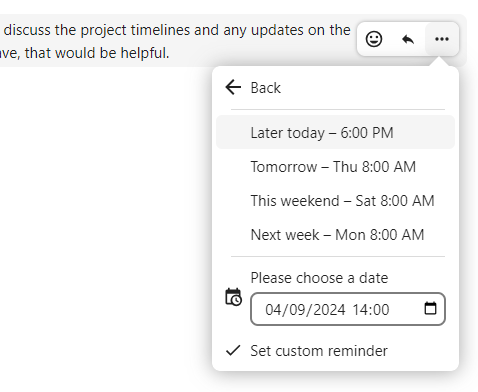
Impostazione promemoria sui messaggi
Puoi impostare promemoria per messaggi specifici. Se c’è un messaggio importante di cui vuoi essere avvisato in seguito, passaci sopra il mouse e clicca sull’icona del promemoria.
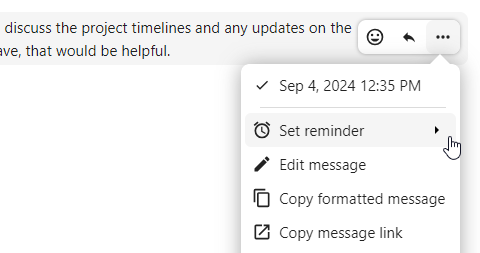
Nel sottomenu è possibile selezionare un orario appropriato per ricevere successivamente una notifica.
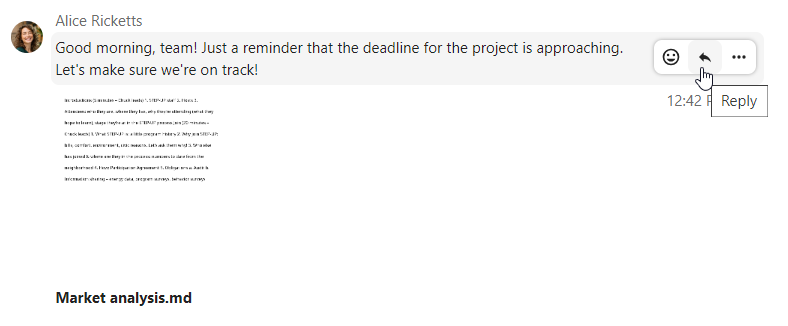
Rispondere ai messaggi e altro ancora
Puoi rispondere a un messaggio utilizzando la freccia che compare quando passi il mouse sopra un messaggio.
In the ... menu you can also choose to reply privately. This will open a one-to-one chat.
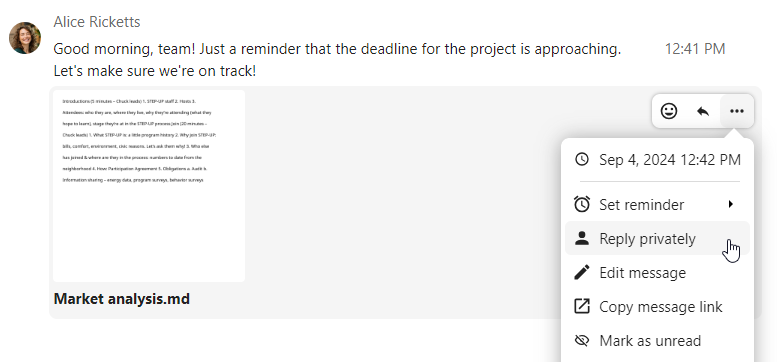
Qui puoi anche creare un collegamento diretto al messaggio o contrassegnarlo come non letto, così potrai scorrere di nuovo lì la prossima volta che entri nella chat. Quando è un file, puoi visualizzarlo in File.
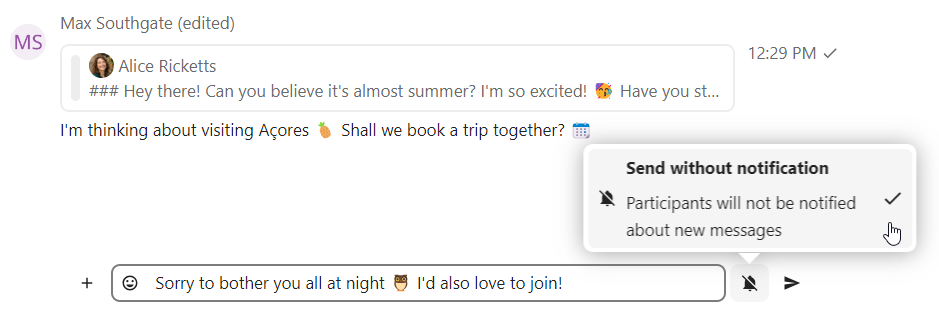
Messaggi silenziosi
Se non vuoi disturbare nessuno nel cuore della notte, puoi attivare la modalità silenziosa per chattare. Quando è attiva, gli altri partecipanti non riceveranno notifiche dai tuoi messaggi.
Scheduling messages
If you want to send a message not right now, but at a specific time, you can schedule it. Just select the desired date and time in the quick actions next to the input field.
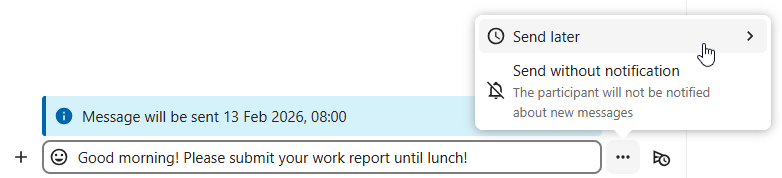
You can find all your scheduled messages by clicking on the clock icon next to the input field. There you can edit, reschedule or delete currently prepared messages.

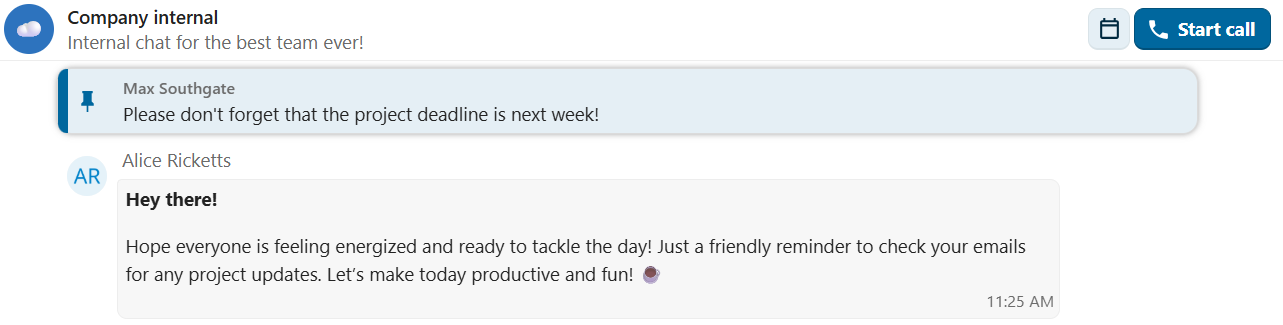
Pinning messages
A moderator can pin important messages in a conversation, for certain period of time or until it’s no longer relevant.
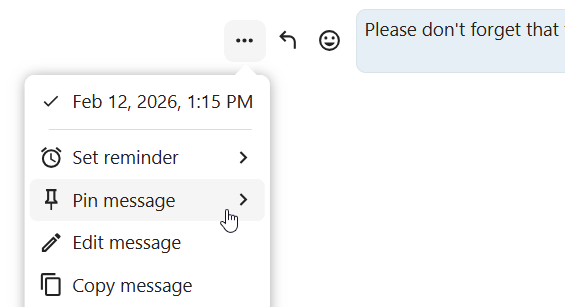
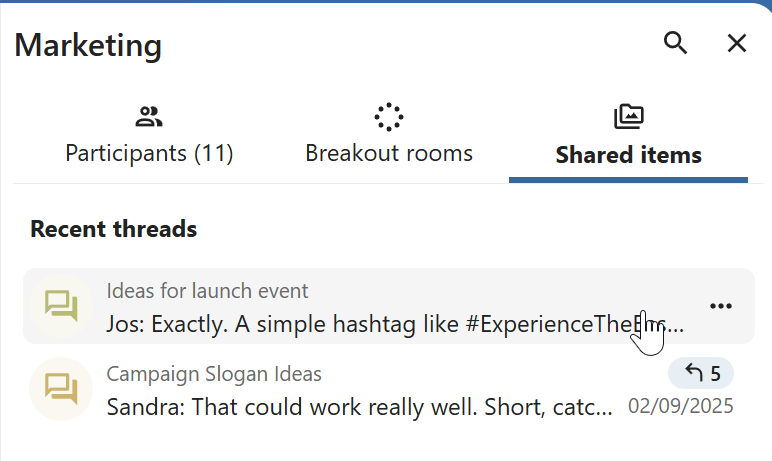
Pinned messages are highlighted and accessible above the chat or in the Shared items tab of the content sidebar. If you no longer need a pinned message, you can unpin it for everyone or only yourself from quick actions.
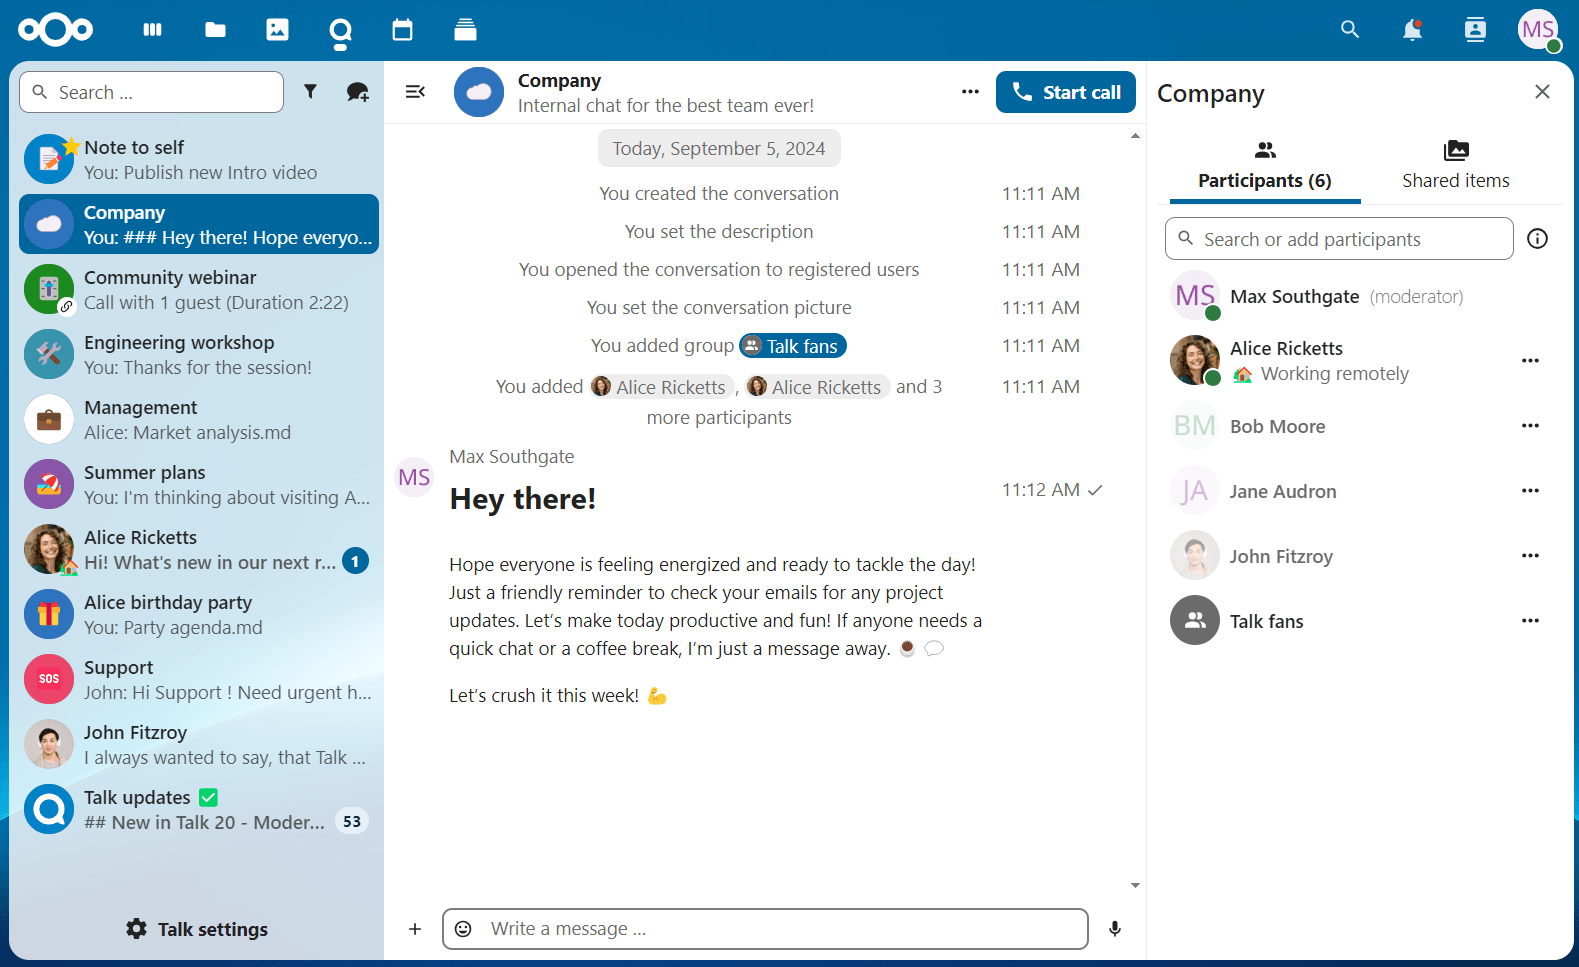
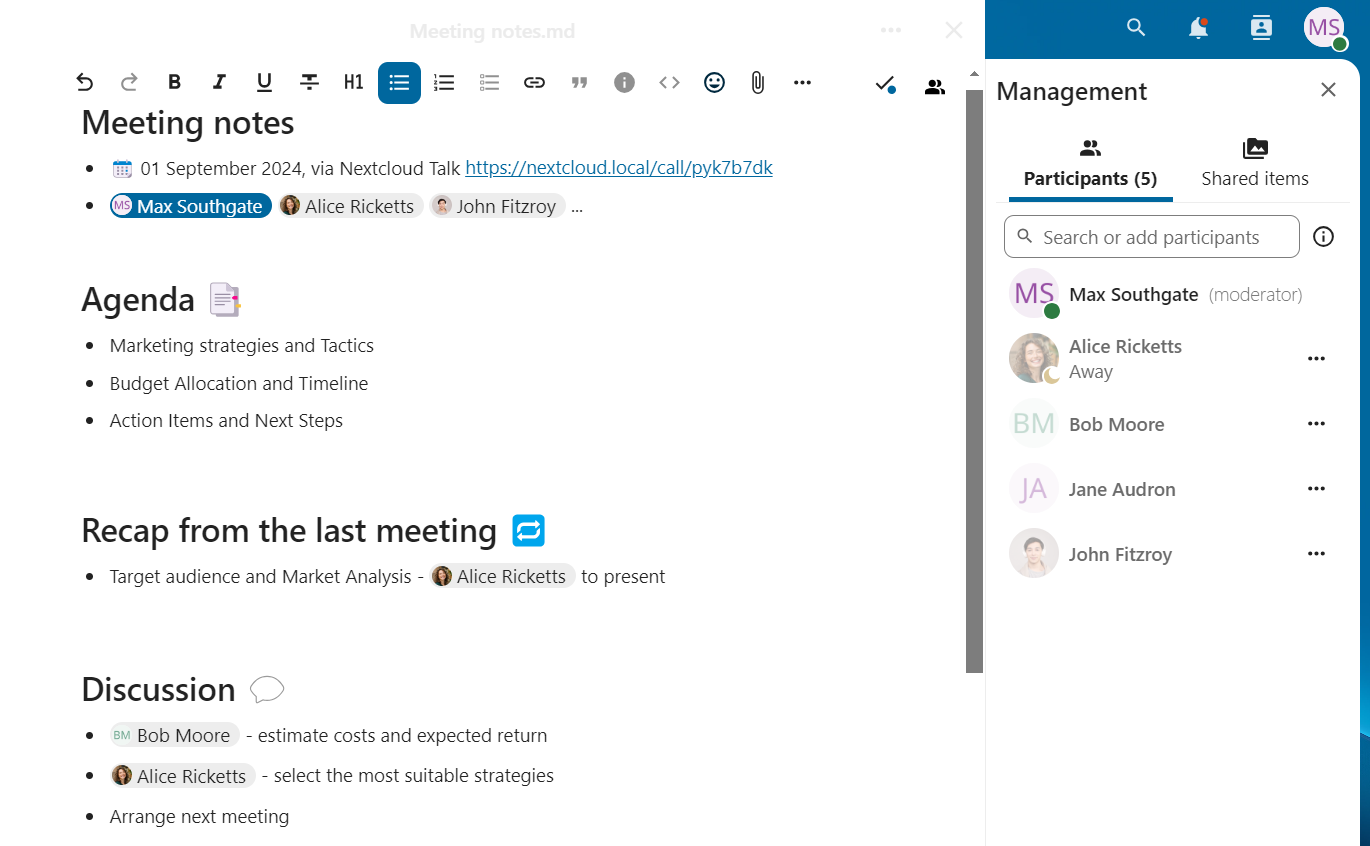
Gestione di una conversazione
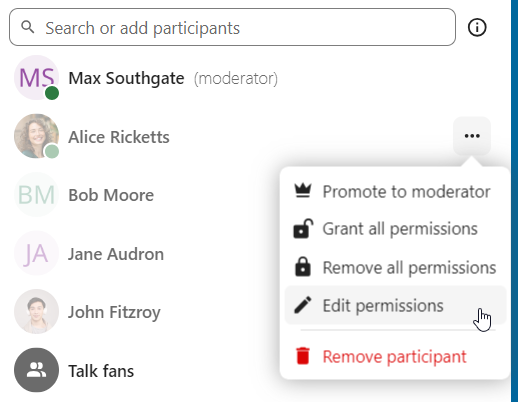
Sei sempre moderatore nella tua nuova conversazione. Nell’elenco dei partecipanti puoi promuovere altri partecipanti a moderatori usando il menu ... a destra del loro nome utente, assegnare loro permessi personalizzati o rimuoverli dalla conversazione.
Anche la modifica delle autorizzazioni di un utente che ha partecipato a una conversazione pubblica aggiungerà definitivamente quell’utente alla conversazione.
I moderatori possono configurare la conversazione. Seleziona Impostazioni conversazione dal menu ... della conversazione in alto per accedere alle impostazioni.
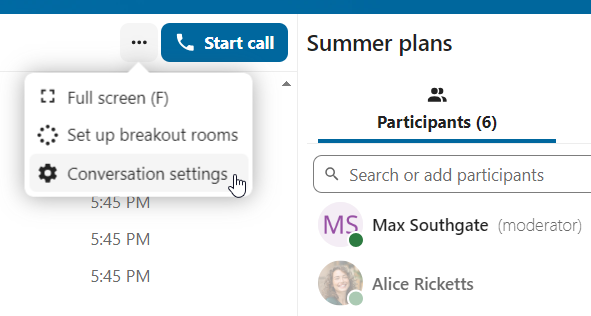
Qui puoi configurare la descrizione, l’accesso come ospite, se la conversazione è visibile ad altri sul server e altro ancora.
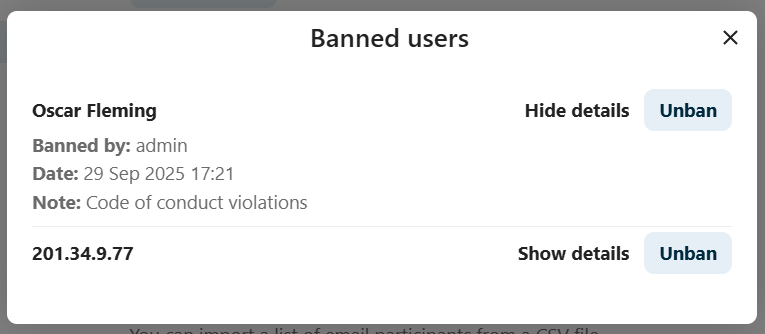
Ban participants
To help keep discussions safe and under control, moderators can ban participants from conversations. It could be internal users or guests (in this case their IP-addresse will additionally be banned).
In the participants list, select the user or guest you, and click Remove participant.
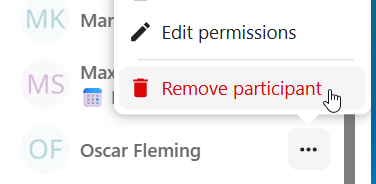
There, toggle checkbox Also ban from this conversation and provide a reason for the ban. The banned user will be removed and prevented from rejoining.

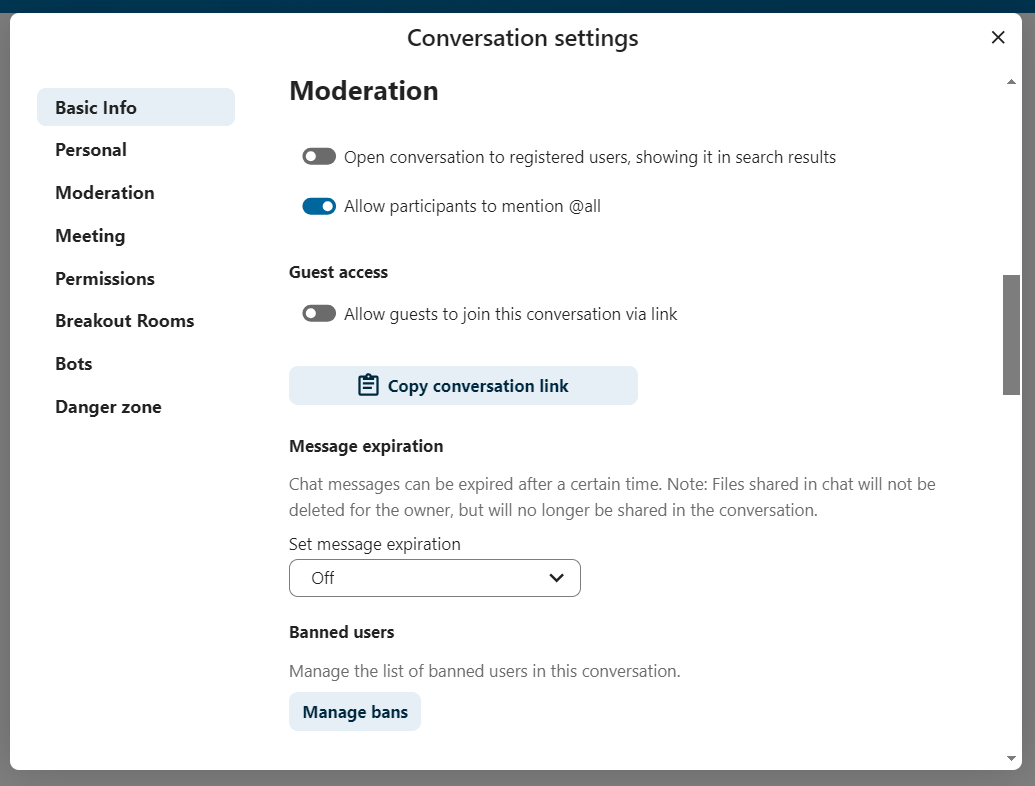
You can later find the list of banned users in the Moderation section of conversation settings.
Here, you can see the reason for the ban and revert it if needed.
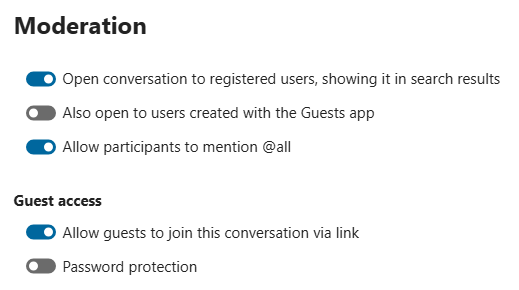
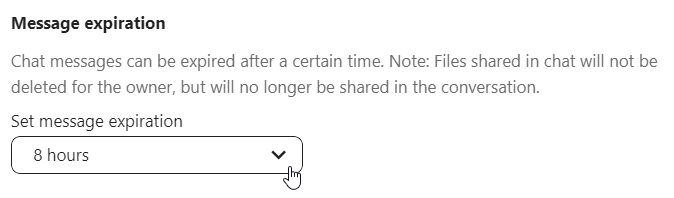
Scadenza dei messaggi
Un moderatore può configurare la scadenza dei messaggi nella sezione Impostazioni conversazione, all’interno della sezione Moderazione. Una volta raggiunta la scadenza, un messaggio viene automaticamente rimosso dalla conversazione. Le durate di scadenza disponibili sono 1 ora, 8 ore, 1 giorno, 1 settimana, 4 settimane o mai (impostazione predefinita).
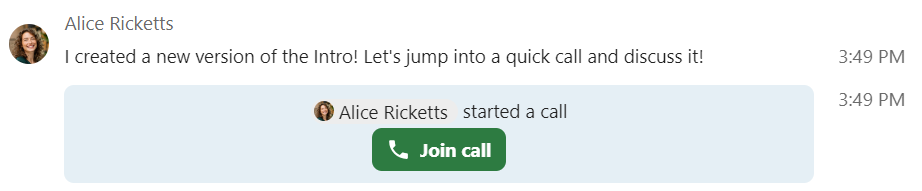
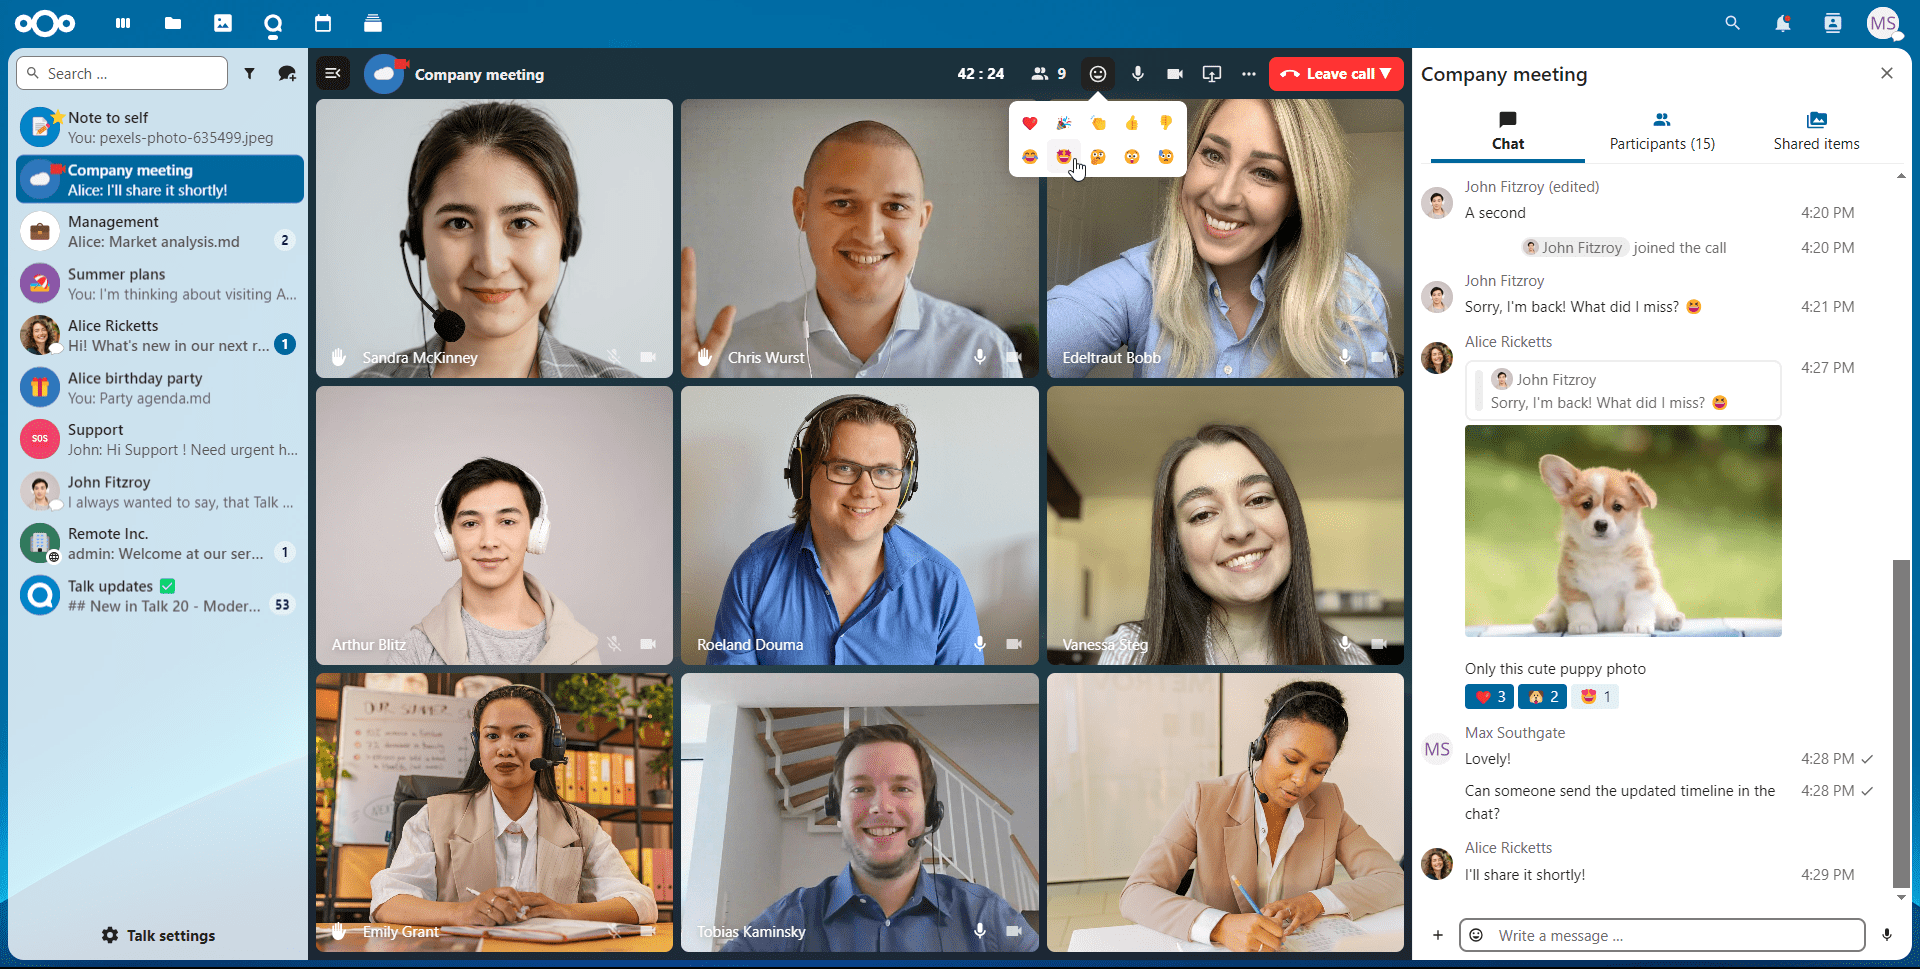
Avviare una chiamata
Quando sei in una conversazione, puoi iniziare una chiamata in qualsiasi momento con il pulsante Inizia chiamata. Gli altri partecipanti riceveranno una notifica e potranno unirsi alla chiamata.
Se qualcun altro ha già avviato una chiamata, il pulsante diventerà verde e dirà Unisciti alla chiamata.
Durante una chiamata, puoi disattivare l’audio del microfono e disabilitare il video con i pulsanti sul lato destro della barra superiore, oppure usando le scorciatoie M per disattivare l’audio e V per disattivare il video. Puoi anche usare la barra spaziatrice per attivare/disattivare l’audio. Quando l’audio è disattivato, premendo la barra spaziatrice si riattiverà l’audio, così puoi parlare finché non rilasci la barra spaziatrice. Se l’audio è attivato, premendo la barra spaziatrice si riattiverà l’audio finché non rilasci la barra spaziatrice.
Puoi nascondere il tuo video (utile durante una condivisione dello schermo) con la piccola freccia appena sopra il flusso video. Riportalo indietro con la piccola freccia di nuovo.
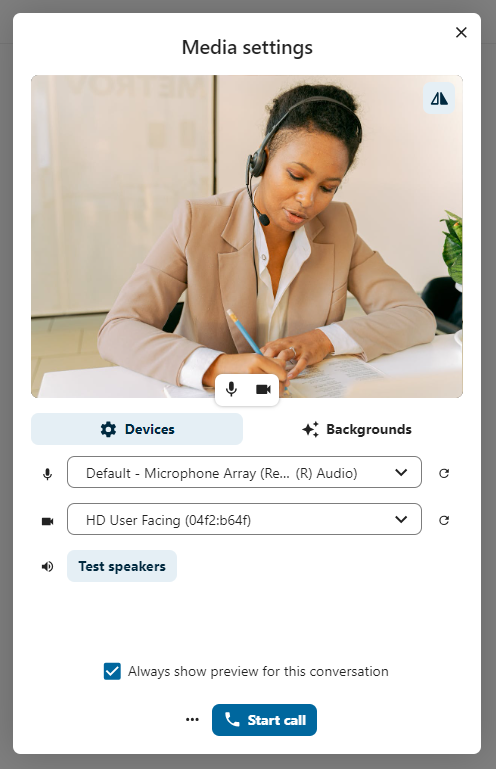
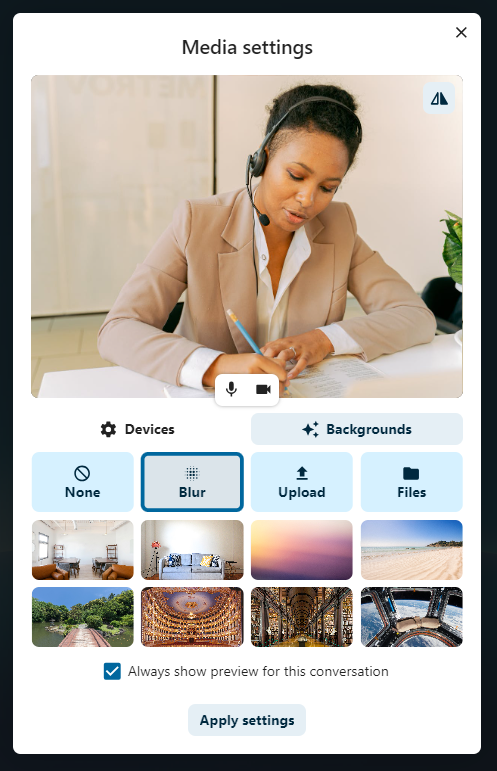
Puoi accedere alle tue impostazioni e scegliere una webcam, un microfono e altre impostazioni diverse nel menu ... nella barra in alto.
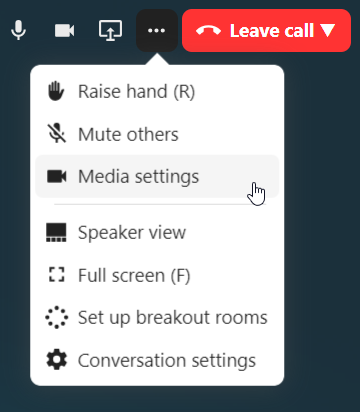
Dalla finestra di dialogo delle impostazioni multimediali puoi anche cambiare lo sfondo del tuo video.
All these settings are also available as direct actions in the bottom bar.

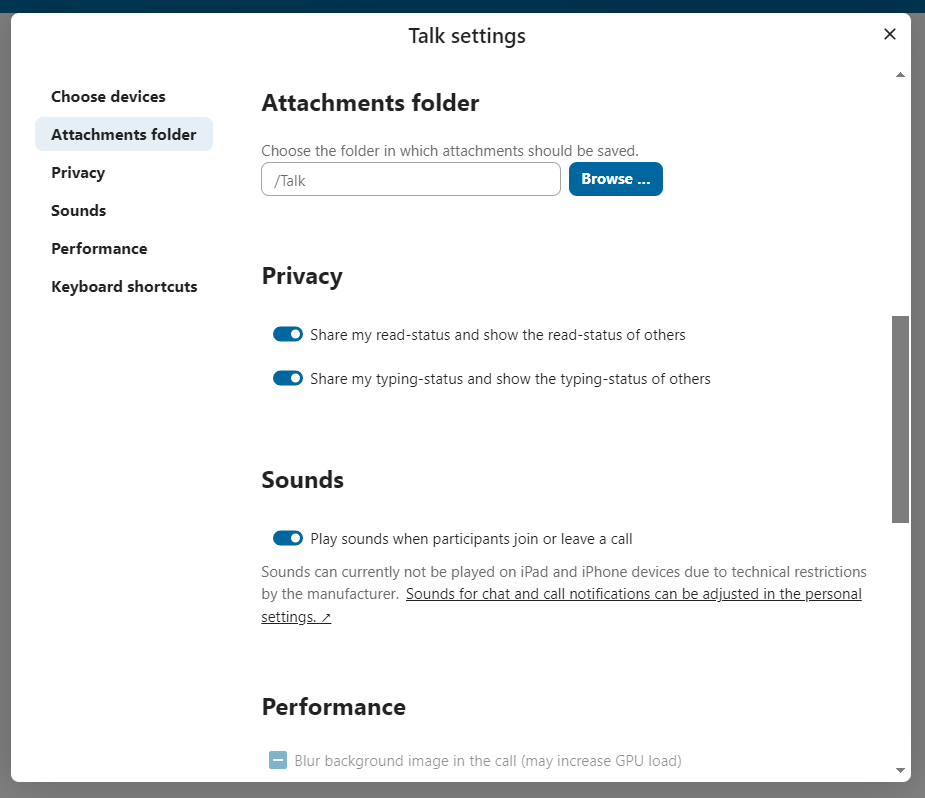
Puoi modificare altre impostazioni nella finestra di dialogo Impostazioni di discussione.
Avviare una condivisione dello schermo
Puoi cliccare sull’icona del monitor nel tuo flusso video per condividere lo schermo. A seconda del browser, avrai la possibilità di condividere un monitor, una finestra dell’applicazione o una singola scheda del browser. Se è disponibile anche il video della tua webcam, gli altri partecipanti lo vedranno in una piccola vista relatore accanto alla condivisione dello schermo.

You can zoom in and out of the shared screen with mouse wheel, double click or touchpad gestures.
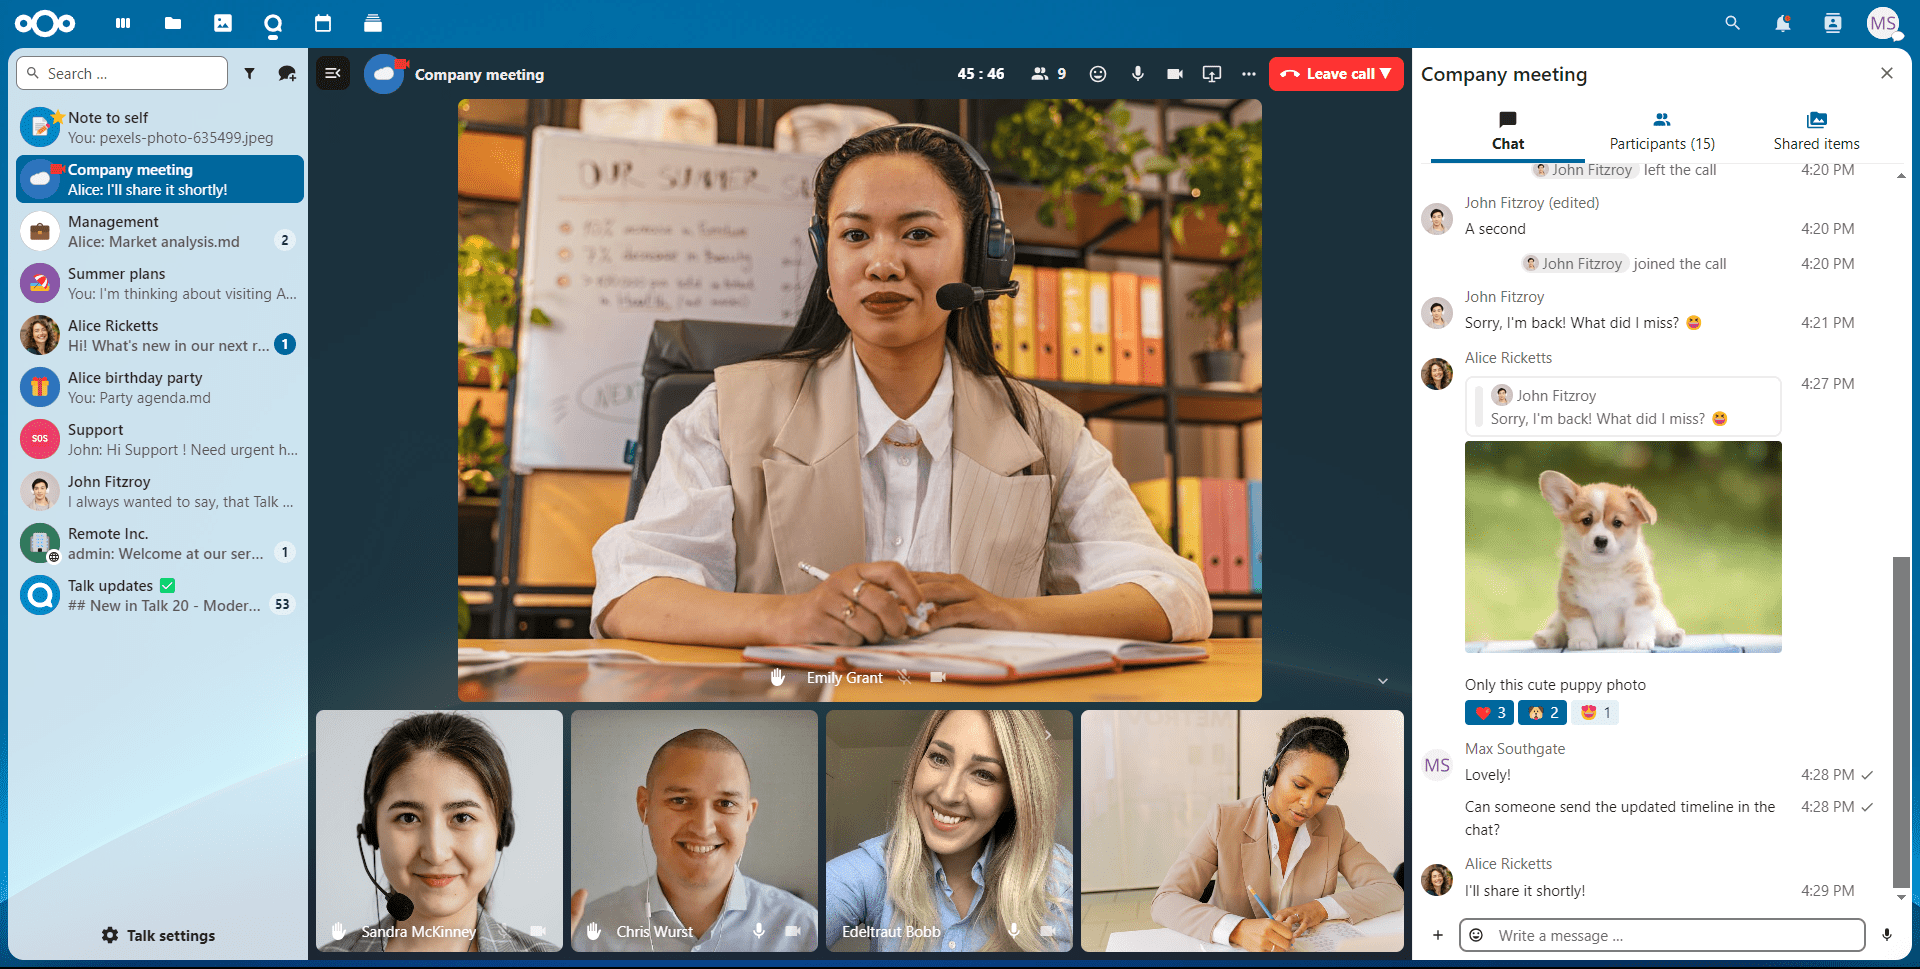
Modifica della vista durante una chiamata
You can switch the view in a call in the bottom bar between promoted view and grid view.
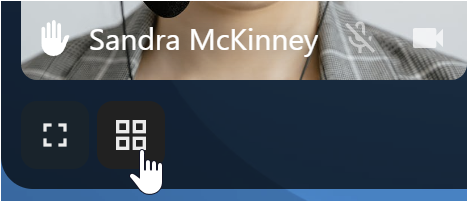
The grid view will show as many people as the screen can fit, allowing navigation with buttons on the left and right.
La vista promossa mostra l’oratore in grande e gli altri in una fila sotto. Se le persone non rientrano nello schermo, a sinistra e a destra verranno visualizzati i pulsanti che ti consentiranno di navigare.
Download call participants list
You can download the list of participants in a call from the ... menu in the top bar. This will download a CSV file with the names and email addresses of all participants in the call.
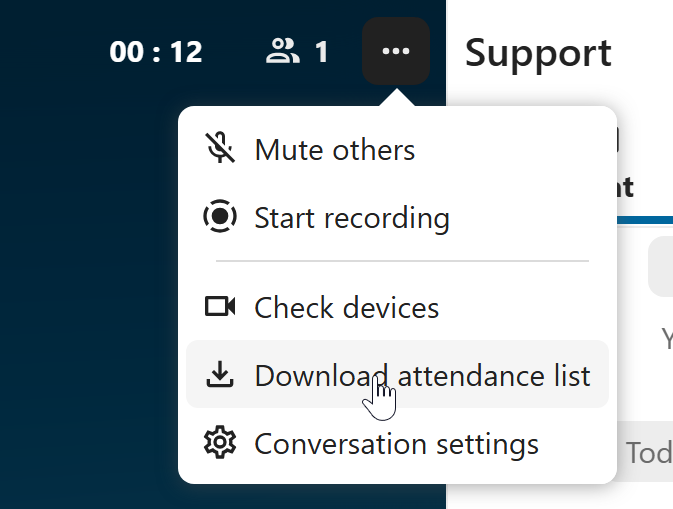
The table in the CSV file contains the following columns:
Name: The name of the participant.
Email: The email address of the participant.
Type: Indicates whether the participant is a registered user or a guest.
Identifier: Unique identifier for the participant.
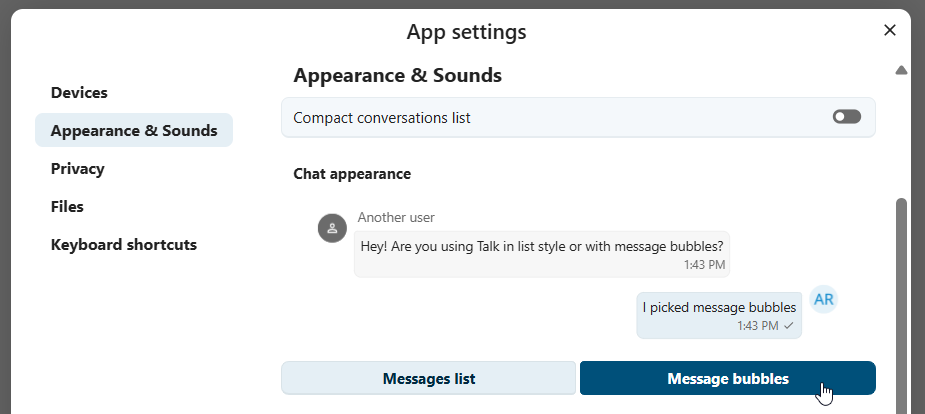
Appearance
Compact view of conversations list
Compact view allows to hide last message preview in the conversation list, providing a more focused interface.
Chat messages
Chat appearance settings allow you to customize the look of your conversation chats. You can choose between classic list or message bubbles, with your own messages on the side.
You can change both settings from the Talk settings dialog in Appearance section.
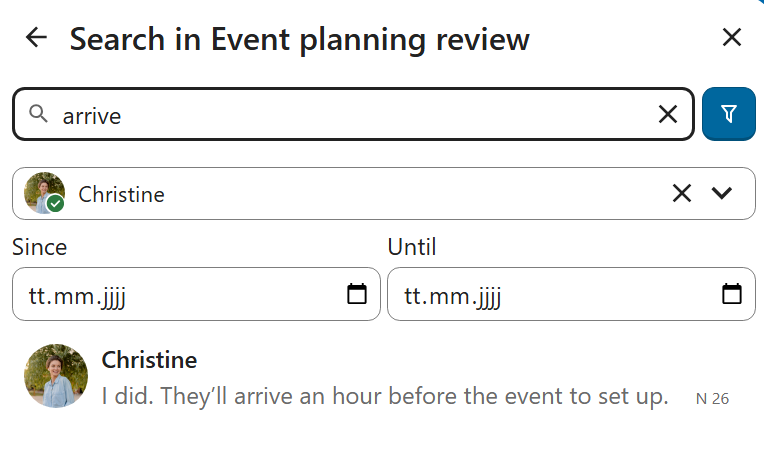
Messages search in a conversation
In addition to global unified search, you can search for messages within a specific conversation. In the content sidebar of a conversation, click the search icon to open the search tab.
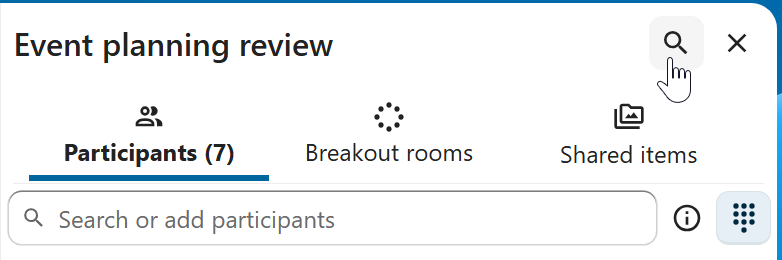
You can narrow down your search by using filters such as date range, and sender.
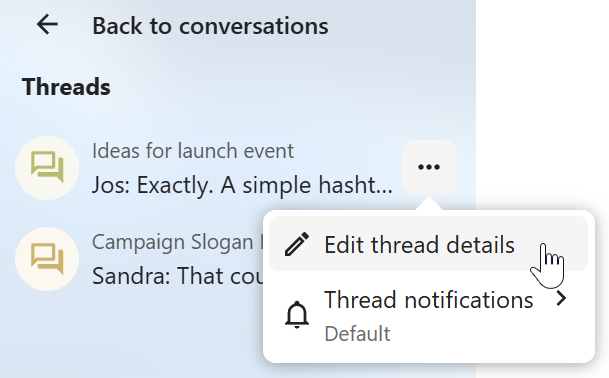
Threaded messages
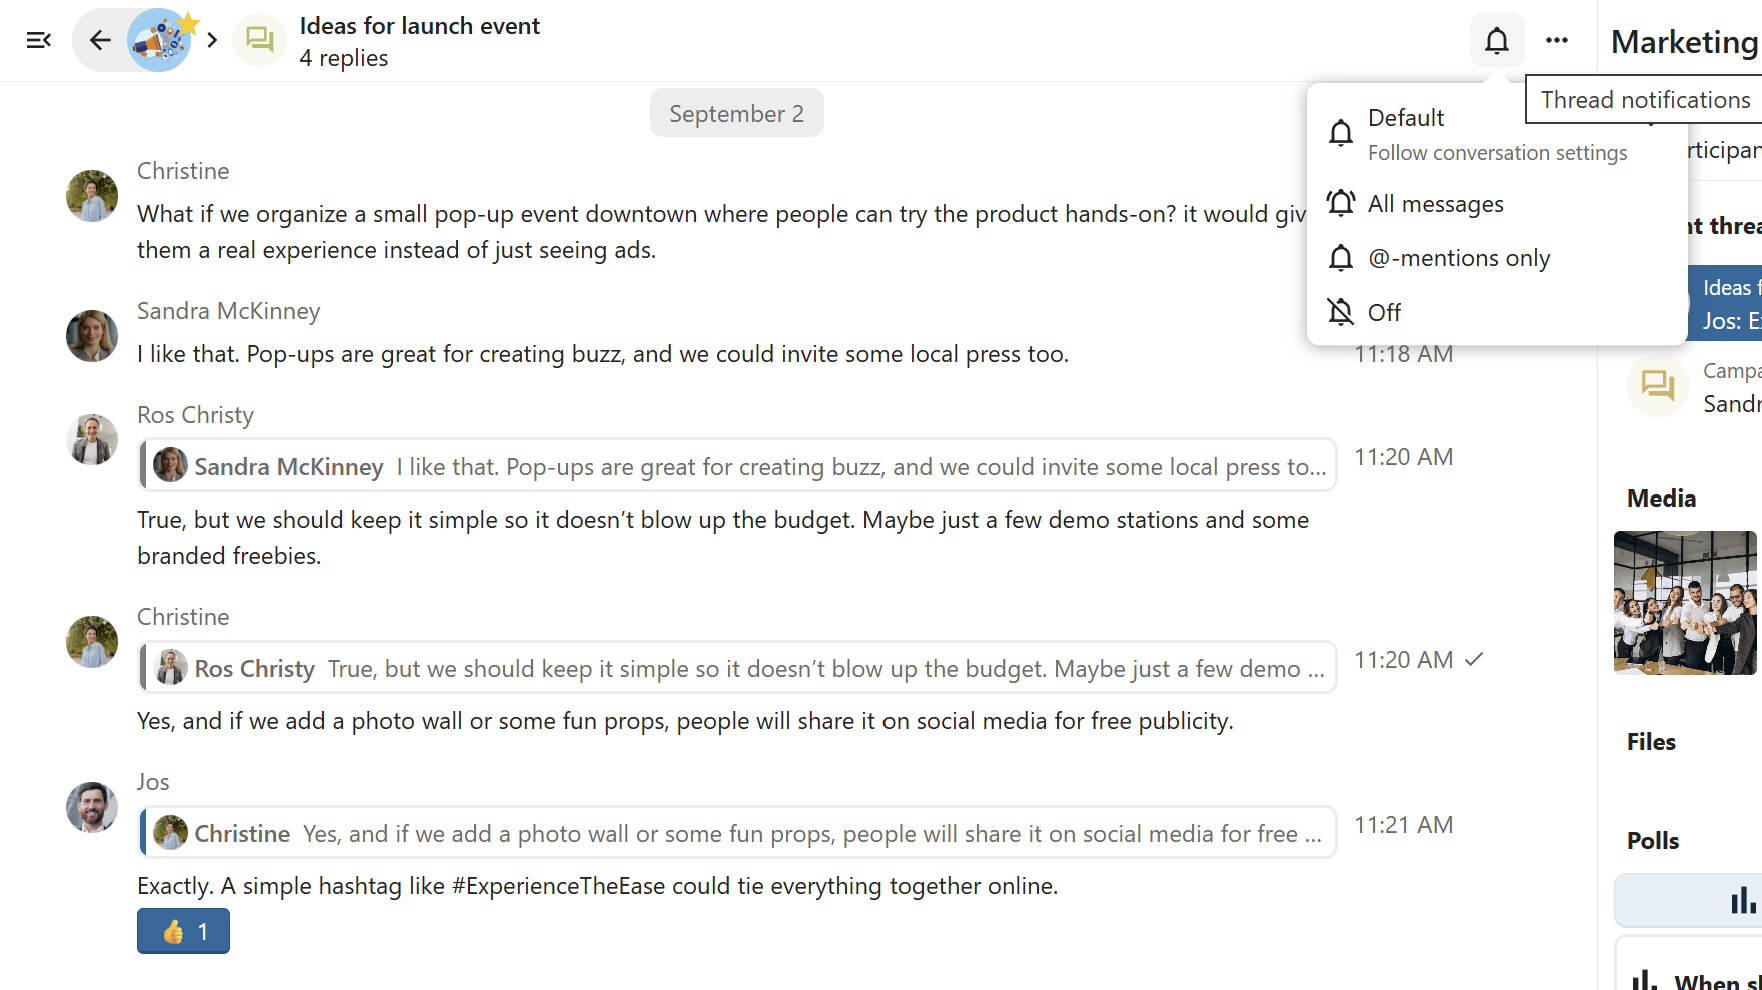
You can create threads in conversations to keep discussions organized. The thread creation option is available in the new message additional actions.
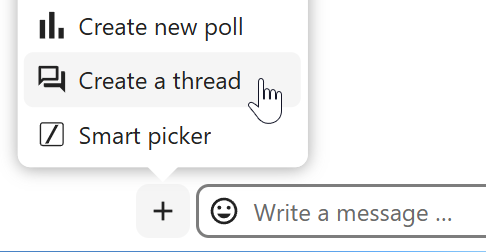
Then, you can add a title and description for the thread and start the discussion.

You can view all replies in a thread either from the replies button on the message or from Shared items tab in the content sidebar.
You can subscribe to a thread to receive notifications about new replies. It is possible to subscribe from the thread itself or from the sidebar.
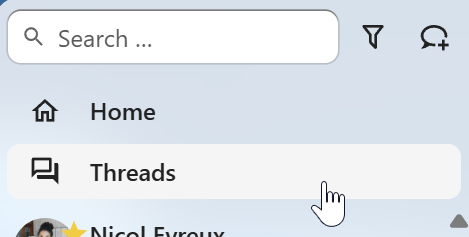
Subscribed threads are easily accessible from the navigation bar in Threads navigation.
Editing thread title is possible from the thread itself or from the sidebars.