Uso do aplicativo E-Mail
Nota
O aplicativo E-Mail vem instalado com o Nextcloud Hub por padrão, mas pode ser desativado. Solicite o aplicativo ao seu administrador.

Gerenciamento de sua conta de e-mail
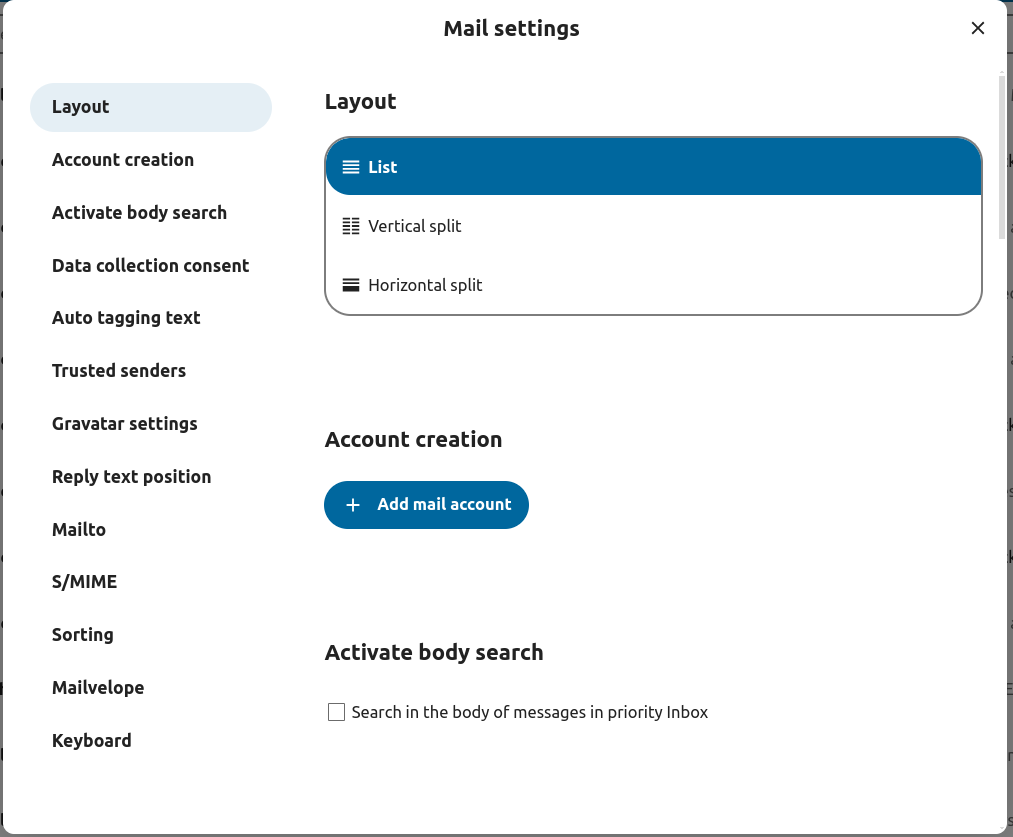
Trocar o layout
Adicionado na versão 3.6.
Visite as configurações de e-mail
Escolha entre Lista, Divisão vertical e Divisão horizontal
Use Compact Mode
Adicionado na versão 5.7.0.
Compact mode offers a cleaner and more efficient way to view your messages. Avatars are hidden, selection checkboxes are always visible, and the preview of messages is removed. It saves space allowing you to see more emails at once.
Visit the mail settings
Go to Appearance
Toggle the Compact Mode

Modo de Visualização das Mensagens / de Operação
Adicionado na versão 5.2.
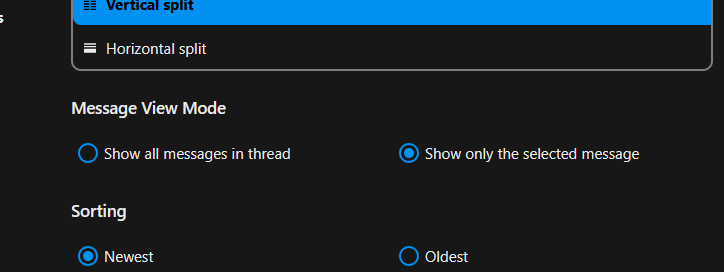
O E-mail pode alternar entre dois modos diferentes de visualização e operação de mensagens: Fio e Individual.
No modo Fio, as mensagens são agrupadas por conversa. Na lista de mensagens da caixa de correio, as mensagens relacionadas são empilhadas de modo que somente a mensagem mais recente é mostrada, e todas as mensagens relacionadas são mostradas no painel de exibição de mensagens depois que a mensagem empilhada é selecionada. Isso é útil para acompanhar discussões e entender o contexto das respostas. Neste modo, as operações de mensagem, como mover e excluir, aplicam-se a todo o fio, o que significa que, quando você move ou exclui um fio, todas as mensagens desse fio são afetadas.
No modo Individual, as mensagens são exibidas individualmente, tanto na lista de mensagens da caixa de correio quanto no painel de exibição de mensagens, e operações como mover e excluir se aplicam somente à mensagem selecionada. Este modo é útil quando você deseja gerenciar mensagens separadamente sem afetar toda a conversa.
Visite as configurações de e-mail
Escolha entre Fio e Individual
Adicionar uma nova conta de e-mail
Ative aplicativo de e-mail nos aplicativos
Clique no ícone de e-mail no cabeçalho
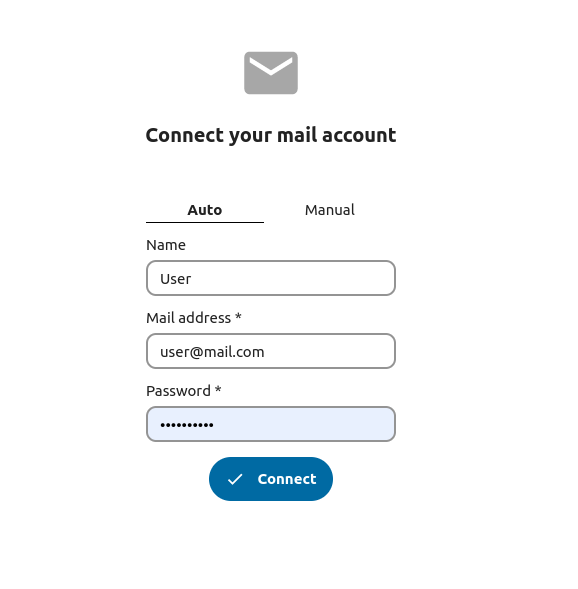
Preencha o formulário de login (automático ou manual)
Alterar a ordenação dos e-mails
Adicionado na versão 3.5.
Visite as configurações de e-mail
Vá para Ordenação
Você pode escolher o e-mail mais antigo our mais novo primeiro
Nota
Esta alteração será aplicada a todas as suas contas e caixas de correio
Sort favorites up
Adicionado na versão 5.7: Nextcloud 31 or newer
This setting allows you to show messages set as favorite in a separate section on top of the message list.
Visite as configurações de e-mail
Go to Appearance
Enable sorting favorites up
Mensagens agendadas
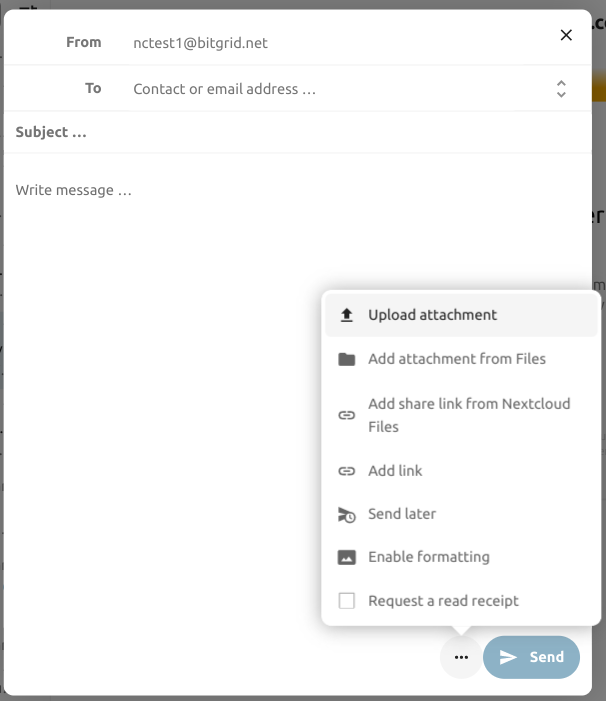
Clique no botão de nova mensagem no canto superior esquerdo da tela
Clique no menu de ação (…) no compositor modal
Clique em Enviar mais tarde
Caixa de entrada prioritária
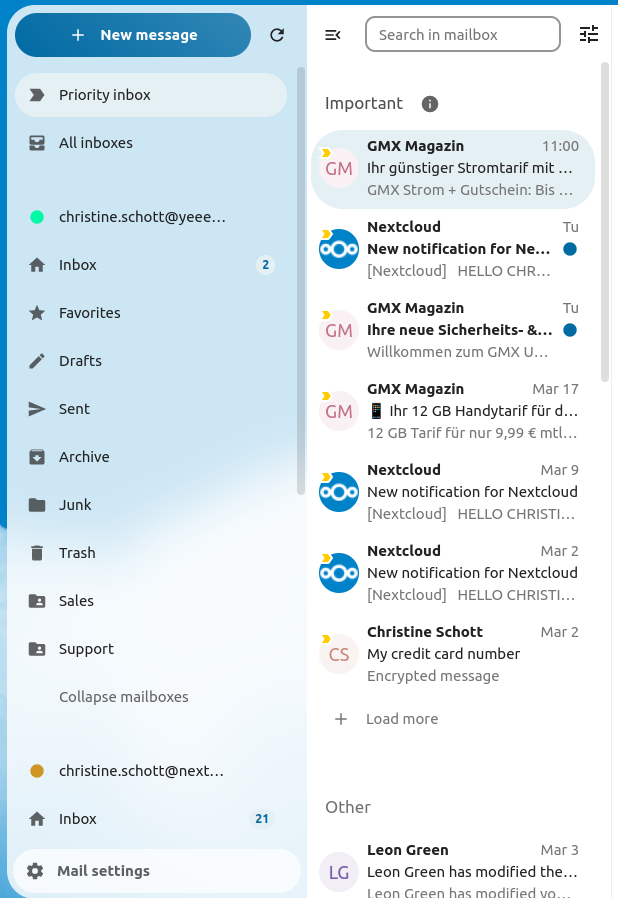
A caixa de entrada prioritária tem 2 seções Importante e Outros. As mensagens serão marcadas automaticamente como importantes com base nas mensagens com as quais você interagiu ou marcou como importantes. No início, talvez você precise alterar manualmente a importância para ensinar o sistema, mas isso melhorará com o tempo.
The automatic classification is optional. You can opt-out when setting up an account. The classification can also be turned on and off in the account settings at any time.
Todas as caixas de entrada
Todas as mensagens de todas as contas nas quais você fez login serão mostradas aqui em ordem cronológica.
Configurações de conta
As configurações da sua conta, como:
Aliases
Assinatura
Pastas Padrão
Resposta automática
Remetentes confiáveis
… e mais
Pode ser encontrado no menu de ação de uma conta de e-mail. Lá você pode editar, adicionar ou remover configurações dependendo da sua necessidade.
Mover mensagens para a pasta Spam
Adicionado na versão 3.4.
O E-mail pode mover uma mensagem para uma pasta diferente quando ela é marcada como spam.
Visite as Configurações de conta
Vá para as Pastas padrão
Verifique se uma pasta está selecionada para as mensagens spam
Vá para as Configurações de spam
Clique em Mover mensagens para a pasta Spam

Refresh mailbox
You can manually trigger a sync of your mailbox by clicking the refresh button located at the top of the mailbox list.
Starting from version 5.7 triggering the sync will also refresh the list of folders for the selected account.
Pesquisa na caixa de correio
Adicionado na versão 2.1.
Na parte superior da lista de envelopes em qualquer layout de e-mail, há um campo de atalho de pesquisa para pesquisar assuntos de e-mail. A partir da versão 3.7, este atalho permite que você pesquise por assunto, destinatário (para) ou remetente (de) por padrão.
Pesquisa avançada na caixa de correio
Adicionado na versão 3.4.
Você pode acessar nosso recurso de pesquisa avançada por meio de um modal localizado no final do atalho de pesquisa.
Ativar a pesquisa nos corpos do e-mail
Adicionado na versão 3.5.
Os corpos dos e-mails agora podem ser pesquisados; este recurso é opcional devido a possíveis problemas de desempenho.
Para habilitá-la:
Visite as Configurações de conta
Vá para Pesquisa na caixa de correio
Ativar a pesquisa nos corpos do e-mail
Aviso
Se você quiser ativá-la também para caixas de correio unificadas, deverá fazê-lo nas configurações do E-mail
Ao ativá-la, a caixa de pesquisa principal agora pesquisará tanto os assuntos quanto os corpos dos e-mails, e uma opção separada Corpo aparecerá na pesquisa avançada.
Delegação de conta
O aplicativo permite a delegação de contas para que um usuário possa enviar e-mails do endereço de outro.
A delegação deve ser configurada no servidor de e-mail por um administrador
Adicione o outro endereço de e-mail como um alias para sua própria conta de e-mail
Ao enviar um e-mail, selecione o alias como remetente
Aviso
O e-mail enviado pode não estar visível para a conta original se estiver armazenado em sua caixa de correio pessoal Enviadas.
Exclusão automática da lixeira
Adicionado na versão 3.4.
O aplicativo E-mail pode excluir automaticamente mensagens da pasta de lixo após um determinado número de dias.
Visite as Configurações de conta
Vá para Exclusão automática da lixeira
Digite o número de dias após os quais as mensagens devem ser excluídas
Desative a retenção de lixo deixando o campo vazio ou configurando-o como 0.
Nota
Somente e-mails excluídos após a ativação da retenção de lixo serão processados.

Escrever mensagens
Clique em nova mensagem no canto superior esquerdo da tela
Comece a escrever sua mensagem
Minimizar o modal do compositor
Adicionado na versão 3.2.
O modal do compositor pode ser minimizado enquanto você escreve uma nova mensagem, edita um rascunho existente ou uma mensagem da caixa de saída. Basta clicar no botão minimizar no canto superior direito do modal ou clicar em qualquer lugar fora do modal.

Você pode retomar sua mensagem minimizada clicando em qualquer lugar no indicador no canto inferior direito da tela.

Pressione o botão Fechar no modal ou o indicador no canto inferior direito para interromper a edição de uma mensagem. Um rascunho será salvo automaticamente na sua caixa de rascunhos.
Informações do destinatário no compositor
Adicionado na versão 4.2.
Ao adicionar o primeiro destinatário ou contato no campo “Para”, será exibido um painel à direita com os detalhes do perfil salvos desse contato. A adição de um segundo contato recolherá a lista, permitindo selecionar e expandir qualquer contato adicionado para visualizar seus detalhes. Se preferir se concentrar apenas na escrita no compositor, você pode ocultar o painel direito clicando no ícone de expansão no canto superior direito. Para mostrar o painel direito novamente, basta clicar no ícone de minimizar no mesmo local.
Mencionar contatos
Adicionado na versão 4.2.
Você pode mencionar contatos em sua mensagem digitando @ e, em seguida, selecionando o contato da lista. Ao fazer isso, o contato será automaticamente adicionado como destinatário.
Nota
Somente contatos com um endereço de e-mail válido serão indicados.
Blocos de texto
Adicionado na versão 5.2.
Os blocos de texto são trechos de texto predefinidos que podem ser inseridos no seu e-mail. Eles podem ser criados e gerenciados nas configurações de e-mail. Eles podem ser inseridos no editor digitando ! e selecionando o bloco na lista ou nas ações do editor. Os blocos de texto podem ser compartilhados com usuários e grupos de usuários.
Caixa de saída
Quando uma mensagem é composta e o botão “Enviar” é clicado, a mensagem é adicionada à caixa de saída, que pode ser encontrada no canto inferior esquerdo da barra lateral esquerda.
Você também pode definir a data e a hora da operação de envio para um momento futuro (consulte Mensagens agendadas) - a mensagem será mantida na caixa de saída até a data e a hora escolhidas e, em seguida, será enviada automaticamente.
A caixa de saída só fica visível quando há uma mensagem esperando para ser tratada pela caixa de saída.
Você pode abrir novamente o compositor para uma mensagem na caixa de saída a qualquer momento antes de a operação “enviar” ser acionada.
Nota
Quando ocorre um erro durante o envio, são possíveis três mensagens de erro:
- Não foi possível copiar para a caixa de correio “Enviadas”
O e-mail foi enviado, mas não pôde ser copiado para a caixa de correio “Enviadas”. Este erro será tratado pela caixa de saída e a operação de cópia será tentada novamente.
- Erro no servidor de e-mail
O envio não foi bem-sucedido com um estado que pode ser tentado novamente (p. ex., não foi possível acessar o servidor SMTP). A caixa de saída tentará enviar a mensagem novamente.
- A mensagem não pôde ser enviada
O envio pode ou não ter falhado. O servidor de e-mail não pode nos informar o estado da mensagem. Como o aplicativo E-mail não tem como determinar o estado da mensagem (enviada ou não enviada), a mensagem permanecerá na caixa de saída e o usuário da conta terá que decidir como proceder.
Ações de caixa de correio
Adicionar uma caixa de correio
Abra o menu de ação de uma conta
Clique em adicionar caixa de correio
Adicionar uma subcaixa de correio
Abra o menu de ação de uma caixa de correio
Clique em adicionar subcaixa de correio
Ações de envelope
Criar um evento
Crie um evento para uma determinada mensagem/fio diretamente pelo aplicativo E-mail
Abra o menu de ação de um envelope
Clique em Mais ações
Clique em Criar evento
Nota
O título do evento e uma agenda são criados para você se o administrador tiver ativado essa opção.
Criar uma tarefa
Adicionado na versão 3.2.
Crie uma tarefa para uma determinada mensagem/fio diretamente pelo aplicativo E-mail
Abra o menu de ação de um envelope
Clique em Mais ações
Clique em Criar tarefa
Nota
As tarefas são armazenadas em calendários compatíveis. Se não houver um calendário compatível, você pode criar um novo com o aplicativo Calendário.
Resumo por IA
Adicionado na versão 4.2.
Ao examinar sua caixa de correio, você verá um breve resumo gerado por IA dos seus e-mails como uma pré-visualização.
Nota
Por favor, observe que o recurso deve ser ativado pelo administrador
Quick actions
Adicionado na versão 5.5: (Nextcloud 30)
Allows you to group action steps that you would normally perform on envelopes such as tagging, moving, marking as read … into quick actions that can be executed with a single click. Quick actions are scoped to one mail account and can be created and managed in the mail settings under “Quick actions” or directly from the envelope action menu.
Nota
Some action steps such as Mark as spam, Move thread and Delete thread are mutually exclusive and cannot be part of the same quick action, they also can’t be re-ordered and will always be executed last.
Nota
Please note that quick actions will be performed on all messages in a thread when executed on one.
Ações de mensagem
Cancelar inscrição em uma lista de discussão
Adicionado na versão 3.1.
Algumas listas de discussão e boletins informativos permitem cancelar a assinatura facilmente. Se o aplicativo E-mail detectar mensagens de tal remetente, ele mostrará um botão Cancelar inscrição ao lado das informações do remetente. Clique e confirme para cancelar a inscrição na lista.
Adiamento
Adicionado na versão 3.4.
Adiar uma mensagem ou um fio o move para uma caixa de correio dedicada até que a data de adiamento selecionada seja atingida e a mensagem ou fio seja movido de volta para a caixa de correio original.
Abra o menu de ação de um envelope ou fio
Clique em Adiar
Selecione por quanto tempo a mensagem ou fio deve ser adiado
Respostas inteligentes
Adicionado na versão 3.6.
Quando você abre uma mensagem no aplicativo E-mail, ele propõe respostas geradas por IA. Basta clicar em uma resposta sugerida para que o compositor seja aberto com a resposta pré-preenchida.
Nota
Por favor, observe que o recurso deve ser ativado pelo administrador
Nota
Os idiomas suportados dependem do modelo de linguagem de grande escala usado
Tradução de e-mails
Adicionado na versão 4.2.
Você pode traduzir as mensagens para seus idiomas configurados de forma semelhante ao Talk.
Nota
Por favor, observe que os recursos de tradução devem ser ativados no servidor
Nota
Desde a versão 5.3, se LLM estiver habilitado pelo administrador, serão sugeridas traduções.
Resumo de fio
O aplicativo E-mail suporta o resumo de fios de mensagens que contêm 3 ou mais mensagens.
Adicionado na versão 3.4.
Nota
Por favor, observe que o recurso deve ser ativado pelo administrador
Nota
Observe que este recurso só funciona bem com integration_openai. Os LLMs locais demoram muito tempo para responder e a solicitação de resumo provavelmente atingirá o tempo limite e ainda criará uma carga significativa no sistema.
Filtros e resposta automática
O aplicativo E-mail tem um editor para scripts do Sieve, uma interface para configurar respostas automáticas e uma interface para configurar filtros. O Sieve deve ser ativado nas configurações de conta.
Respostas automáticas
Adicionado na versão 3.5: A resposta automática pode seguir as configurações do sistema.
A resposta automática está desativada por padrão. Ela pode ser definida manualmente ou seguir as configurações do sistema. Seguir as configurações do sistema significa que a mensagem longa de ausência inserida na seção Configurações de ausência é aplicada automaticamente.
Filtros
Adicionado na versão 4.1.
O E-mail 4.1 inclui um editor simples para configurar regras de filtro.
Nota
Não há suporte para a importação de filtros existentes. Entretanto, todos os filtros existentes permanecerão ativos e inalterados. Recomendamos fazer backup de seu script atual por meio do editor de scripts do Sieve como precaução.
Como Adicionar um Novo Filtro
Abra as configurações de sua conta.
Verifique que o Sieve está ativado para sua conta (consulte as configurações do servidor Sieve).
Clique em Filtros.
Selecione Novo Filtro para criar uma nova regra.
Como Excluir um Filtro
Abra as configurações de sua conta.
Assegure que o Sieve esteja ativado em sua conta (consulte as configurações do servidor Sieve).
Clique em Filtros.
Passe o mouse sobre o filtro que deseja excluir e clique no ícone da lixeira.
Condições
As condições são aplicadas aos e-mails recebidos em seu servidor de e-mail, visando a campos como Assunto, Remetente e Destinatário. Você pode usar os seguintes operadores para definir condições para estes campos:
é exatamente: Uma correspondência exata. O campo deve ser idêntico ao valor fornecido.
contém: Uma correspondência de um parte da cadeia. O campo corresponde se o valor fornecido estiver contido nele. Por exemplo, “portaria” corresponderia a “port”.
corresponde: Uma correspondência de padrão usando curingas. O símbolo “*” representa qualquer número de caracteres (inclusive nenhum), enquanto “?” representa exatamente um caractere. Por exemplo, “relatório” corresponderia a “Primeiro relatório de 2024”.
Ações
As ações são acionadas quando os testes especificados são verdadeiros. As seguintes ações estão disponíveis:
fileinto: Move a mensagem para uma pasta especificada.
addflag: Adiciona um marcador à mensagem.
stop: Interrompe a execução do script de filtro. Nenhum outro filtro será processado após esta ação.
Criar um filtro a partir de uma mensagem
Adicionado na versão 5.2.
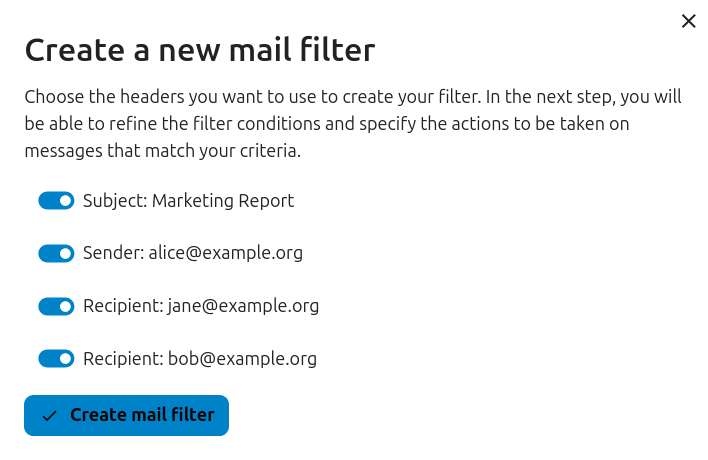
Para criar um filtro a partir de uma determinada mensagem, abra a mensagem e, em seguida, abra o menu clicando nos três pontos. Em seguida, clique em “Mais ações” e depois em “Criar filtro de e-mail”.
Na caixa de diálogo, selecione as condições para corresponder às mensagens recebidas e continue clicando em “Criar filtro de e-mail”.
Lembretes de acompanhamento
Adicionado na versão 4.0.
O aplicativo E-mail lembrará você automaticamente quando um e-mail enviado não tiver recebido uma resposta. Cada e-mail enviado será analisado por uma IA para verificar se uma resposta é esperada. Após quatro dias, todos os e-mails relevantes serão exibidos em sua caixa de entrada prioritária.
Ao clicar em um e-mail, será exibido um botão para fazer o acompanhamento rápido com todos os destinatários. Também é possível desativar os lembretes de acompanhamento para um e-mail enviado.
Nota
Observe que o recurso deve ser ativado pelo administrador.
Segurança
Detecção de phishing
Adicionado na versão 4.0.
O aplicativo E-mail verificará possíveis tentativas de phishing e exibirá um aviso ao usuário.
As verificações são as seguintes:
O endereço do remetente salvo no catálogo de endereços não é o mesmo que o da conta de correio
O remetente está usando um endereço de e-mail personalizado que não corresponde ao endereço de origem
A data de envio está definida no futuro
Os links no corpo da mensagem não estão apontando para o texto exibido
O endereço de resposta não é o mesmo que o endereço do remetente
Nota
Observe que o aviso não significa que a mensagem seja uma tentativa de phishing. Significa apenas que o aplicativo E-mail detectou uma possível tentativa de phishing.
Endereços internos
Adicionado na versão 4.0.
O aplicativo E-mail permite adicionar endereços e domínios internos e avisará o usuário se o endereço não estiver na lista, ao enviar e ao receber uma mensagem.
Para adicionar um endereço interno:
Abra as configurações do E-mail
Navegue até a seção Privacidade e segurança
Ative os endereços internos clicando na caixa de seleção
Clique no botão Adicionar endereço interno
Digite o endereço ou domínio e clique em Adicionar
Integração do painel
Adicionado na versão 1.8.
O aplicativo de e-mail oferece dois widgets projetados para integração com o painel do Nextcloud:
E-mails não lidos: este widget exibe os e-mails não lidos.
E-mails importantes: este widget mostra os e-mails que foram marcados como importantes.
Estes widgets utilizam os e-mails das contas de e-mail configuradas para sua conta.
Calendar integration
The Mail app integrates with the Calendar app to help you manage meeting invitations and keep your calendar up to date.
Meeting invitations
When you receive a message containing a meeting invitation, the Mail app automatically detects the attached calendar file and displays a formatted action section to help you respond.
You can:
Accept the invitation
Decline the invitation
Tentatively accept the invitation
Your response is sent directly from the Mail app, and the event is added to your primary calendar accordingly.
You can also manually add a meeting invitation to a specific calendar:
Open the message with the meeting invitation
Scroll to the bottom of the message to the attachments section
Select the calendar file (usually with a .ics extension), then click the three dots menu.
Click “Import in to calendar” and choose the desired calendar.
Meeting invitation automation
When a meeting organizer sends updates to an existing event (such as time changes or location updates), the Mail app processes these automatically and updates the corresponding event in your calendar.
Adicionado na versão 5.7: (Nextcloud 32 or newer)
You can also configure Mail to automatically add all new meeting invitations to your calendar without requiring manual acceptance. The invitations will be added to the calendar as tentative.
To enable this feature:
Visit account settings of a specific mail account
Navigate to Calendar settings section
Enable Automatically create tentative appointments in calendar
Nota
With this setting enabled, invitations will still appear in your mail list, but they will be automatically added to your calendar.
Keyboard shortcuts
The Mail app implements several keyboard shortcuts to speed up your experience.
For a full list of the supported shortcuts, check out the Mail settings in your instance.

